Prep time: 20 minutes
Cook time: 0 minutes
Total time: 4 hours (including chilling)
Servings: 8 servings
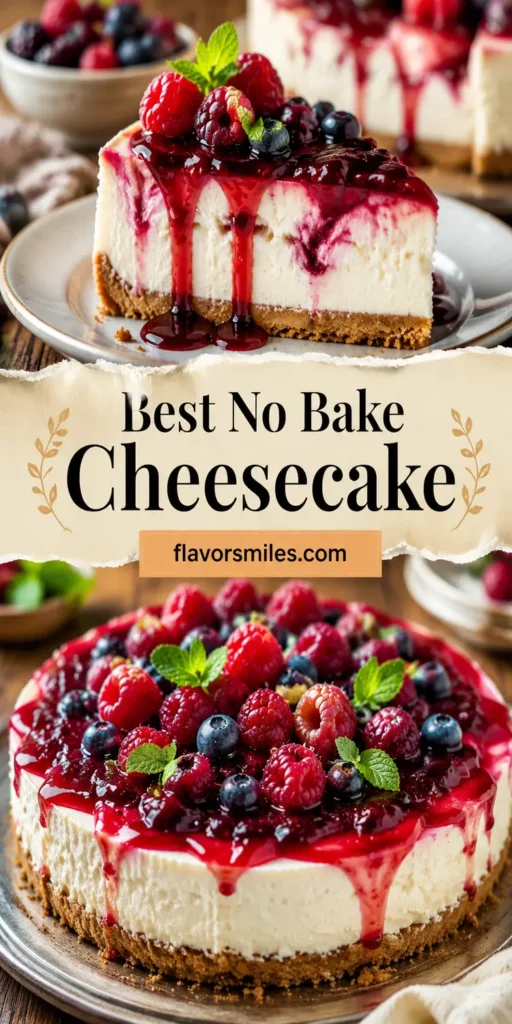
The first bite of cheesecake can be a magical moment. It’s creamy, rich, and velvety, a dessert that evokes nostalgia for many. But what if you’re looking to whip up a cheesecake without the fuss of baking? Enter the **Best No Bake Cheesecake Recipe for Beginners**. This recipe is simple enough for novice cooks, yet it delivers astonishing results that will impress even the most discerning palates.
What Is The Best No Bake Cheesecake Recipe for Beginners?
No bake cheesecakes utilize the natural creaminess of cream cheese and whipped cream to create a luscious dessert without the hassle of baking. Perfect for busy parents, this recipe requires minimal ingredients and time, making it ideal for those who want a splendid dessert without spending hours in the kitchen. The saving grace here is the refrigeration, which sets the cheesecake perfectly, giving you a dessert that’s light and fluffy, yet indulgent.
Why You’ll Love This
This no bake cheesecake is an excellent alternative for multiple reasons. It’s fantastic for summer gatherings or celebrations when you want a cool dessert without the oven’s heat. It’s also a lifesaver for those new to baking or with limited kitchen tools, as it requires minimal equipment. Plus, you can customize it easily to suit your preferences. Whether you’re a busy parent squeezed for time or a beginner looking to impress, this cheesecake has you covered.
Ingredients You’ll Need
To make the best no bake cheesecake, gather the following ingredients:
- Graham cracker crumbs (1 ½ cups): These provide the base for the cheesecake’s crust, lending a sweet, crunchy texture to contrast with the creaminess of the filling.
- Granulated sugar (⅓ cup): Sugar sweetens the crust as well as the filling, enhancing the overall flavor of the cheesecake.
- Unsalted butter (½ cup): Melted butter binds the crumb mixture together and softens the flavor.
- Cream cheese (16 oz.): The star of the show! Softened cream cheese creates the smooth, rich filling you’ll adore.
- Powdered sugar (1 cup): This sugar dissolves easily into the cream cheese, ensuring a silky consistency without grittiness.
- Vanilla extract (2 teaspoons): For that hint of warmth and richness, vanilla plays a crucial role in elevating this dessert.
- Heavy whipping cream (1 ½ cups): Whipped cream adds airiness and lightness to the filling, making each bite melt in your mouth.
How to Make
Follow these simple steps to create your No Bake Cheesecake:
- Prepare the crust: In a mixing bowl, combine the graham cracker crumbs, granulated sugar, and melted butter. Stir until the mixture resembles wet sand. Press it firmly into the bottom of a 9-inch springform pan to form an even layer. Make sure to pack it tightly to prevent it from crumbling later.
- Beat the cream cheese: Using a hand mixer or stand mixer, beat the softened cream cheese until smooth and creamy in a large bowl. This should take about 2-3 minutes. Ensure there are no lumps for a silky texture.
- Add powdered sugar and vanilla: Gradually add the powdered sugar and vanilla extract to the cream cheese mixture. Beat until well combined. The mixture should be sweet and fragrant.
- Whip the heavy cream: In a separate bowl, whip the heavy cream until soft peaks form. This will take approximately 3-5 minutes. Be careful not to overbeat, as you want it to remain soft and fluffy.
- Fold in the whipped cream: Gently fold the whipped cream into the cream cheese mixture using a spatula. Use a light hand to maintain as much air as possible while combining. This creates that light, airy texture in your cheesecake.
- Assemble the cheesecake: Pour the filling over the prepared crust in the springform pan, smoothing the top with a spatula. Tap the pan gently on the counter to remove any air bubbles and settle the filling evenly.
- Chill: Cover the cheesecake with plastic wrap or aluminum foil and refrigerate for at least 4 hours or overnight. This is essential for the cheesecake to set properly; patience is key!
Variations & Substitutions
Fruit Topping Variation: For a refreshing twist, consider adding a layer of fresh fruit on top. Strawberries, blueberries, or raspberries complement the cheesecake beautifully. You can create a fruit compote by cooking down the fruit with a little sugar and a splash of lemon juice over medium heat until thickened.
Chocolate Variation: For chocolate lovers, mix in 1 cup of melted chocolate into the cream cheese filling. You could also opt for a chocolate crust by using chocolate graham crackers instead of plain ones. Top with chocolate shavings for extra flair!
Nutty Variation: Incorporating finely chopped nuts directly into the crust (like pecans or almonds) adds a delightful crunch. Serve topped with caramel sauce for a delightful flavor pairing.
Vegan Variation: To create a vegan version of this cheesecake, substitute the cream cheese with a cashew or coconut-based vegan alternative and use coconut cream in place of heavy cream. Look for vegan butter or coconut oil to replace standard butter.
Common Mistakes to Avoid
When preparing your no bake cheesecake, certain pitfalls can hinder its final outcome. Be cautious with overusing gelatin if you decide to add it for extra stability; too much can create a rubbery texture rather than a creamy one. Don’t skip the chilling time, as this is crucial ensures the cheesecake sets properly; rushing this step will lead to a soft, messy slice.
Also, ensure your cream cheese is at room temperature before beginning; cold cream cheese is difficult to blend smoothly, creating lumps in your filling. Lastly, don’t be tempted to rush through the whipping process of the cream. Gently folding it into the cream cheese mixture is key to a light texture—overmixing can lead to a denser cheesecake.
Storage, Freezing & Reheating Tips
Your no bake cheesecake can be stored in the refrigerator, where it remains fresh for up to one week. Make sure to cover it tightly with plastic wrap or keep it in an airtight container to prevent it from absorbing any other smells from the fridge.
If you find yourself with leftovers, freezing is an excellent option. Wrap individual slices tightly in plastic wrap, and then place them in a sealable freezer bag. This way, you’ll have a slice ready whenever you crave something sweet. To defrost, simply place it in the refrigerator overnight or let it sit at room temperature for 30 minutes.
Avoid thawing in the microwave, as this may alter the texture of the cheesecake. When ready to serve, you can add a fresh layer of fruit or whipped cream for a gorgeous presentation.
Frequently Asked Questions
Can I use low-fat cream cheese?
Yes, you can use low-fat cream cheese for a lighter version of this no bake cheesecake. However, using full-fat varieties will yield a creamier texture.
Can I use a different type of cookie for the crust?
Absolutely! You can experiment with cookies like Oreos, peanut butter cookies, or even vanilla wafers for different flavor profiles. Each will lend a unique taste to your cheesecake.
How do I prevent my cheesecake from cracking?
While no bake cheesecakes are less likely to crack than baked ones, sudden changes in temperature should be avoided. Ensure the cheesecake chills evenly and avoid introducing warm toppings immediately after removing it from the fridge.
Can I make this cheesecake ahead of time?
Yes, this cheesecake is perfect for preparing in advance! It’s best enjoyed after it has been chilled for at least 4 hours or overnight, so feel free to make it a day or two prior to your event.
What can I use if I don’t have a springform pan?
If you don’t have a springform pan, you can use a regular pie dish. The drawback is that removing slices may be trickier, but it will still taste delicious.
Conclusion: This no bake cheesecake recipe is not only easy to make, but it also serves as a canvas for your culinary creativity. Whether you prefer fruity toppings or rich chocolates, you can adapt it to fit your tastes. So gather your ingredients and whip up this delightful dessert—it’s a classic you’ll return to time and time again!