Prep time: 10 minutes
Cook time: 20 minutes
Total time: 30 minutes
Servings: 12 cookies
Have you ever craved the indulgence of a chocolatey dessert that’s both rich and satisfying? Allow me to introduce you to the delightful world of Black Forest Cookie: Oreo Stuffed Black Forest Cookies in 30 Minutes. These cookies are an exciting twist on the classic Black Forest cake, merging chocolatey cookie goodness with the creamy delight of Oreo filling. They are perfect for just about any occasion, whether it’s a cozy evening at home, a festive gathering, or simply satisfying a sweet craving.
When you take a bite, you’ll experience the luscious chocolate cookie with the hidden surprise of Oreo filling, complemented by a hint of cherry. It’s a fusion that brings joy to young and old alike. Plus, they’re simple enough to whip up in just half an hour, which makes them ideal for busy parents and kitchen beginners who might be looking for a quick yet impressive dessert. You’re not just baking; you are creating a delightful experience!
What Is Black Forest Cookie: Oreo Stuffed Black Forest Cookies in 30 Minutes?
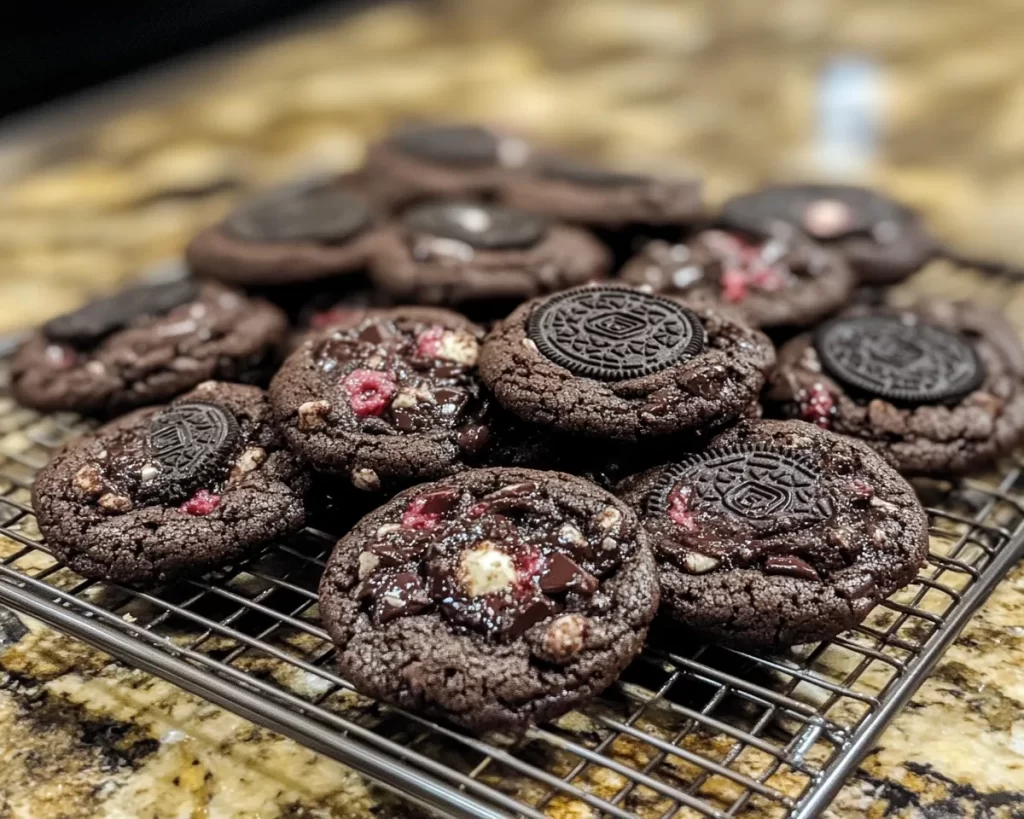
Black Forest Cookie: Oreo Stuffed Black Forest Cookies in 30 Minutes is an innovative recipe that combines the flavors of traditional Black Forest cake with the iconic Oreo cookie. Made from rich chocolate cookie dough, each of these cookies is stuffed with a whole Oreo, creating a pleasant texture contrast between the soft cookie and the crunchy, creamy filling that Oreo lovers adore. With a burst of chocolate, a hint of cherry, and the familiar taste of Oreo, this treat is sure to be a showstopper on your dessert table.
Why You’ll Love This
These cookies are loved for various reasons. First and foremost, the combination of flavors is extraordinary. Chocolate cookie dough enveloping an Oreo creates an irresistible snack. They are also quick to make, allowing your family to enjoy a sweet treat without spending too much time in the kitchen. Additionally, they can easily be modified to accommodate different tastes — whether you prefer more cherry flavor, additional chocolate, or other variations. Lastly, they remain soft and chewy even the next day, making them perfect for meal prep or spontaneous baking sessions.
Ingredients You’ll Need
- 1 cup unsalted butter (softened): This provides the rich base that gives these cookies their tender, melt-in-your-mouth texture.
- 1 cup granulated sugar: Sugar adds sweetness and helps in the softening process.
- 1 cup brown sugar: The molasses in brown sugar gives these cookies a deeper flavor and chewiness.
- 2 large eggs: Eggs bind the ingredients together and contribute to the cookies’ overall structure.
- 1 tablespoon vanilla extract: This enhances the flavors in the cookies.
- 2 cups all-purpose flour: The main dry ingredient that provides bulk.
- 1/2 cup unsweetened cocoa powder: This ingredient gives the cookies their rich chocolate flavor.
- 1 teaspoon baking soda: This leavening agent helps the cookies rise and become fluffy.
- 1/2 teaspoon salt: A vital ingredient that balances the sweetness.
- 12 Oreo cookies (whole): The star of the recipe, which adds creaminess and chocolate crunch.
INSERT IMAGE HERE according to image insertion rule
How to Make
- Preheat your oven to 350°F (175°C) and line a baking sheet with parchment paper. This will ensure your cookies don’t stick while baking and promote even cooking.
- In a large mixing bowl, cream together the softened butter, granulated sugar, and brown sugar until the mixture is light and fluffy. This should take about 3 to 5 minutes. The air incorporated here is essential for achieving soft cookies.
- Add in the eggs, one at a time, followed by the vanilla extract. Beat well after each addition until everything is well combined.
- In a separate bowl, whisk together the flour, cocoa powder, baking soda, and salt. Gradually add this dry mixture to the wet ingredients, mixing until just incorporated. Be cautious not to over-mix, as this can lead to dense cookies.
- Using a cookie scoop or your hands, take a portion of the cookie dough and wrap it around an Oreo, ensuring the Oreo is completely encased in the dough. Space the cookie dough balls about two inches apart on your prepared baking sheet, as they will spread while baking.
- Bake in the preheated oven for 12 to 15 minutes or until the edges are set. The centers should still look a bit underbaked; this will set as they cool down. Once done, let them cool on the baking sheet for 5 minutes before transferring them to a wire rack.
Variations & Substitutions
Cherry Filling Variation: If you want to take this recipe to the next level, consider adding a cherry filling. You can use cherry pie filling and place a small spoonful on top of the Oreo before wrapping the cookie dough around it. The sweet and tart cherry flavor beautifully complements the chocolate cookie and Oreo.
Mint Oreo Variation: For those who love a refreshing twist, opt for Mint Oreo cookies instead. This adds a delightful minty flavor to your cookies. This can be especially appealing during the holiday season or whenever you want that cool sensation in every bite.
Gluten-Free Variation: To make these cookies gluten-free, substitute all-purpose flour with a 1:1 gluten-free flour blend. Ensure your baking soda and other ingredients are also gluten-free certified. This allows everyone to indulge without worrying about gluten sensitivities.
Nutty Crunch Variation: Mix in some chopped walnuts or pecans into the cookie dough for additional texture. The nuts add a nice crunchy contrast to the soft, chewy cookie surrounding the creamy Oreo filling, making each bite even more delightful.
Common Mistakes to Avoid
One common mistake is using cold butter. Using cold butter can result in dense cookies instead of the desired soft and chewy texture. Always allow the butter to soften at room temperature before you begin.
Another issue people encounter is overmixing the dough. Overmixing can produce tough cookies, as it develops the gluten too much. Mix until just combined for the best results.
Make sure to adjust baking time based on your oven’s performance. Underbaking can lead to gooey cookies that won’t hold their shape, while overbaking makes them dry. Monitor closely towards the end of the baking time.
Storage, Freezing & Reheating Tips
Once you’ve baked your Black Forest Cookies, store them in an airtight container at room temperature, where they’ll stay fresh for up to 5 days. For longer storage, consider freezing them. Allow the baked cookies to cool completely before placing them in a freezer-safe container or bag. They can be stored in the freezer for up to three months. When you’re ready to enjoy them, let them thaw at room temperature or pop them in the oven for a few minutes at 350°F (175°C) for a warm treat.
Make sure to keep an eye on the cookies while reheating, ensuring they don’t dry out. You can also microwave them for about 10-15 seconds for a quick warm-up. Just remember to wrap them in a paper towel to retain moisture.
Frequently Asked Questions
Can I use other types of cookies instead of Oreos? Yes, you can substitute Oreos with different sandwich cookies like Nutter Butter or even gluten-free options. Keep in mind that flavor profiles will change slightly, but it could lead to a fun new twist.
How can I ensure my cookies turn out soft? To maintain that soft texture, be sure not to overbake. The cookies should appear a little underbaked when you take them out of the oven, as they will continue to cook on the baking sheet after being removed.
Can I prepare the dough in advance? Absolutely! The cookie dough can be made ahead of time and stored in the refrigerator for up to a week or frozen for up to three months. If frozen, let the dough thaw overnight in the fridge before using.
What pairs well with these cookies? A scoop of vanilla ice cream is the perfect accompaniment, as the cold creaminess complements the rich chocolate and Oreo flavors. You might also enjoy them with a glass of cold milk to bring out the cookies’ sweetness.
How do I make my cookies chewy instead of cakey? Be careful with the amount of flour you use; spooning flour into your measuring cup rather than scooping directly from the bag can prevent adding too much. Additionally, the eggs should be at room temperature to help achieve that chewy texture.
Conclusion: These Black Forest Cookie: Oreo Stuffed Black Forest Cookies in 30 Minutes are an exciting dessert that is sure to impress. Simple yet sophisticated, they offer a mouthwatering blend of chocolate and cream that is perfect for any occasion. Happy baking!