**Prep time:** 10 minutes
**Cook time:** 20-25 minutes
**Total time:** 30-35 minutes
**Servings:** 24 sausage balls
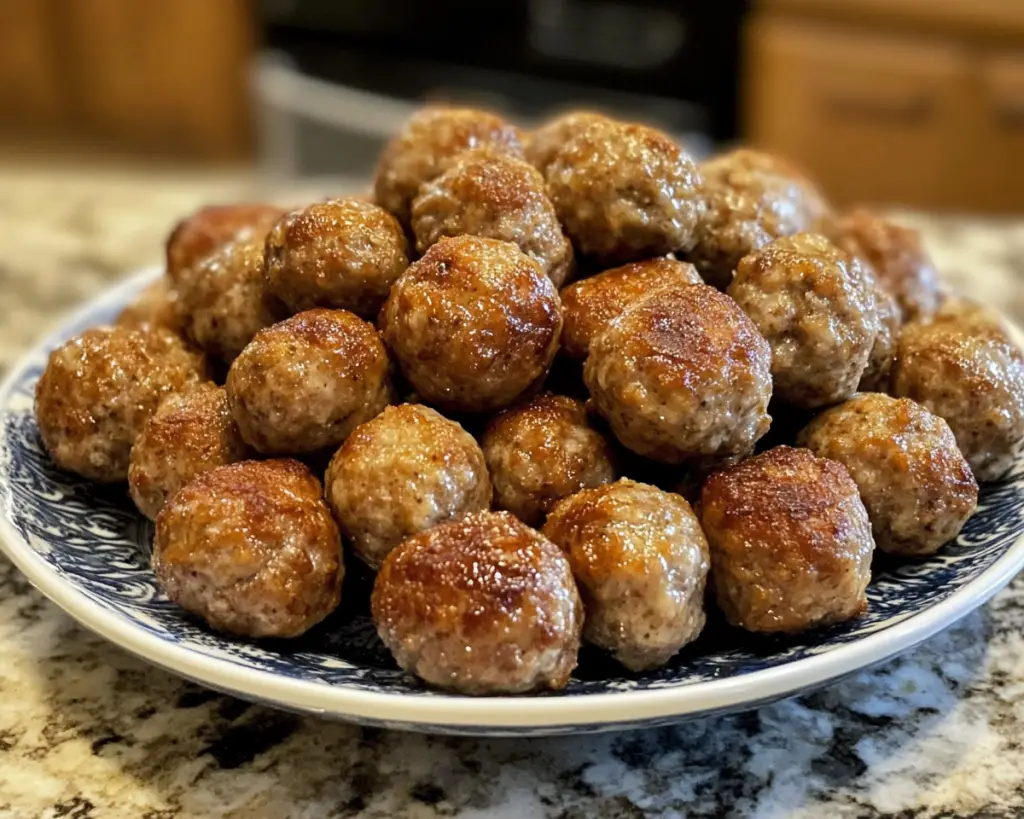
If you’re looking for a hearty snack that’s bursting with flavor and easy to make, look no further than sausage balls with Bisquick. These savory bites are perfect for parties, game days, or even as a comforting addition to brunch. Imagine popping one of these warm, cheesy morsels into your mouth; the aroma of sausage, biscuit mix, and melted cheese fills the air, inviting everyone to indulge. A long-time favorite in many households, sausage balls have stood the test of time for good reason.
What makes this recipe special? It’s simplicity! With just a few basic ingredients, you can whip up a big batch of deliciousness that pleases both kids and adults alike. This article will guide you through the process of making these scrumptiously cheesy sausage balls, give you exciting variations to try, and answer some of your burning questions about this beloved dish. Let’s dive in!
What Are Sausage Balls with Bisquick?
Sausage balls are a southern classic snack or appetizer that typically features a mixture of **sausage**, **cheddar cheese**, and **Bisquick®** — a versatile and convenient baking mix that substitutes for traditional flour in many recipes. The combination of these ingredients creates a savory, flavorful ball that is often baked until golden brown and crispy on the outside, while remaining moist and tender on the inside. These little bites are perfect for dipping into your favorite sauces, or they can be enjoyed on their own.
Originating in the southern United States, sausage balls have become a staple at holiday gatherings, baby showers, and tailgate parties. Their appeal lies not only in their taste but also in their incredible versatility. You can customize them to fit your family’s preferences or dietary needs, making them a go-to recipe for many occasions.
The key texture of sausage balls is a delightful blend, with the chewy sausage countered by the light fluffy crumb of the Bisquick mix and a hit of creaminess from the melted cheese. The **savory flavors** are accompanied by subtle hints of spice, making these bites addictive and hard to resist.
Why You’ll Love This Sausage Balls Recipe
There are countless reasons to embrace this sausage balls with Bisquick recipe. First and foremost, the **taste** is unbeatable. The savory sausage pairs wonderfully with the sharpness of cheddar cheese, creating a flavor profile that leaves you craving more. The contrast of textures—the crispy outside and tender inside—adds to its appeal.
Next, this recipe is incredibly **easy** to prepare; it requires no fancy equipment or advanced cooking skills. Whether you’re a beginner or a seasoned cook, you can trust that this recipe will turn out perfectly every time. Just mix, roll, and bake!
Cost-effective meals are vital for any household, and sausage balls are budget-friendly. Most of the ingredients are pantry staples that can be purchased inexpensively, making them a wholesome treat that won’t break the bank.
Moreover, they are extremely **versatile**. While the classic recipe is always a hit, you can easily swap ingredients or add extras like spices, herbs, or even vegetables to tailor them to your taste or dietary needs. Catering to different preferences is simple, too. For example, you can make them gluten-free by using gluten-free baking mix, or turkey sausage for a leaner option.
Finally, sausage balls are ideal for **meal prep**. You can make a large batch and store them for quick snacks later on, making them a convenient option for busy parents or anyone looking to save time in the kitchen.
Ingredients You’ll Need
Here’s a list of the simple ingredients required to make these delicious sausage balls:
– **1 pound of sausage (Italian, breakfast, or your choice)**: The star of the dish! Choose a flavor that suits your palate. If you like it spicy, opt for hot sausage; for a milder taste, lean towards breakfast sausage.
– **2 cups of Bisquick® mix**: This baking mix is essential for binding and providing that biscuit-like texture. It’s quick, easy, and saves time compared to making your own biscuit dough from scratch.
– **2 cups of shredded cheddar cheese**: Classic sharp cheddar adds creaminess and flavor. Feel free to experiment with other cheeses like pepper jack or mozzarella if you want a twist on the traditional taste.
– **1/2 cup of milk or cream**: This moistens the mixture and helps bind the ingredients together, ensuring a tender ball.
– **1 teaspoon of garlic powder (optional)**: An optional ingredient but strongly recommended! Garlic powder adds depth and savory notes to your sausage balls.
– **1/2 teaspoon of black pepper**: For a little heat and flavor enhancement.
– **1/2 teaspoon of onion powder (optional)**: Another layer of flavor that enhances the overall taste. You can adjust these seasonings to your preference.
Gather these ingredients, and you’ll be well on your way to enjoying these delectable bites!
How to Make Sausage Balls with Bisquick
Now, let’s get down to the steps involved in making these irresistible sausage balls.
**1. Preheat the oven:** Begin by preheating your oven to 375°F (190°C). This step is crucial as it ensures your sausage balls cook evenly and develop a beautiful golden color.
**2. Prepare a baking sheet:** Line a cookie sheet or baking pan with parchment paper or grease it lightly with non-stick cooking spray. This helps prevent sticking and makes cleanup much easier.
**3. Combine the ingredients:** In a large bowl, combine the pound of sausage, 2 cups of Bisquick, and 2 cups of shredded cheddar cheese. You may also add garlic powder, onion powder, and black pepper if you’re including those. Use your hands or a spatula to mix everything until well combined. The mixture should be sticky but should begin to hold its shape.
**4. Add the milk:** Pour in the 1/2 cup of milk or cream and mix until the ingredients are fully integrated. The mixture should be moist enough to form into balls without falling apart. If you find it too dry, you can add a touch more milk, but be careful not to overdo it, or the mixture could become too sticky.
**5. Form the sausage balls:** Using your hands, take about a tablespoon-sized portion of the mixture and roll it into a ball. Place the finished balls onto your prepared baking sheet, leaving a little space between each one to allow for expansion during baking. Aim for uniformity in size so they cook evenly.
**6. Bake in the oven:** Once all the sausage balls are formed and arranged on the baking sheet, place them in the preheated oven. Bake for 20-25 minutes, or until the sausage balls are golden brown, and you can smell that irresistible savory aroma wafting from your oven.
**7. Check for doneness:** After 20 minutes, you may want to take one ball out and cut it in half to ensure it’s fully cooked inside. The juices should run clear, and there should be no pink in the center.
**8. Serve and enjoy:** Let the sausage balls cool for a few minutes on the baking sheet before transferring them to a serving platter. They can be enjoyed warm or at room temperature, making them perfect for gatherings or packed lunches.
These straightforward steps yield an inviting dish that’s sure to delight everyone!
3 Variations & Substitutions
While the classic sausage balls with Bisquick are always a winner, you might want to mix things up a bit. Here are three exciting variations and substitutions to consider:
**1. Cheese Lover’s Sausage Balls**
For a more cheesy flavor explosion, try mixing different types of cheese into your sausage balls. Instead of just cheddar cheese, incorporate 1 cup of mozzarella cheese and keep 1 cup of sharp cheddar, or add crumbles of feta for a Mediterranean twist. This variation alters the taste and adds delightful stringiness to the texture of the balls, plus it appeals to cheese lovers!
**2. Vegetable-Infused Sausage Balls**
You can easily sneak in some vegetables to make these sausage balls even healthier. Finely chop vegetables like bell peppers, spinach, or onions and add them to the mixture. You won’t just get added flavor; you’ll also boost the nutritional content of your snack. Make sure to drain excess moisture from the veggies to prevent the mixture from becoming too wet.
**3. Gluten-Free Option**
If you’re following a gluten-free diet, Bisquick now offers a gluten-free baking mix! Simply substitute regular Bisquick with the gluten-free option, and you’ll have a delicious gluten-free version of the classic sausage balls. Keep in mind that the texture may be slightly different, but they should be equally satisfying!
Experimenting with these variations can lead to fun, new family favorites, so don’t hesitate to try them all!
Common Mistakes to Avoid
While sausage balls are relatively easy to make, there are some common mistakes that can lead to less than perfect results:
**1. Overmixing the dough:** It’s important not to overwork the mixture; doing so can lead to tough sausage balls rather than tender ones. Mix until just combined and no dry spots remain—this ensures optimal texture.
**2. Not using enough cheese:** Cheese is what gives these balls their wonderful flavor and moistness. Skimping on cheese can result in a dry product.
**3. Baking on a cold pan:** Always ensure your oven is preheated before placing your sausage balls inside. Baking on a cold pan can lead to uneven cooking and unwanted textures.
**4. Ignoring cooking times:** Every oven behaves differently, so while the recommended time is 20-25 minutes, it’s always best to check for doneness a little earlier. Use a meat thermometer to ensure they reach an internal temperature of 160°F (71°C).
Pay attention to these common pitfalls, and you’ll be well on your way to achieving perfect sausage balls each time.
Storage, Freezing & Reheating Tips
Sausage balls can easily be made ahead of time and stored for later. Here are some specific storage tips:
– **Room temperature:** If you plan on consuming your sausage balls within a few hours, they can be kept on the counter covered with a clean kitchen towel to keep them warm.
– **Refrigerating:** Allow the sausage balls to cool completely before placing them in an airtight container. They can be stored in the fridge for up to 3 days.
– **Freezing:** For longer storage, freeze the sausage balls in a single layer on a baking sheet. Once solid, transfer them to a freezer-safe bag. They can be frozen for up to 3 months. When ready to enjoy, bake straight from the freezer without thawing, adding an extra 5-10 minutes to the cooking time.
– **Reheating:** To reheat, place your sausage balls on a baking sheet and warm them in a 350°F (175°C) oven for about 10-15 minutes or until heated through. You can also microwave them for quick warming, though this may alter the texture slightly.
By following these storage tips, you can enjoy your sausage balls for days or even weeks to come!
Frequently Asked Questions
**1. Can I use a different meat other than sausage?**
Absolutely! While the traditional recipe calls for ground sausage, you can use ground turkey or chicken for a lighter option. You can even try it with ground beef, or a plant-based sausage for a vegetarian or vegan alternative, provided that you adjust your seasoning accordingly.
**2. Are there any vegetarian alternatives?**
Yes! Many brands produce high-quality plant-based sausage alternatives that can replace traditional sausage in this recipe. You can also consider using **mushrooms** or **beans** for a hearty, protein-packed vegetarian option.
**3. How do I spice up the flavors?**
Feel free to add spices like cayenne pepper, paprika, or cooked bacon bits for a unique flavor twist. Fresh herbs like chives or parsley can also brighten the flavors and make them feel fresher!
**4. Can I prepare the mixture ahead of time?**
Yes, you can prepare the sausage ball mixture in advance. After combining your ingredients, cover the bowl with plastic wrap and store it in the fridge for up to 24 hours before forming and cooking the sausage balls.
**5. What dips pair well with sausage balls?**
Sausage balls are delicious on their own or can be paired with a variety of dips! Consider serving them with ranch dressing, honey mustard, or a spicy sriracha mayo. You could even try adding a tangy barbecue sauce for a sweet and savory experience.
In conclusion, sausage balls with Bisquick are a delightful and easy-to-make recipe that brings joy and satisfaction to any gathering. With a few simple ingredients, minimal prep time, and flavor that’s sure to please, this recipe is a must-try for snack lovers everywhere. Whether you stick to the classic version or experiment with variations, you’re bound to make memorable moments while enjoying these savory bites. So go ahead, roll up your sleeves, and whip up a batch of these crowd-pleasers today! Don’t forget to share your experience and your own creative variations with fellow food lovers. Happy cooking!