Prep time: 20 minutes
Cook time: 30 minutes
Total time: 50 minutes
Servings: 24 bars
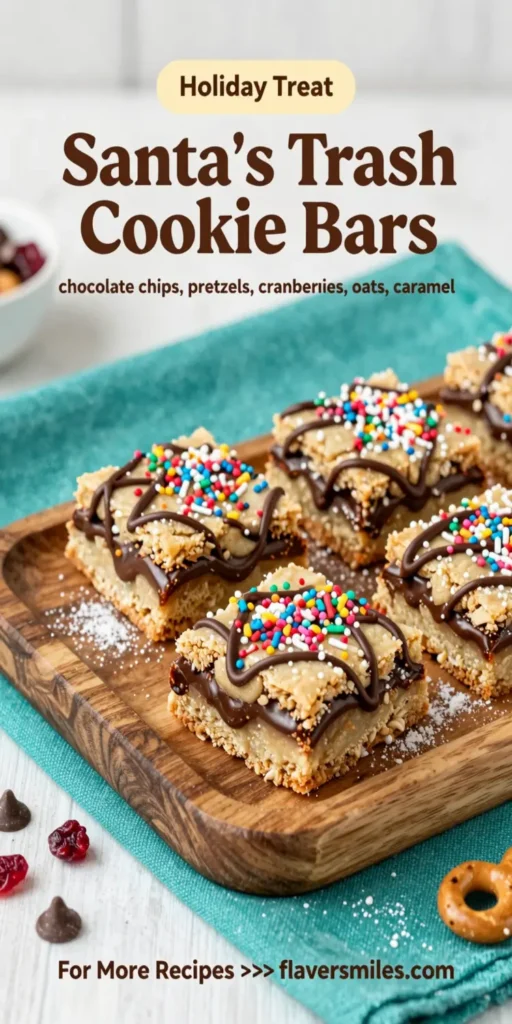
Santa’s Trash Cookie Bars are the perfect festive treat that embodies the spirit of the holiday season. Combining an assortment of holiday favorites—such as chocolate, nuts, and a dash of creativity—these cookie bars resemble a delightful mix of everything you could possibly enjoy about the holidays. No one can refuse a good cookie bar, especially when it’s as fun and unique as this one!
What Is Santa’s Trash Cookie Bars?
Santa’s Trash Cookie Bars are essentially a playful twist on traditional cookie recipes. Made with crushed cookies, fun toppings, and a blend of delicious flavors, these bars are a chewable, shareable confection that’s perfect for gatherings and family holiday events. Think of it like a robust cookie that holds together comfortably yet offers a multitude of flavors with every bite. They often feature sweet chips, nuts, and even some dried fruit, all layered together in a deliciously rich bar.
Why You’ll Love This
There are many reasons why Santa’s Trash Cookie Bars will become a favorite in your household. Firstly, they are incredibly easy to prepare, making them perfect for busy parents or anyone who might feel intimidated in the kitchen. These cookie bars also lend themselves beautifully to personal touches—you can add your favorite toppings or use leftover holiday treats. They require minimal hands-on time but maximum flavor payoff, perfect for festive baking without the fuss!
Another reason to adore these bars? You can easily customize them according to your family’s tastes. Whether you love chocolate, nuts, or a hint of something zesty, these bars can adapt accordingly. They also make excellent gifts; simply cut them into serving sizes, wrap them up, and share the joy of homemade treats!
Ingredients You’ll Need
- 1 cup unsalted butter, melted: This adds richness and helps bind the ingredients together.
- 1 cup brown sugar: For a deep caramel flavor that enhances the overall sweetness of the bars.
- 1 cup granulated sugar: Balances the richness of the butter and adds sweetness.
- 2 large eggs: Provides structure and moisture to the bars.
- 2 teaspoons vanilla extract: Adds warmth and elevates all the other flavors.
- 3 cups crushed cookies (any type you like): These are the star ingredient, creating a base that is both chewy and crispy.
- 1 cup chocolate chips: Adds indulgence; feel free to use semi-sweet or milk chocolate.
- 1 cup nuts (optional): Walnuts or pecans add a lovely crunch.
- 1 cup dried fruit (optional): Dried cranberries or raisins introduce a tangy zing that balances the sweetness.

How to Make
- Preheat your oven to 350°F (175°C). Grease a 9×13-inch baking pan or line it with parchment paper for easy removal later. This will ensure your cookie bars come out perfectly without sticking.
- In a large mixing bowl, combine the melted butter with the brown sugar and granulated sugar. Stir until well mixed, creating a smooth and glossy mixture. This step is crucial as it incorporates air, ensuring your cookie bars are light and chewy rather than dense.
- Add in the eggs, one at a time, mixing well after each addition. Then, stir in the vanilla extract. The mixture should be smooth and well combined, with a lovely aroma that fills your kitchen.
- Gradually fold in the crushed cookies, ensuring each piece is coated with the buttery mixture. After the cookies are integrated, add the chocolate chips, nuts, and dried fruit, ensuring an even distribution.
- Pour the cookie mixture into your prepared pan and spread it evenly using a spatula. Press down gently to compact the mixture; this will help the bars hold together better when baking.
- Bake in the preheated oven for 25-30 minutes or until the edges are golden and a toothpick inserted into the middle comes out clean. Keep an eye on the bars to avoid overbaking; you want them to remain moist and chewy.
- Once baked, remove from the oven and let them cool in the pan. After about 15 minutes, transfer to a cutting board to cool completely before slicing them into squares or bars. This waiting period helps firm them up, making them easier to cut.
Variations & Substitutions
Chocolate Chip Delight: Instead of using mixed cookies as your base, you can opt for just chocolate chip cookies. Crushed chocolate chip cookies provide a rich flavor, paired with additional chocolate chips for a double chocolate treat. This version appeals immensely to chocolate lovers!
Nutty Buddy: If your family enjoys a bit more crunch, consider adding various nuts: chopped pecans, almonds, or even hazelnuts. Nuts not only provide texture but also introduce healthy fats. For a seasonal twist, you could even incorporate candied nuts to give a sweet crunch during the holidays.
Fruity Fun: Incorporate dried fruits like blueberries or apricots instead of just chocolate. This variation offers a vibrant twist while maintaining the bar’s chewy texture without overwhelming the sweetness. The tartness of the fruit balances beautifully with the buttery base.
Gluten-Free Version: To make these cookie bars gluten-free, swap regular cookies with your favorite gluten-free variety, and use gluten-free flour for binding. This way, everyone in your gathering can enjoy them without worry.
Common Mistakes to Avoid
One common mistake is using cold butter instead of melted butter, which can result in dense cookie bars that don’t rise correctly. **Always make sure your butter is fully melted and slightly cooled before adding it to the sugars** to create that desirable texture.
Another pitfall is not letting the cookie bars cool adequately before cutting them. **If you cut them while they are too warm, they might crumble and fall apart**, resulting in a messy presentation.
Lastly, be cautious with overbaking. **Keep a close eye on the baking time**; removing the bars from the oven just as the edges turn golden will ensure that they stay soft and chewy instead of dry.
Storage, Freezing & Reheating Tips
To store Santa’s Trash Cookie Bars, ensure they are completely cooled, then place them in an airtight container. They can be kept at room temperature for 3-5 days, though refrigeration can extend their shelf life. However, refrigerating them might alter their texture slightly, making them denser.
If you want to keep them longer, these bars freeze beautifully. Cut them into portions, wrap each piece in plastic wrap, and then place them in a freezer-safe container or freezer bag. They’ll last for up to three months in the freezer. When you’re ready to enjoy them, simply take out how many you need and let them thaw at room temperature.
Reheating is simple; just pop the bars in the microwave for about 10-15 seconds to restore the soft, chewy texture. Be careful not to overheat, as this could cause them to become too gooey.
Frequently Asked Questions
Can I use different types of cookies for the base?
Absolutely! The beauty of Santa’s Trash Cookie Bars is their flexibility. You can use any crushed cookies you prefer, whether they are chocolate, vanilla, or even flavored varieties. Feel free to mix and match to discover your favorite combination.
Are these bars suitable for gifting during the holidays?
Yes, they make a lovely homemade gift! Simply package the cookie bars in a decorative tin or festive wrap. Not only will they delight the recipient’s taste buds, but they also show that you put thought into your gift.
Can I easily double this recipe?
Yes, you can double the ingredients and bake them in a larger pan, such as a half-sheet pan, depending on how many servings you need. Just keep an eye on the baking time, as larger quantities may require additional time in the oven.
What can I substitute for eggs in this recipe?
If you’re looking for an egg substitute, you can use 1/4 cup of unsweetened applesauce per egg or a mixture of 1 tablespoon of ground flaxseed mixed with 2.5 tablespoons of water, left to sit for 5-10 minutes until it becomes gelatinous. This keeps the bars moist and allows them to hold together.
What if I don’t have chocolate chips?
No worries! You can certainly skip the chocolate chips entirely or replace them with other goodies like butterscotch chips, peanut butter chips, or even chunks of your favorite chocolate bar. Feel free to get creative with this recipe!
Conclusion: Santa’s Trash Cookie Bars are not just a delightful treat but an opportunity to engage in a fun and creative baking experience. They bring a sense of joy, whether you’re whipping them up for a festive gathering or just to satisfy a sweet tooth. Give this recipe a try, and watch as everyone delights in the mess of flavors packed into one delicious bar! Happy baking!