Prep time: 20 minutes
Cook time: 0 minutes
Total time: 20 minutes
Servings: 8
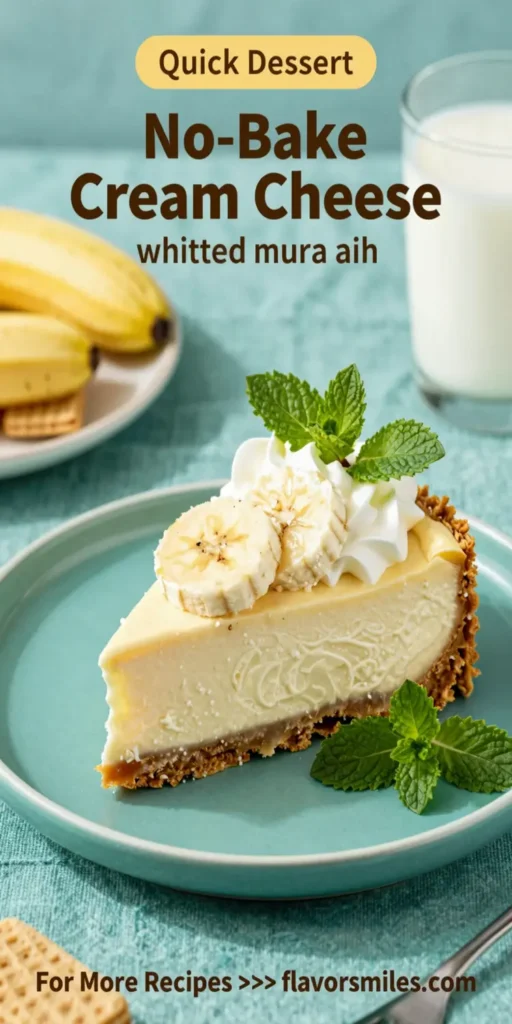
No-Bake Banana Pudding Cheesecake is a delightful dessert that bridges the classic flavors of banana pudding with the creamy decadence of cheesecake. If you’re looking for a dessert that doesn’t require turning on the oven, this cheesecake is perfect for you. With its layers of banana flavor, creamy filling, and a crunchy cookie crust, it’s sure to impress family and friends alike.
What Is No-Bake Banana Pudding Cheesecake?
No-Bake Banana Pudding Cheesecake is an innovative dessert that combines the flavors and textures of traditional banana pudding and cheesecake into a single dessert masterpiece. This dessert features a smooth and creamy filling made from cream cheese and whipped cream, combined with the sweet, ripe flavors of fresh bananas. The crust typically consists of crushed vanilla wafers or graham crackers, which provide a satisfying crunch that contrasts with the creamy filling. The best part? It sets in the refrigerator, which means no baking is required.
Why You’ll Love This
There are numerous reasons to love No-Bake Banana Pudding Cheesecake. First and foremost, it’s incredibly easy to make—perfect for busy parents or anyone just starting their culinary journey. With minimal ingredients and a straightforward process, this dessert can be whipped up in just moments, making it an excellent option for impromptu gatherings or planned events. Additionally, the creamy texture and intense flavor of bananas in this cheesecake create a heavenly experience for your taste buds. The dessert is also versatile, allowing you to experiment with toppings and flavors to suit your preferences.
Ingredients You’ll Need
- 1 ½ cups vanilla wafer cookies: These cookies create a deliciously crunchy base for the cheesecake and add a traditional banana pudding flavor.
- ½ cup unsalted butter: Melted butter binds the crust together and adds richness.
- 16 ounces cream cheese: This gives the cheesecake its creamy texture and rich flavor; be sure it’s softened for the best mixing.
- 1 cup powdered sugar: This sweetens the cream cheese filling while maintaining a light texture.
- 1 teaspoon vanilla extract: Vanilla enhances the overall flavor profile of the cheesecake.
- 2 cups heavy cream: Whipped to form peaks, this adds volume and airy lightness to the cheesecake.
- 3 ripe bananas: Sliced and layered, bananas are the star of this dessert, providing sweetness and texture.
- Additional vanilla wafers for garnish: To add crunch and an attractive presentation on top of the cheesecake.

How to Make
- Prepare the crust: Start by crushing the vanilla wafer cookies in a food processor or placing them in a resealable bag and crushing them with a rolling pin. The goal is to achieve fine crumbs. In a mixing bowl, combine these crumbs with melted butter until they resemble wet sand. Press this mixture into the bottom of a 9-inch springform pan, ensuring an even layer. This will create a solid foundation for the cheesecake.
- Make the filling: In a separate bowl, beat the softened cream cheese with an electric mixer until it’s smooth and creamy, about 2 minutes. Gradually add the powdered sugar and vanilla extract, continuing to mix until well incorporated.
- Whip the cream: In another bowl, whisk the heavy cream until stiff peaks form. This process is crucial because it adds volume and a light texture to the cheesecake. Gently fold the whipped cream into the cream cheese mixture using a spatula, taking care not to deflate the whipped cream.
- Add bananas: Slice the ripe bananas and gently fold them into the cheesecake mixture. This step infuses the filling with the natural sweetness and flavor of the bananas while keeping the texture interesting.
- Assemble the cheesecake: Pour the banana-infused mixture over the prepared crust in the springform pan, spreading it evenly. Tap the pan lightly on the counter to release any air bubbles that may have formed. Cover the cheesecake with plastic wrap and refrigerate for at least 4 hours or until it is set.
- Serve and enjoy: Once the cheesecake has set, remove it from the springform pan. Decorate the top with additional banana slices and crushed vanilla wafers. Slice into portions and serve chilled, enjoying the delightful layers of creamy, banana-rich flavor.
Variations & Substitutions
Chocolate Banana Pudding Cheesecake: Instead of using vanilla wafers for the crust, use chocolate cookie crumbs. You can also melt some chocolate and fold it into the cream cheese mixture for an extra chocolatey twist that pairs beautifully with bananas.
Vegan No-Bake Banana Pudding Cheesecake: Substitute cream cheese with a vegan cream cheese alternative and use coconut whipped cream instead of heavy cream. Ensure the vanilla wafers are dairy-free, and you have a delicious, vegan-friendly version of the dessert!
Peanut Butter Banana Cheesecake: For a nutty flavor, fold in ½ cup of smooth peanut butter to the cream cheese filling. This variation adds a rich taste that complements the bananas remarkably well.
Banana Cream Pie Cheesecake: Layer the bananas in the cheesecake filling with a layer of vanilla pudding for added texture and flavor. Top with whipped cream before serving for a classic pie presentation.
Common Mistakes to Avoid
When making No-Bake Banana Pudding Cheesecake, one common mistake is overmixing the cream cheese. This can lead to a dense, heavy filling rather than the light, fluffy texture desired. Always mix until just combined. Another mistake is not allowing the cheesecake to set long enough, which may result in a filling that is too soft to slice properly. Be patient and give it enough time in the refrigerator. Lastly, using unripe bananas can cause the dessert to lack sweetness. Always choose ripe bananas for the best flavor.
Storage, Freezing & Reheating Tips
To store your No-Bake Banana Pudding Cheesecake, cover it tightly with plastic wrap and place it in the refrigerator. It can last for up to 5 days, but for optimal flavor, try to consume it within 3 days. If you wish to freeze the cheesecake, slice it first and wrap each piece individually in plastic wrap and then foil to prevent freezer burn. It can stay in the freezer for up to 2 months. To thaw, simply move it to the refrigerator overnight. Never refreeze thawed cheesecake as this can affect its texture.
Frequently Asked Questions
Can I use different fruits in this cheesecake? Absolutely! You can substitute other fruits like strawberries or peaches. Just keep in mind that the flavor and texture will vary based on the fruit you choose. Always ensure they are ripe for the best taste.
How do I know when the cheesecake is set? The cheesecake should be firm to the touch and should not jiggle significantly when gently shaken. If it’s still soft in the middle, it needs more time in the refrigerator.
Can I use store-bought crust for this recipe? Yes, you can certainly use a store-bought graham cracker or cookie crust to save time. Just make sure it’s a 9-inch crust to match the recipe measurements.
What is the best way to cut the cheesecake? Use a sharp, hot knife to cut through the cheesecake smoothly. Wipe the knife on a cloth between cuts to ensure clean slices. This method helps to maintain the integrity of the layers.
Can I make this cheesecake ahead of time? Yes, this cheesecake can be made a day in advance, making it an excellent dessert option for gatherings. Just ensure it’s stored properly in the refrigerator until you’re ready to serve.
Conclusion: This No-Bake Banana Pudding Cheesecake is a delightful and easy dessert that requires no baking. It’s perfect for any occasion and sure to satisfy your sweet tooth with its creamy filling, crunchy crust, and rich banana flavor. With variations available and tips to avoid common mistakes, you can easily make this a standout treat in your recipe collection. Enjoy every bite!