Prep time: 25 minutes
Cook time: 30 minutes
Total time: 55 minutes
Servings: 10 servings
Lemon Layer Cake is a delightful and zesty treat that brings brightness to your dessert table. With its fluffy layers of lemon-infused cake and luscious cream frosting, it’s not just a cake; it’s an experience! This recipe is perfect for everything from birthdays to casual get-togethers. The aroma of fresh lemons combined with the sweet scent of vanilla will have everyone peeking into the kitchen. Once you serve this cake, expect compliments and requests for seconds!
What Is Lemon Layer Cake?
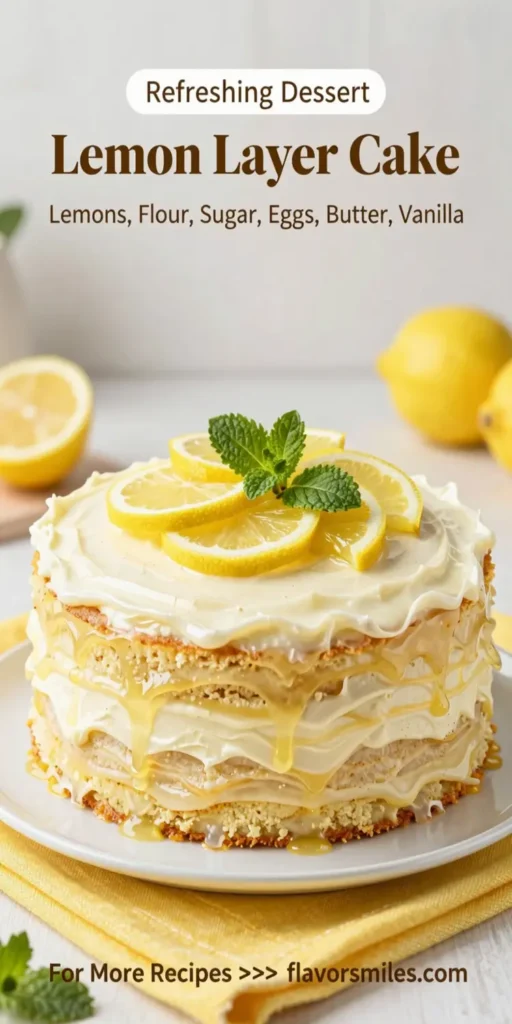
Lemon Layer Cake is a classic dessert that features multiple layers of lemon-flavored cake, typically frosted with a light buttercream or cream cheese icing. The bright, tangy flavor of lemons balances beautifully with the sweetness of the frosting, creating a harmonious blend that excites the taste buds. This dessert can be decorated with lemon slices, zest, or edible flowers, making it as appealing to the eyes as it is to the palate.
Why You’ll Love This
There are several reasons you’ll love this Lemon Layer Cake! First, it’s incredibly light and fluffy, making it perfect for celebrations during warm months. Second, the lemon flavor is refreshing, offering a unique twist on traditional cakes. Third, it’s a visually stunning dessert that will impress your guests. Finally, each slice offers a burst of citrusy goodness that can brighten anyone’s day. This cake is not overly sweet, allowing the bright notes of lemon to shine.
Ingredients You’ll Need
- 2 ½ cups all-purpose flour: Provides structure to the cake.
- 2 cups granulated sugar: Adds sweetness to balance the tartness of the lemon.
- ½ cup unsalted butter, softened: Contributes richness and moisture.
- 1 cup buttermilk: Ensures the cake stays moist and adds flavor.
- 4 large eggs: Acts as a binding agent that helps the cake rise.
- 1 tablespoon lemon zest: Intensifies the lemon flavor.
- 1 teaspoon pure vanilla extract: Adds depth to the flavor.
- 1 tablespoon baking powder: Provides leavening for a light texture.
- ½ teaspoon salt: Balances the sweetness.

How to Make
- Preheat the oven: Start by preheating your oven to 350°F (175°C). Grease and flour three 9-inch round cake pans. This step ensures easy removal of the cakes after baking.
- Mix dry ingredients: In a medium bowl, whisk together 2 ½ cups of all-purpose flour, 1 tablespoon of baking powder, and ½ teaspoon of salt. This mixture will be the foundational base of your cake.
- Combine wet ingredients: In a large bowl, cream together ½ cup of softened unsalted butter and 2 cups of granulated sugar until the mixture is light and fluffy. This usually takes about 3-5 minutes. Gradually add in 4 large eggs one at a time, mixing well after each addition. Then, stir in 1 tablespoon of lemon zest and 1 teaspoon of pure vanilla extract.
- Alternate adding flour and buttermilk: Slowly add the dry mixture to the wet mixture, alternating with 1 cup of buttermilk. Start and end with the flour mixture. Mix just until combined; overmixing can result in a dense cake.
- Pour and bake: Divide the batter evenly among the prepared pans. Bake for 25-30 minutes until golden brown and a toothpick inserted in the center comes out clean. Be sure to check at the lower end of baking time to prevent over-baking.
- Cool the cakes: Once baked, remove the cakes from the oven and let them cool in the pans for about 10 minutes. Then, turn them out onto wire racks to cool completely. Cooling the cakes thoroughly will help prevent the frosting from sliding off.
- Prepare the frosting: While the cakes cool, you can prepare your frosting. For a lemon buttercream, beat together 1 cup of softened unsalted butter with 4 cups of powdered sugar, then add 2-3 tablespoons of lemon juice and a pinch of salt to taste. Mix until smooth and fluffy.
- Assemble the cake: Once the layers are cooled, place one layer on a serving plate and spread a generous amount of frosting on top. Add a second layer and repeat the process. Top with the final layer, then frost the top and sides as desired. Don’t hesitate to be generous with the frosting; you want each bite to be heavenly!
Variations & Substitutions
Chocolate Lemon Layer Cake: For a twist on the classic, you can create a chocolate lemon layer cake. Simply substitute 1 cup of the all-purpose flour with unsweetened cocoa powder. This variation offers a rich chocolatey flavor that perfectly complements the bright lemon.
Gluten-Free Lemon Layer Cake: If you’re looking for a gluten-free option, replace the all-purpose flour with a gluten-free all-purpose blend. Ensure it contains a binding agent like xanthan gum for the best texture. The lemon flavor will still shine through, making it a delightful treat for those with dietary restrictions.
Lemon Cream Cheese Frosting: If you want to take your frosting to the next level, try a lemon cream cheese frosting. Replace half of the butter with cream cheese for a tangy alternative that pairs exceptionally well with the lemon cake.
Common Mistakes to Avoid
The first mistake to avoid is overmixing the batter. While it may be tempting to mix until everything is thoroughly combined, overmixing can lead to a dense cake. Instead, mix just until you no longer see any flour. Secondly, be cautious of underbaking. Always do the toothpick test to ensure your cake is fully baked; if the toothpick comes out with wet batter, it needs more time in the oven. Additionally, not allowing the cakes to cool completely before frosting is a common error. Warm cake can cause the frosting to melt, ruining the presentation. Lastly, don’t overlook the importance of proper measuring. Using too much flour or sugar can drastically change the texture and flavor of your cake.
Storage, Freezing & Reheating Tips
To store your Lemon Layer Cake, cover it tightly with plastic wrap or aluminum foil and keep it in the refrigerator if you don’t plan to consume it within the first couple of days. It should be good for up to a week. You can freeze individual slices by wrapping them in plastic wrap and then placing them in an airtight container. For best results, enjoy the slices within three months. To reheat, place the frozen slices in the refrigerator overnight or warm them on a low setting in the microwave until just warm. Be sure to check frequently to avoid overheating, which can dry them out.
Frequently Asked Questions
Can I make Lemon Layer Cake in advance?
Yes, you can make the cake layers in advance and freeze them. Ensure they are wrapped tightly and stored in an airtight container. You can then frost them once they have fully thawed. Baking ahead of time is a great strategy for busy schedules!
How can I make the cake more lemony?
To enhance the lemon flavor, consider adding an additional tablespoon of lemon zest or a few extra tablespoons of lemon juice in the batter. You can also drizzle a simple lemon syrup over the layers after baking to infuse extra moisture and flavor.
Can I use a different size pan?
Absolutely! If you don’t have three 9-inch round pans, you can use two 9-inch pans or even a 13×9-inch pan. If using different sizes, be sure to adjust the baking time accordingly. A larger cake will take longer, while smaller ones will bake quicker.
What can I use instead of buttermilk?
If you don’t have buttermilk on hand, you can easily substitute it with regular milk mixed with a tablespoon of lemon juice or vinegar. Let the mixture sit for about 5-10 minutes until it slightly thickens before using it in the recipe.
Can I decorate the cake ahead of time?
Yes, you can decorate the cake ahead of time! However, if you plan on storing it in the refrigerator, consider adding any delicate decorations, like fruit or flowers, right before serving to ensure they stay fresh and vibrant.
Conclusion:
Lemon Layer Cake is not just a dessert; it’s a celebration of flavors that brings joy to any occasion. With its fluffy texture and vibrant lemon taste, this cake is sure to be a hit among your friends and family. Whether you stick with the classic recipe or explore various variations, you’ll find that each bite offers a perfect balance of sweetness and tartness. Enjoy the baking process and serve a slice of happiness!