Prep time: 20 minutes
Cook time: 15 minutes
Total time: 35 minutes
Servings: 16 pieces
Homemade Christmas Toffee is a delightful treat that can brighten up any holiday gathering or cozy evening at home. The richness of buttery toffee, combined with a crunchy layer of chocolate and sprinkled nuts, creates a divine indulgence that’s sure to tantalize your taste buds. This recipe is accessible for busy parents and kitchen beginners alike, making the holiday baking experience enjoyable and stress-free. The process of creating this simple yet decadent candy can also serve as a wonderful bonding opportunity when involving kids or friends, bringing warmth and happiness to your holiday celebrations.
What Is Homemade Christmas Toffee?
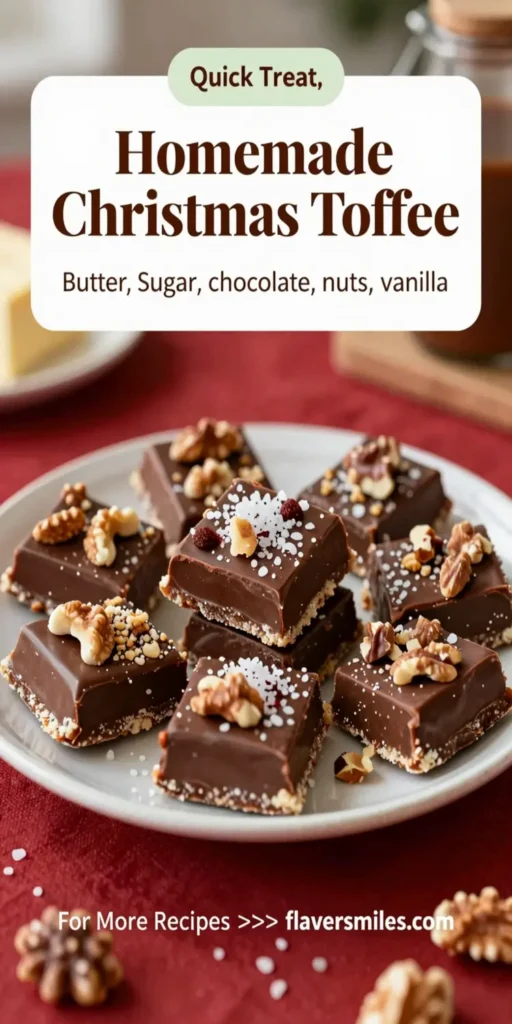
Homemade Christmas Toffee is a traditional confection that consists of a sweet, buttery base topped with melted chocolate and nuts. This easy-to-make toffee is typically created during the holiday season, making it a popular choice for gifts and festive gatherings. The main components include sugar, butter, chocolate, and nuts, all of which contribute to its crunchy texture and rich flavor profile. The great thing about this recipe is the versatility it offers; you can swap out ingredients to find your personal favorite combinations while still maintaining that perfect toffee texture.
Why You’ll Love This
There are countless reasons to love Homemade Christmas Toffee. Firstly, it’s incredibly simple to prepare, requiring minimal ingredients and equipment. Secondly, the blend of crunchy, buttery toffee, smooth chocolate, and the nutty crunch gives your palate a delightful experience. Whether you enjoy it as a treat for yourself or gift it to friends and family, Homemade Christmas Toffee is a wonderful way to embrace the spirit of the season. Plus, its festive appearance makes it an excellent addition to holiday platters or dessert tables.
Ingredients You’ll Need
- 1 cup unsalted butter (2 sticks): This provides the rich, creamy base that gives toffee its delicious melt-in-your-mouth texture.
- 1 cup granulated sugar: This is essential for sweetening the toffee and creating that delightful caramelized flavor.
- ½ cup light brown sugar: The inclusion of brown sugar adds depth of flavor and a hint of molasses, enriching the toffee’s taste.
- 1 teaspoon vanilla extract: This adds a warm, aromatic element to the toffee, enhancing overall flavor.
- ¼ teaspoon salt: A touch of salt balances the sweetness, making each bite irresistible.
- 1 cup chocolate chips: Melted on top, the chocolate forms a deliciously smooth layer that complements the toffee’s crunch.
- ½ cup chopped nuts (such as walnuts or almonds): These provide a lovely crunch and additional flavor contrast to the toffee.
How to Make
- Begin by preparing a baking sheet. Line a half-sheet pan with parchment paper, ensuring it covers the bottom fully. This will help in removing the toffee later.
- In a medium saucepan, melt the butter over medium heat. Once melted, add in the granulated sugar and brown sugar, stirring consistently until well combined. This process should take about 5 minutes, and you want to ensure the mixture is bubbling gently.
- Continue stirring the mixture and use a candy thermometer to monitor the temperature. You want to bring the mixture up to 300°F (149°C), which is known as the hard crack stage, about 10-15 minutes of cooking.
- Once the desired temperature is reached, remove the saucepan from heat and mix in the salt and vanilla extract quickly. Pour the mixture onto the prepared baking sheet, spreading it out evenly with a spatula.
- Immediately sprinkle the chocolate chips over the hot toffee. Allow the chips to sit for a couple of minutes to soften, then use a spatula to spread the melted chocolate evenly over the top.
- Finish by sprinkling the chopped nuts over the chocolate layer. Allow the toffee to cool completely at room temperature, which will take about 1 hour.
- Once cooled, break the toffee into pieces and enjoy! Store any leftovers in an airtight container to maintain freshness.
Variations & Substitutions
Milk Chocolate Toffee: If you prefer a sweeter option, swap out semi-sweet chocolate chips for milk chocolate chips. This will give a creamier finish and a slightly different flavor profile that appeals to chocolate lovers.
Spiced Toffee: For a festive twist, add spices such as cinnamon or nutmeg to the butter mixture while cooking. These spices complement the sweetness and contribute a warm flavor perfect for the holidays.
Nut-Free Version: If you or your recipients have nut allergies, simply leave out the nuts altogether or replace them with a sprinkle of crushed pretzels or toffee bits instead.
Dark Chocolate Toffee: For a richer taste, use dark chocolate instead of milk or semi-sweet varieties. Dark chocolate enhances the complexity of flavors, making a sophisticated treat.
Candied Fruit Topping: Instead of nuts, consider using candied fruits such as orange or lemon peel on top of the chocolate layer for a tangy sweetness that balances the toffee nicely.
Common Mistakes to Avoid
One common mistake when making toffee is not monitoring the temperature closely. Failure to reach the proper temperature can result in a soft toffee that doesn’t harden adequately. A candy thermometer is essential to achieving the desired texture.
Another frequent error is stirring too vigorously when the mixture begins to bubble. Too much agitation could cause the sugars to crystallize, leading to a grainy texture rather than a smooth toffee. It’s important to stir gently but consistently.
Lastly, allowing the toffee to sit for too long before adding the chocolate can cause it to harden too much. Timing is essential; adding the chocolate immediately after pouring the toffee ensures it melts and spreads easily.
Storage, Freezing & Reheating Tips
To store your Homemade Christmas Toffee, place it in an airtight container at room temperature away from direct sunlight. This will keep it fresh and prevent it from absorbing moisture. The toffee will last for about 2 weeks if stored properly.
If you want to extend its shelf life, you can freeze it. Wrap the pieces in wax paper and place them in a freezer-safe container. When you’re ready to enjoy them, simply let them thaw at room temperature—no need for reheating as the toffee can be enjoyed straight from the freezer.
Make sure to always check for any signs of spoilage before consuming, especially if the toffee has been stored over a long spell. Keeping it in a cool, dry place will greatly help maintain its quality and prevent any undesirable texture changes.
Frequently Asked Questions
Can I use margarine instead of butter?
While margarine can be used in a pinch, using unsalted butter is recommended for the best flavor and texture. Butter contains fats that help create the smooth consistency essential for quality toffee.
What type of chocolate is best for toffee?
The choice of chocolate can depend on your personal preference. Semi-sweet chocolate is usually the standard choice, but feel free to experiment with dark or milk chocolate for different flavors. Each type brings a unique dimension to the overall taste.
Why is my toffee sticky?
Sticky toffee often indicates that it has not reached the proper temperature during cooking. Ensure you accurately monitor the temperature with a candy thermometer, aiming for the hard crack stage at 300°F (149°C).
Can I add flavors to the toffee?
Yes, you can get creative with flavors! Adding things like cocoa powder, espresso, or even extracts like almond or peppermint can give the toffee a different character, making it even more delightful during the festive season.
How should I cut the toffee?
Once the toffee has cooled completely, you can use a sharp knife to break it into pieces. It’s easier to cut or break when it’s cold, but be careful as the edges may be sharp.
Conclusion: Homemade Christmas Toffee is a festive treat that delights the senses. With its rich flavors and unique textures, this recipe is simple enough for anyone to make. Be sure to pay attention to the details to achieve the perfect toffee, and don’t hesitate to share it with friends and loved ones this holiday season! Enjoy your delicious creation and embrace the joy of baking.