Prep time: 30 minutes
Cook time: 50 minutes
Total time: 1 hour 20 minutes
Servings: 12
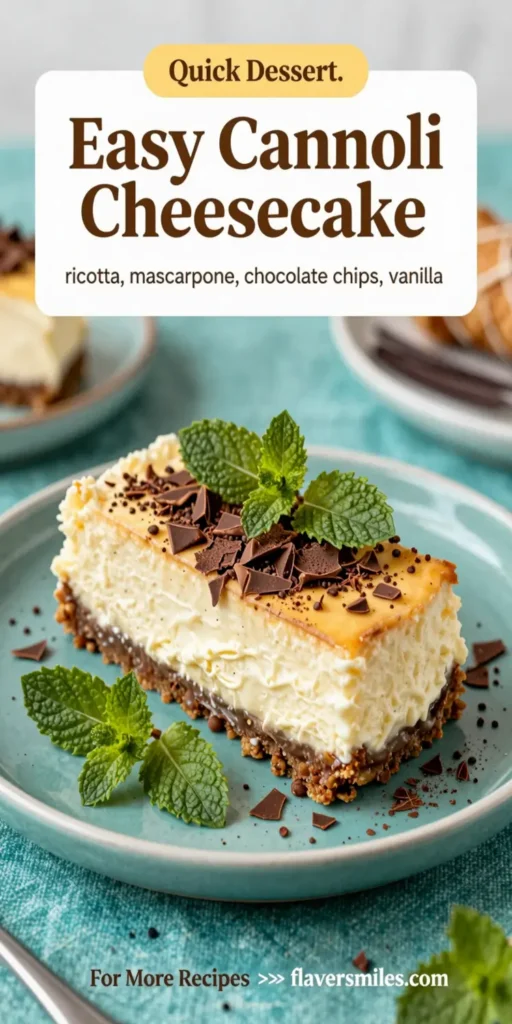
Easy Cannoli Cheesecake brings together the rich, creamy flavors of traditional cannoli with the enticing texture of cheesecake. This dessert is perfect for those who love the classic Italian pastry but want to enjoy it in a creamy, luscious form. With its crispy cannoli shell crust and a smooth, ricotta cheesecake filling, this dessert is sure to impress your family and friends. Let’s dive into the details of this extraordinary treat!
What Is Easy Cannoli Cheesecake?
Easy Cannoli Cheesecake is a delightful twist on the traditional Italian cannoli. While cannoli typically consists of crispy pastry shells filled with sweetened ricotta cheese, this recipe transforms those same flavors into a decadent cheesecake. The cheesecake batter includes ricotta, which provides the characteristic flavor that’s synonymous with cannoli. Additionally, it’s often flavored with citrus and chocolate, giving the dessert a refreshing citrusy zing and delightful chocolatey bursts in every bite.
This cheesecake is baked until it is set, creating a wonderfully creamy texture that melts in your mouth. The crispy cannoli shell crust adds a crunchy contrast that elevates the whole experience, making it a coveted dessert at gatherings and family celebrations. It contains all the flavors and textures you would expect from a traditional cannoli, but with the added creaminess of cheesecake!
Why You’ll Love This
There are several reasons why Easy Cannoli Cheesecake will become a beloved addition to your dessert repertoire. First and foremost, the harmonious blend of flavors ensures that each bite is an indulgent experience. The sweetness of the cheesecake perfectly balances the slight tang from the ricotta and the crispness of the shell.
Another reason you will love this dessert is its adaptability. It is essential for special occasions such as birthdays or holiday gatherings, yet it can be prepared easily for a weekday treat. This cheesecake is not only delicious but also looks stunning, making it a fantastic conversation starter at any event.
Finally, the recipe is beginner-friendly! You don’t need to be a professional baker to whip up this impressive dessert. It’s straightforward, and each step is easy to follow. Plus, the ingredient list is manageable, making it perfect for busy parents or those who are new to baking.
Ingredients You’ll Need
- Cannoli shells: These provide the crunchy base of the cheesecake. You can purchase them pre-made or try making them at home for a truly authentic touch.
- Ricotta cheese: The centerpiece of this recipe, ricotta gives the cheesecake its signature flavor and light texture.
- Cream cheese: This adds richness and creaminess to the cheesecake filling.
- Sugar: A key ingredient for sweetness, it helps balance the flavors.
- Vanilla extract: An essential ingredient to enhance the overall flavor profile of the dessert.
- Chocolate chips: Mini chocolate chips are mixed into the filling for added texture and sweetness.
- Eggs: These act as binding agents, giving the cheesecake its structure.
- Ground cinnamon: Adds warmth and depth to the flavor of the cheesecake.
How to Make
- Start by preheating your oven to 325°F (163°C). This ensures that the cheesecake bakes evenly and properly. A consistent temperature is crucial for achieving a creamy texture.
- In a large mixing bowl, combine the ricotta cheese, cream cheese, and sugar. Beat the mixture with an electric mixer until it is smooth and well combined, taking care to scrape down the sides to ensure everything is evenly mixed. This process usually takes about 3 to 5 minutes.
- Add the eggs, one at a time, mixing well after each addition. It’s essential for the eggs to be at room temperature to achieve a smooth batter. Incorporate the vanilla extract and ground cinnamon next for added flavor.
- Once the batter is smooth, gently fold in the mini chocolate chips. This will ensure that each bite of cheesecake has delightful bursts of chocolate, making it even more irresistible.
- Prepare your cannoli shells by crumbling them into small pieces. Press the crumbled shells into the bottom of a springform pan to create a sturdy crust that contrasts beautifully with the creamy filling.
- Pour the cheesecake filling over the prepared crust, smoothing the top with a spatula. This will create an even and beautiful surface, helping your cheesecake bake evenly.
- Bake in the preheated oven for approximately 50 minutes, or until the center is just set but not jiggly. A slight wobble in the middle is a sign that the cheesecake will set perfectly as it cools.
- Once baked, turn off the oven and leave the cheesecake inside for about an hour to cool gradually. This step is essential to prevent cracks from forming on the surface. After an hour, cool it to room temperature before refrigerating for at least four hours or overnight.
Variations & Substitutions
Citrus Twist: For a refreshing change, consider adding the zest of one lemon or orange to the filling. These citrus flavors will provide a bright acidity that cuts through the richness of the cheesecake, enhancing the overall flavor profile.
Nutty Flavor: If you enjoy nuts, fold in some finely chopped pistachios or almonds into the filling for a crunchy surprise. You can even sprinkle them on top of the cheesecake before serving for added texture and visual appeal.
Raspberry Swirl: For a fruity alternative, create a raspberry puree by blending fresh or frozen raspberries with a bit of sugar. Swirl this mixture into the cheesecake filling before baking for a beautiful marbled effect and burst of berry flavor.
Chocolate Lovers: For the chocolate enthusiasts, you can substitute some of the cream cheese with chocolate cream cheese to amplify the chocolatey goodness. Additionally, a drizzle of chocolate ganache on top after baking can take it to the next level.
Common Mistakes to Avoid
One common pitfall is overmixing the batter. When incorporating the eggs, mix just until combined, as overmixing can lead to incorporating too much air, leading to cracks in the finished cheesecake.
Another mistake is not allowing the cheesecake to cool in the oven. Skipping this step can cause the cheesecake to crack as it cools too quickly due to temperature fluctuations.
Lastly, not using room temperature ingredients is a frequent issue. Cold ingredients don’t blend well, resulting in a lumpy filling. Always allow your cheeses and eggs to come to room temperature before mixing.
Storage, Freezing & Reheating Tips
To ensure maximum freshness, store any leftover Easy Cannoli Cheesecake in an airtight container in the refrigerator for up to 5 days. It’s best enjoyed cold, so keep it chilled until serving.
If you want to extend its shelf life, you can freeze the cheesecake. Wrap it tightly in plastic wrap, then in aluminum foil, and store it in the freezer for up to 3 months. To defrost, simply transfer it to the refrigerator overnight.
When reheating individual slices, it’s best to do it gently in the microwave in 15-second intervals, checking to ensure it doesn’t get too warm. A quick reheat can make it easier to enjoy if the cheesecake becomes too firm after freezing.
Frequently Asked Questions
Can I make this cheesecake ahead of time?
Absolutely! In fact, Easy Cannoli Cheesecake tastes even better after a day in the fridge as the flavors meld. It can be prepared up to two days before serving; just make sure it’s covered well to maintain its moisture and freshness.
What can I substitute for ricotta cheese?
If you’re looking for alternatives, consider using mascarpone cheese for a different texture, or a blend of cottage cheese and cream cheese for a similar effect. However, keep in mind that this may slightly alter the flavor profile.
Can I use store-bought cannoli shells?
Definitely! For ease and convenience, store-bought cannoli shells simplify the process. They offer a great crunch and save time, allowing you to enjoy this delightful dessert without the hassle of making shells from scratch.
Is there a gluten-free option for the crust?
Yes! You can create a gluten-free crust by substituting traditional cannoli shells with crushed gluten-free cookies or even using gluten-free graham crackers. Mix them with a little melted butter to form the base.
How do I know when the cheesecake is done?
The best indicator is a slight jiggle in the center of the cheesecake when gently shaken. The edges should be firm while the center remains slightly soft. It will continue to cook as it cools, ensuring a perfect texture.
Conclusion: Easy Cannoli Cheesecake is not only a luxurious dessert option but also an excellent choice for anyone looking to impress at their next event. The combination of creamy filling with a crunchy crust presents a wonderful balance of flavors and textures, making it a must-try recipe. Enjoy baking and sharing this delightful dessert with your loved ones!