## Prep Time
10 minutes
## Cook Time
20 minutes
## Total Time
30 minutes
## Servings
12 rolls
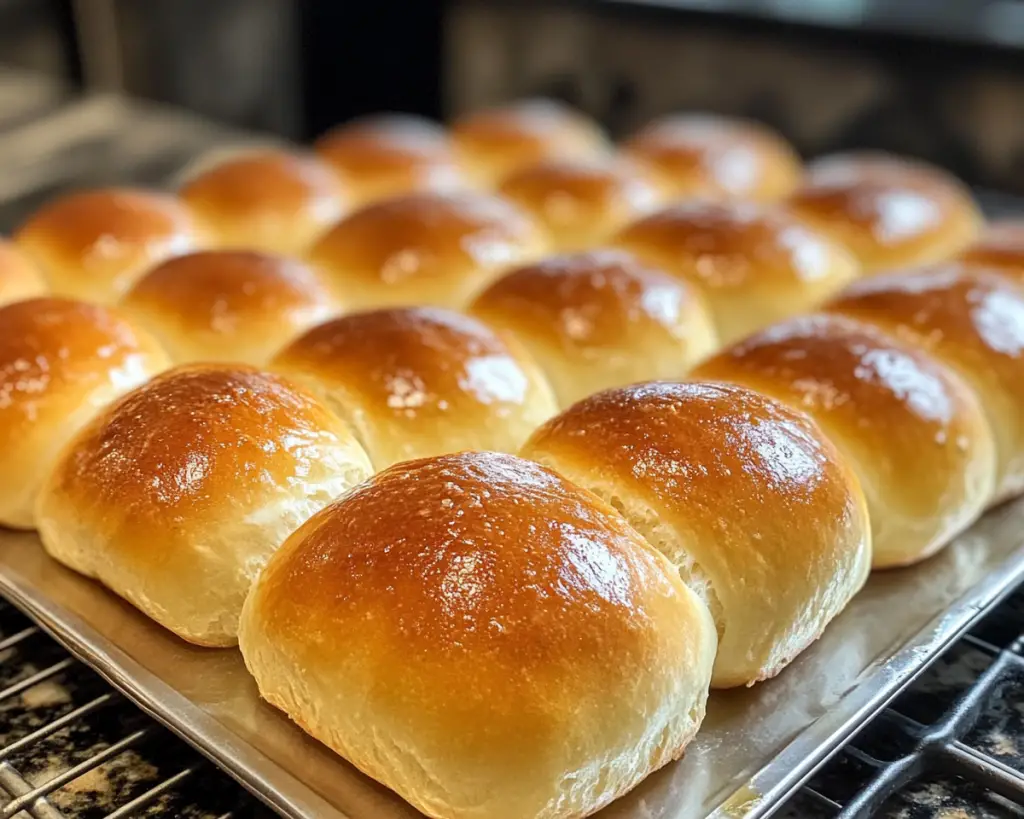
There’s nothing quite like the smell of freshly baked dinner rolls wafting through your home. Whether you’re anticipating a family feast, a cozy dinner with friends, or just a comforting dish to accompany your meal, **homemade dinner rolls** are always a hit. Soft, fluffy, and with a slight golden crust, these rolls can elevate any dining experience. They’re versatile, too — perfect for soaking up gravy, served alongside a soup, or slathered in butter.
In this article, you’ll discover how to make the perfect dinner rolls from scratch. We’ll go through each step in detail, cover variations that cater to different tastes, and provide troubleshooting tips to ensure your rolls come out just right. You’re about to embark on a culinary journey that will leave you with a batch of the most delightful, homemade dinner rolls!
What Are Dinner Rolls?
Dinner rolls are small, usually round bread rolls served at the beginning of a meal or alongside main dishes. They have a rich history, originating in European cuisines, where they were served on the dining table for companionable enjoyment. The texture of a dinner roll is often soft and fluffy, and they can be made from various types of dough, including white, whole wheat, or enriched with butter, milk, and sugar.
A good dinner roll strikes a balance between a crisp exterior and a soft, airy interior. This delightful contrast makes them perfect for pairing with savory dishes or enjoying with sweet toppings like honey or jam. Key ingredients often include all-purpose flour, yeast, water, sugar, milk, and butter, which together create the deliciousness that many of us associate with warm family gatherings. This makes them a favorite in many households, especially during holidays or special occasions.
The flavor profile of dinner rolls can vary from plain and simple to rich and buttery, depending on the additional ingredients used. By adjusting the ratios and introducing flavors like garlic, herbs, or cheese, you can customize your rolls to suit your family’s preferences.
Why You’ll Love These Dinner Rolls
This dinner roll recipe is perfect for everyone — whether you’re a seasoned baker or a beginner in the kitchen! Here are just a few reasons why you’ll love making these rolls:
1. **Taste**: The warmth of the fresh rolls, with a buttery, slightly sweet flavor, creates a comforting experience. The aroma alone as they bake is enough to make anyone’s mouth water!
2. **Ease**: This recipe is simple and doesn’t require any special equipment. Just a mixing bowl, a spoon, and a baking sheet are all you need.
3. **Cost-Effective**: Compared to store-bought rolls, homemade dinner rolls are inexpensive to make. Most ingredients are basic pantry staples, making this recipe budget-friendly.
4. **Versatility**: You can serve these rolls with soups, salads, chicken dishes, or even use them for sliders. They can be enjoyed fresh out of the oven or reheated the next day.
5. **Customizable**: This recipe offers plenty of room for creativity. You can easily incorporate herbs, cheeses, or sweet flavors depending on the meal you’re preparing.
6. **No More Store-Bought**: Once you taste fresh homemade rolls, it will be hard to go back to store-bought options. You’ll feel proud to serve these fluffy, warm rolls to loved ones.
It’s essential to address common misconceptions that baking bread is difficult or reserved only for skilled bakers. While it may seem intimidating, with this straightforward recipe, anyone can achieve delicious results. A common mistake is to over knead the dough, thinking that will yield better rolls. However, handling the dough gently ensures it maintains its soft, pillowy texture.
Ingredients You’ll Need
To make the perfect dinner rolls, gather the following ingredients:
– **3 1/4 cups all-purpose flour**: This is the foundation of your rolls. For a lighter roll, use unbleached flour which ensures a fluffier texture. You can substitute with bread flour for even greater chewiness.
– **1 packet active dry yeast (2 1/4 teaspoons)**: This is what helps your rolls rise. If you don’t have active dry yeast, you can use instant yeast, which doesn’t require activation in warm water.
– **1/4 cup granulated sugar**: This sweetener not only enhances the flavor but also feeds the yeast during fermentation. For a sugar substitute, try honey or agave syrup.
– **1 teaspoon salt**: Essential for flavor in any bread recipe, it also strengthens the dough structure. Avoid using coarse sea salt as it might not dissolve properly.
– **1/2 cup whole milk**: Milk adds richness and moisture to the dough, creating a tender crumb. You can substitute with almond milk or oat milk for a dairy-free option.
– **1/4 cup unsalted butter, melted**: This contributes to flavor and creates that soft texture. You can replace it with coconut oil or olive oil if you’re looking for a dairy-free variant.
– **1 large egg**: Adds a rich flavor and helps bind the ingredients. If you’re vegan, you can use a flaxseed meal equivalent (1 tablespoon flaxseed meal + 2.5 tablespoons water = 1 egg).
– **1/2 cup warm water (about 110°F)**: Necessary for activating the yeast and hydrating the dough. Ensure the water is not too hot, as it could kill the yeast.
Each ingredient plays a crucial role in creating the perfect dinner roll. Be sure to measure accurately for the best results!
How to Make Dinner Rolls
Now that you have your ingredients, let’s get started making these delectable dinner rolls. Follow these step-by-step instructions, and you’ll have your rolls rising in no time!
1. **Activate the Yeast**: In a small bowl, combine the warm water and granulated sugar. Sprinkle the yeast over the top and let it sit for about 5-10 minutes until it becomes frothy. This step is vital as it proves that your yeast is active. If the mixture doesn’t froth, you may need to start over with fresh yeast.
2. **Mix the Dry Ingredients**: In a large mixing bowl, whisk together the flour and salt. Creating a well in the center, pour in the melted butter, milk, and the activated yeast mixture. Start mixing with a spoon or spatula until the dough begins to come together.
3. **Knead the Dough**: Once the dough is roughly combined, turn it out onto a lightly floured surface. Knead the dough for about 8-10 minutes until it becomes smooth and elastic. You’ll know it’s ready when it feels soft and slightly tacky, but doesn’t stick to your hands too much.
4. **First Rise**: Place the kneaded dough into a large, greased bowl. Cover it with a damp cloth or cling wrap, and let it rise in a warm, draft-free place until it doubles in size, about 1 hour. This is the magic moment where the yeast works its wonders.
5. **Shape the Rolls**: Once the dough has risen, punch it down gently to release air. Turn it back onto your floured surface and divide the dough into 12 equal portions. Shape each piece into a ball by tucking the edges underneath to create a smooth surface.
6. **Second Rise**: Place the shaped balls into a greased 9×13 inch baking dish or on a lined baking sheet. Cover again with a cloth and allow them to rise for another 30-45 minutes, until they puff up.
7. **Preheat the Oven**: Approximately 10 minutes before baking, preheat your oven to 375°F (190°C).
8. **Bake**: Once the rolls have risen, place them in the preheated oven. Bake for 15-20 minutes or until they are golden brown on top. Keep an eye on them to prevent over-baking.
9. **Brush with Butter**: As soon as they come out of the oven, brush them with more melted butter for that irresistible shine and flavor.
10. **Cool and Serve**: Allow the rolls to cool in the pan for a few minutes before transferring them to a cooling rack. These rolls are best served warm but can be enjoyed at room temperature as well.
Your homemade dinner rolls are now ready to be enjoyed and shown off at the dinner table!
5 Variations & Substitutions
1. **Herb-Infused Dinner Rolls**: Adding dried or fresh herbs like thyme, rosemary, or garlic powder during the mixing stage can enhance the flavor profile of your rolls. Herbs add an aromatic quality, making the rolls perfect for a holiday dinner or accompanied with roasted meats. Simply mix in about 1-2 teaspoons of your chosen herb during the dry ingredient stage for delicious results.
2. **Cheesy Dinner Rolls**: For a gooey twist, incorporate shredded cheese into the dough or sprinkle cheese on top of the rolls before baking. Cheddar, mozzarella, or even feta work spectacularly. Cheese adds a savory depth to the flavor, and the melted bits will create an indulgent experience.
3. **Sweet Dinner Rolls**: To turn your dinner rolls into a delightful side for breakfast or brunch, add a cinnamon-sugar mixture and raisins or mixed dried fruits. Simply swathe the dough in melted butter before adding the mixture, roll it like a log, and then slice. Drizzle with icing after baking for a scrumptious treat.
4. **Whole Wheat Dinner Rolls**: For a healthier alternative, substitute half or all of the all-purpose flour with whole wheat flour. This will give your rolls a nuttier flavor and more fiber. Remember, you may need to add a touch more liquid as whole wheat flour absorbs more moisture.
5. **Vegan Dinner Rolls**: Substitute the milk with almond or soy milk, use a flaxseed meal mixture instead of egg, and replace butter with coconut oil. These thoughtful substitutions yield rolls that are fluffy, soft, and still incredibly flavorful, catering to those with dietary restrictions.
Taking the time to explore these variations is half the fun of baking bread – and it makes each batch unique!
Common Mistakes to Avoid
While making dinner rolls can be simple, there are a few common pitfalls that even experienced bakers can fall into:
– **Using Old Yeast**: Always check your yeast validation date! Expired yeast won’t rise, and you’ll end up with flat rolls. To test if your yeast is good, combine it with warm water and sugar—if it doesn’t foam, it’s time to get a new packet.
– **Over-Kneading the Dough**: Though kneading develops gluten, overworking can lead to tough rolls instead of soft ones. Knead just until the dough is smooth and elastic.
– **Not Letting the Dough Rise**: Many novice bakers rush through this step. Allowing the dough to rise until it has doubled in size is crucial for creating those fluffy dinner rolls. If your kitchen is chilly, you can turn on your oven to the lowest setting for a few minutes, then turn it off and place the dough inside.
– **Neglecting to Measure Ingredients Accurately**: Baking is a science, and precise measurements are key. Use a kitchen scale for the best results, especially with flour which can vary in weight depending on how it’s packed.
– **Opening the Oven Too Soon**: Opening the oven door during baking can cause the rolls to collapse. Be patient and check only at the end of the baking time.
By being aware of these potential mistakes, you’ll ensure a successful batch of fluffy dinner rolls every time.
Storage, Freezing & Reheating Tips
If you find yourself with leftover dinner rolls, don’t worry! Proper storage and reheating can maintain their deliciousness.
– **Storage**: Let the rolls cool completely before storing. Place them in an airtight container at room temperature for up to three days. If you prefer them to last longer, wrap them in foil or plastic wrap and refrigerate.
– **Freezing**: Dinner rolls freeze beautifully. To freeze, place cooled rolls in a single layer on a baking sheet and freeze until solid. Afterward, transfer them to a freezer-safe bag or container. They will last for up to three months.
– **Reheating**: To reheat, take the rolls out of the freezer and let them thaw in the fridge overnight. Preheat your oven to 350°F (175°C) and warm the rolls for about 10-15 minutes until heated through. You can also heat them in the microwave for about 15-20 seconds, but be cautious as this can make them chewy if overheated.
With these tips, you can enjoy fresh rolls even days after baking!
Frequently Asked Questions
1. **Can I make dough ahead of time?**
Yes, you can! Prepare the dough, let it rise, and then shape the rolls. Place them on a greased baking sheet, cover, and refrigerate overnight. When ready, allow them to come to room temperature and rise again before baking.
2. **Why are my rolls dense?**
Dense rolls are often a result of not allowing the dough to rise adequately or using too much flour. Ensure that you use the correct flour measurement and allow enough time for the dough to double in size.
3. **What is the best way to tell if my rolls are done?**
The color is a good indicator; look for a golden-brown top. Additionally, you can tap the bottom of a roll — it should sound hollow if fully baked.
4. **What can I serve with dinner rolls?**
Dinner rolls pair perfectly with a variety of dishes, including soups, stews, roasted meats, or a simple salad. They are also delicious with butter, honey, or a dip.
5. **How do I make gluten-free dinner rolls?**
Substitute the all-purpose flour with a gluten-free flour blend and add a bind like xanthan gum or psyllium husk. Adjust the liquid to achieve a smooth dough consistency.
Baking dinner rolls can seem like a daunting task, but with the right guidance, practice, and patience, you can master this classic recipe. As you gather around the table and serve your homemade rolls, you’ll create lasting memories that will have everyone clamoring for seconds or even thirds!
Now that you’re equipped with all the knowledge you need, why not roll up your sleeves and give these dinner rolls a try? Whether for a special occasion or just as an everyday treat, you won’t regret the delicious joy they will bring to your table!
Remember to customize your rolls and make them your own. Happy baking!