Prep time: 30 minutes
Cook time: 15 minutes
Total time: 45 minutes
Servings: 24 cookies
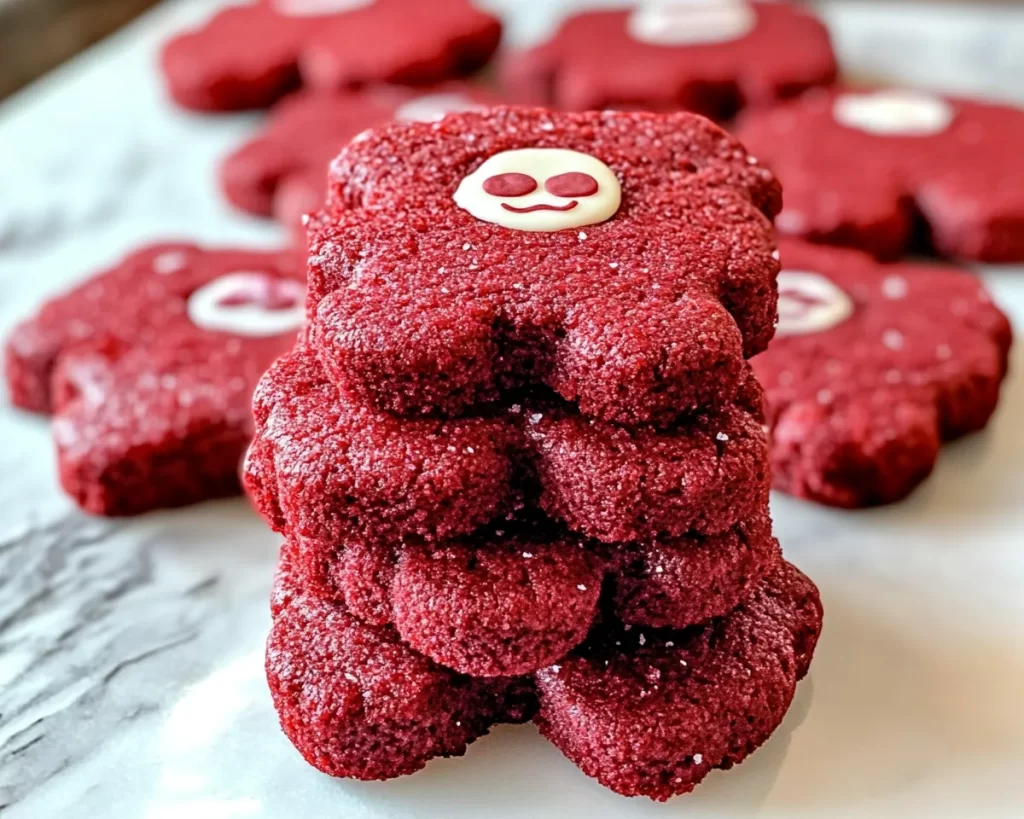
Classic Red Velvet Bear Cookies are a delightful treat that can whisk anyone away to a nostalgic realm of sweet, sugary comfort. Every bite brings forth a symphony of flavors that are both rich and tender, making them a perfect addition to holiday festivities, birthday parties, or just an indulgent afternoon snack. If you’re looking to impress your family or friends, these cookies are sure to become a favorite!
The charm of Red Velvet Bear Cookies lies not only in their distinct deep red color but also in the soft, lush texture that melts in your mouth. They provide a unique twist on classic red velvet cake and are undeniably adorable with their bear shape. The combination of **cocoa powder, buttermilk**, and **butter** creates a delectable cookie that is both visually striking and explosively delicious. In this article, you will learn how to create these delightful cookies at home, what ingredients to use, and how to customize them to fit any occasion.
What Is Classic Red Velvet Bear Cookies?
Classic Red Velvet Bear Cookies are a charming dessert that combines the beloved flavors of red velvet cake into a cookie form, perfect for satisfying sweet cravings. Originating from the rich history of Southern baking, red velvet is known for its vibrant red color, often complemented by a soft cream cheese frosting. However, these cookies take the essence of red velvet and present it in a fun and playful bear shape that brings joy to both children and adults.
The texture of these cookies is truly something special; they are soft, chewy, and a little cake-like, making them stand out from your typical cookie. The unique combination of cocoa powder imparts a subtle chocolate flavor without overwhelming the palate. When you take a bite, you will notice a slight tanginess from the buttermilk, which is essential for achieving that classic red velvet taste. The cookies are not only visually stunning but also have a tender crumb that pairs beautifully with a glass of cold milk or a warm cup of coffee.
You’ll find that the vibrant red hue, paired with a sprinkle of powdered sugar or a drizzle of cream cheese icing, enhances their presentation, making them a delightful centerpiece for any gathering. If you’ve ever enjoyed a slice of red velvet cake, you’ll find that these cookies encapsulate that experience in a fun and portable form.
Why You’ll Love This
There are so many reasons to adore Classic Red Velvet Bear Cookies. First and foremost, they are incredibly delicious! Their soft and chewy texture combined with the unique flavor of red velvet is simply irresistible. They are perfect for a variety of occasions, whether you are celebrating a birthday, hosting a family gathering, or just want to treat yourself. The bear shape adds a level of playfulness that delights kids and adults alike, making them a great dessert for parties.
Another reason you’ll love these cookies is their relatively simple ingredients, which you may already have in your pantry. The prep time is minimal, making it easy for beginners to feel confident in their baking skills. Plus, it’s an excellent way to engage kids in the kitchen, fostering their love for baking from a young age while also creating memorable moments together.
Additionally, these cookies are customizable, allowing you to get creative with flavor and decoration. You can add chocolate chips, nuts, or even dried fruit for a unique twist. They’re also easy to store, which means you can make them ahead of time and enjoy them throughout the week, perfect for busy parents or meal-preppers.
Don’t let misconceptions about **baking** intimidate you; with the right steps and instructions, these cookies can be a fun and rewarding experience!
Ingredients You’ll Need
To create the perfect batch of Classic Red Velvet Bear Cookies, you’ll need the following ingredients:
- All-purpose flour: The base of the cookie, providing structure. You can substitute with gluten-free flour if necessary.
- Cocoa powder: Adds a rich chocolate flavor that complements the sweetness. Use unsweetened cocoa for the best results.
- Granulated sugar: Sweetens the cookies and helps achieve that soft texture. Brown sugar can be partially used for added moisture and flavor.
- Baking soda: Essential for leavening, helping the cookies rise and become fluffy.
- Buttermilk: Adds moisture and that classic tangy flavor characteristic of red velvet. You can make a substitute using milk and vinegar or lemon juice.
- Vegetable oil: Creates a tender cookie. You can also use melted butter for a richer flavor.
- Large egg: Binds the ingredients together and contributes to the texture.
- Red food coloring: Gives the cookies their striking red hue. Use gel coloring for a more vibrant color.
- Vanilla extract: Enhances the overall flavor profile. Always opt for pure vanilla when possible.
- Salt: Balances the sweetness and enhances other flavors.
Each ingredient plays an essential role in achieving the desired texture and flavor, making it crucial to measure accurately and use high-quality products for the best results.
How to Make
Creating Classic Red Velvet Bear Cookies is a straightforward process that results in delightful treats. Follow these step-by-step instructions to ensure success in your baking endeavor:
- Preheat your oven: Start by preheating your oven to 350°F (175°C). This is vital for ensuring that the cookies bake evenly. While the oven heats up, gather all your ingredients to streamline the process.
- Mix dry ingredients: In a medium bowl, whisk together 2 cups of all-purpose flour, 2 tablespoons of cocoa powder, 1 teaspoon of baking soda, and ½ teaspoon of salt. This mixture ensures that the leavening agent and cocoa are evenly distributed throughout the cookies.
- Combine wet ingredients: In a separate large mixing bowl, whisk together 1 cup of granulated sugar and ½ cup of vegetable oil until well blended. Add 1 large egg and mix thoroughly. Follow this with 1 cup of buttermilk, 1 tablespoon of red food coloring, and 1 teaspoon of vanilla extract. Ensure that everything is combined well for a smooth consistency.
- Incorporate dry into wet: Gradually add the dry mixture to the wet ingredients, stirring gently until just combined. Be careful not to overmix, as this can lead to tough cookies. The dough should be soft and slightly sticky, with a rich red color.
- Shape the cookies: Using a tablespoon or cookie scoop, drop balls of dough onto a lined baking sheet, leaving about 2 inches between each ball. You can slightly flatten them with your hand, but they will spread during baking.
- Bake: Place the baking sheet in your preheated oven and bake for approximately 12–15 minutes. The cookies are done when they are set around the edges but still slightly soft in the center. Remember to keep an eye on them, as ovens can vary!
- Cool: Once baked, remove the cookies from the oven and let them cool on the baking sheet for about 5 minutes. Then, transfer them to a wire rack to cool completely. This step helps achieve that perfect chewy texture.
- Serve: Once cooled, you can dust them with powdered sugar for a finishing touch or drizzle with cream cheese icing. Enjoy your delightful creations with a cold glass of milk or a warm beverage!
Try to take a moment to simply enjoy the aroma of these cookies baking in the oven. The scent of vanilla and cocoa will fill your kitchen, creating an inviting atmosphere that makes your hard work worthwhile.
Variations & Substitutions
Chocolate Chip Variation: For those who can’t resist a chocolatey kick, consider adding semi-sweet chocolate chips to the cookie dough. About 1 cup of chocolate chips mixed in before scooping can enhance the flavor and provide a sumptuous texture contrast with each bite. This version is especially great for chocolate lovers who enjoy rich flavors.
Nutty Red Velvet: If you want to add more texture and flavor, try incorporating chopped nuts, like walnuts or pecans. This addition not only introduces a slightly crunchy element but also pairs well with the softness of the cookies. Aim for about ½ cup of nuts, ensuring they are evenly dispersed throughout the cookie dough for the best results.
Dairy-Free Option: To make these cookies dairy-free, substitute the buttermilk with almond or coconut milk combined with 1 tablespoon of vinegar. Additionally, replace the butter or vegetable oil with melted coconut oil for richness. You might also look into dairy-free cream cheese for icing alternatives, ensuring everyone can enjoy your delicious creations!
Gluten-Free Cookies: If you or a loved one has gluten sensitivities, you can substitute the all-purpose flour with a gluten-free baking blend. Make sure it contains binding agents such as xanthan gum to maintain the cookie structure. Follow the same measurements, and enjoy these delicious cookies without sacrificing taste or texture.
Common Mistakes to Avoid
While baking Classic Red Velvet Bear Cookies may seem simple, there are a few common pitfalls to watch out for that can affect your results.
One prevalent issue is overmixing the dough, which can lead to tough cookies. Remember to mix just until the ingredients come together. Another mistake is not measuring ingredients properly—this can affect the texture and taste of your cookies. Always use the spoon-and-level method for flour to avoid packing it down.
Also, be mindful of baking times. Checking your cookies a minute earlier can prevent overbaking; they should still be soft in the center when you remove them from the oven. Lastly, ensure your baking sheets are adequately lined with parchment paper or a silicone mat to prevent sticking.
Using too much food coloring can also lead to an unappealing flavor if used excessively. Stick to the recommended amounts unless you’re aiming for a very bold dessert.
Storage, Freezing & Reheating Tips
For optimal freshness, store Classic Red Velvet Bear Cookies in an airtight container at room temperature. When stored properly, they can last for up to one week. If you wish to maintain their softness, consider placing a slice of bread in the container; this will help keep moisture in, creating a delightful treat every time you reach for one.
Freezing cookies is an excellent way to prolong your enjoyment. Simply place the cooled cookies in a single layer on a baking sheet, freeze until solid, and then transfer them to a freezer-safe container. This method allows you to pull out just a few cookies at a time. They can last in the freezer for up to three months.
When ready to enjoy, simply remove them from the freezer and let them come to room temperature or pop them in the microwave for a few seconds to revive the softness. For the best results, reheat them briefly in the oven at a low temperature, which helps retain their texture.
Frequently Asked Questions
Can I use a different shape for these cookies? Yes! While bear shapes are cute and fun, you can use any cookie cutter of your choice. Just be sure to adjust baking times slightly for larger or smaller shapes to prevent under or overbaking.
Is it necessary to use buttermilk? Buttermilk adds a tangy flavor that is characteristic of red velvet desserts. However, you can substitute it with regular milk mixed with a bit of vinegar or lemon juice if needed. This will give a similar effect to the recipe.
Can I add frosting to these cookies? Absolutely! A cream cheese frosting drizzle or dip can elevate your red velvet cookies to another level. It complements the flavor beautifully and adds an indulgent touch.
What should I do if my cookie dough is too sticky? If your dough is overly sticky, which may happen in humid conditions, try chilling it in the refrigerator for 30 minutes. This can help firm it up, making it easier to scoop and shape.
Can I make these cookies vegan? Yes! You can substitute the egg with flaxseed meal or a store-bought egg replacement and use plant-based milk and oil to make your cookies vegan-friendly without losing flavor or texture.
Conclusion:
Classic Red Velvet Bear Cookies are a delightful way to satisfy your sweet tooth while bringing a touch of joy to any occasion. Their beautiful red hue, soft texture, and enticing flavor make them irresistible. Whether you are enjoying them at a festive gathering or simply treating yourself after a long day, these cookies capture the charm of traditional red velvet cake in a fun and delicious form. Reach out to your family or friends, gather your ingredients, and embark on this culinary adventure. Customize the recipe to fit your tastes and preferences or follow it closely for guaranteed success. Happy baking, and enjoy every mouthwatering bite!