Prep time: 20 minutes
Cook time: 35 minutes
Total time: 55 minutes
Servings: 10
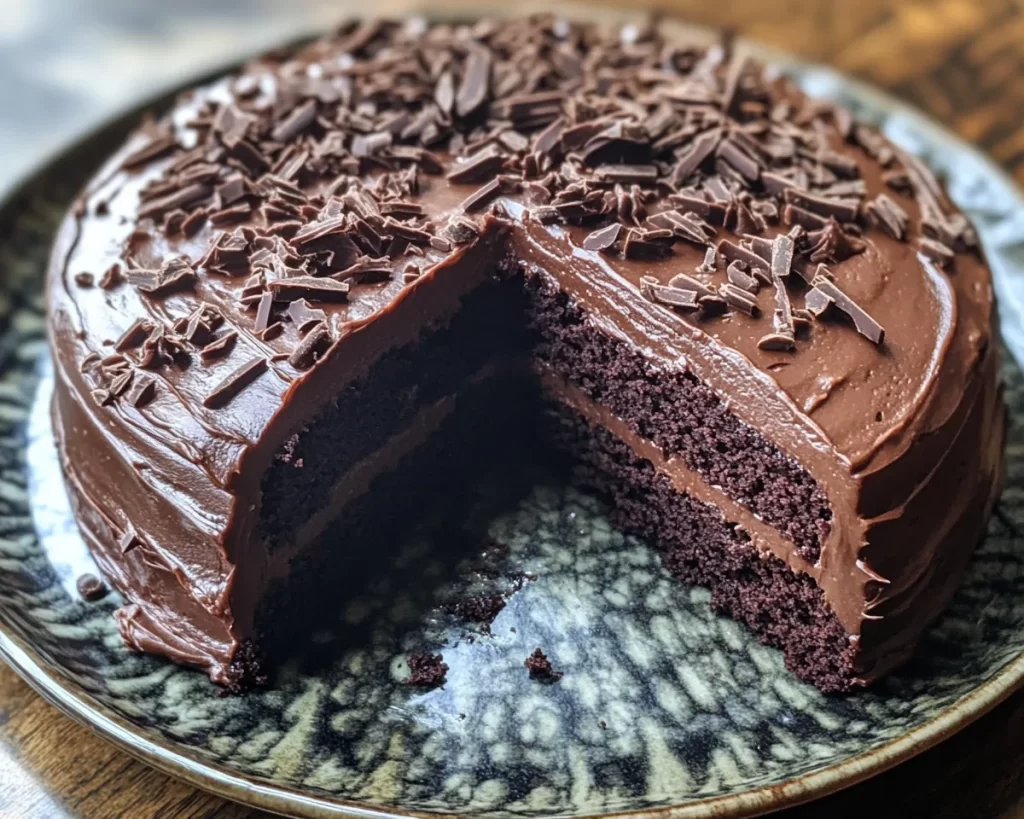
Imagine walking into a beautifully decorated kitchen filled with the scent of chocolate wafting through the air, invoking memories of family gatherings and joyful celebrations. The aroma captivates your senses and instantly enhances your craving for something rich and sweet. This is the magic of the Mother’s Day Classic Chocolate Cake, a dessert that holds a special place in the hearts of many. Not only is this cake a visual treat adorned with luscious frosting, but it also offers a moist, rich, and decadent experience that is sure to impress anyone who takes a slice.
In this article, you will learn how to craft this delightful cake, complete with tips and variations to make it your own. Whether you’re preparing for a Mother’s Day celebration, a birthday party, or simply a family dinner, this recipe provides a wonderful way to create a memorable dessert. You will be guided through each step of the process, from choosing quality ingredients to putting the finishing touches on your cake. So, roll up your sleeves and prepare to embark on a delicious baking adventure!
What Is Mother’s Day Classic Chocolate Cake?
Mother’s Day Classic Chocolate Cake is more than just a dessert; it is a heartfelt tribute to nurturing and love found in every slice. This cake typically showcases a rich chocolate flavor, achieved through a combination of unsweetened cocoa powder and chocolate. The texture is velvety and moist, which can often be attributed to the use of quality ingredients, especially when incorporating eggs and buttermilk to provide an incredible framework that holds moisture.
The origins of chocolate cake can be traced back to the 19th century, when chocolate began to be used as a flavoring in baked goods. This timeless recipe combines tradition with indulgence, allowing families to celebrate together. The incorporation of glossy chocolate frosting or ganache elevates it, turning it into a showstopper that is perfect for special occasions. The Mother’s Day Classic Chocolate Cake is truly a labor of love, embodying the sweet essence of family gatherings.
Beyond its delicious flavor, this cake represents a culmination of memories tied to those we cherish most. Whether it’s your mother, grandmother, or a special aunt, baking this cake allows you to connect with those nurturing figures in your life. It is a wonderful way to express gratitude and affection, making each bite not just a treat, but a piece of shared history.
Why You’ll Love This
There are countless reasons why you will fall in love with the Mother’s Day Classic Chocolate Cake. First and foremost, the taste is undeniably divine. Each bite reveals layers of rich chocolate that melt in your mouth, creating a euphoric experience. The balance of sweetness and cocoa richness makes it a beautifully versatile dessert, appealing to both chocolate lovers and those who appreciate a more subtle treat. The cake maintains a delightful moistness, which is crucial for an enticing dessert.
Additionally, this recipe is remarkably easy to follow, making it perfect for busy parents or beginners who may feel intimidated in the kitchen. The straightforward instructions eliminate confusion, making it accessible for all skill levels. If there are any minor slip-ups during the baking process, commonly encountered by novice cooks, adjustments can easily be made to salvage the dish while encouraging confidence in the kitchen.
Cost is another significant advantage of this recipe. Most ingredients can be found in your pantry, keeping the baking process economical. Furthermore, this cake is incredibly versatile, as you can switch up the toppings or add fillings based on your personal preferences. Whether you’re opting for a cream cheese frosting, a dusting of powdered sugar, or a fruity filling, you’ll find that the Mother’s Day Classic Chocolate Cake is a basic template that welcomes customization.
Ingredients You’ll Need
To create this delicious cake, you’ll need the following ingredients:
- All-purpose flour: This is the primary dry ingredient that gives structure to the cake. You can substitute it with gluten-free flour for a GF version.
- Unsweetened cocoa powder: This is the star ingredient, offering a deep chocolate flavor. Make sure to use good quality cocoa for the best taste.
- Granulated sugar: This adds sweetness and moisture to the cake. Brown sugar can be used as a substitute for a richer flavor.
- Baking soda and baking powder: These are the leavening agents that help the cake rise. Ensure they are fresh for optimal results.
- Salt: This enhances the other flavors in the cake. Do not skip this ingredient, as it elevates the overall taste.
- Eggs: These serve as binding agents, contributing to the cake’s structure and moisture.
- Buttermilk: This not only keeps the cake moist but also adds a slight tang, enriching the overall flavor. You can create a quick substitute by mixing milk with vinegar or lemon juice.
- Vegetable oil: This provides moisture and helps keep the cake tender and soft. You can replace it with melted butter if desired.
- Vanilla extract: This is a flavor enhancer that adds a lovely aroma, rounding out the chocolate flavor.
- Chocolate frosting: For the perfect finishing touch, rich chocolate frosting elevates the cake’s indulgence, creating a beautiful presentation.
Before starting your baking adventure, make sure to have all these ingredients ready and on hand. This will streamline your process, making it easier to focus on creating a masterpiece that everyone will enjoy!
How to Make
Now that you’re equipped with all the ingredients, let’s dive into the step-by-step instructions on how to make the Mother’s Day Classic Chocolate Cake.
- Preheat your oven: Begin by preheating your oven to 350°F (175°C). This step is crucial, as a properly heated oven ensures that your cake rises beautifully without any unwanted texture issues. While your oven is preheating, it’s a great time to prepare your baking pans.
- Prepare the baking pans: Grease and flour two round cake pans (9-inch). This will prevent the cake from sticking. You can also line the bottoms with parchment paper for extra protection. This simple step will save you from the disappointment of your cake breaking apart when you attempt to remove it from the pan.
- Combine dry ingredients: In a large mixing bowl, sift together the all-purpose flour, unsweetened cocoa powder, granulated sugar, baking soda, baking powder, and salt. Sifting these ingredients helps to avoid lumps and creates a lighter cake texture. Whisk them thoroughly to ensure they are evenly combined, then set aside.
- Mix wet ingredients: In a separate bowl, beat together the eggs, buttermilk, vegetable oil, and vanilla extract. Use an electric mixer for about 2-3 minutes until blended. This is where you create the foundation for the moistness of the cake. Make sure to beat until combined but don’t overmix; you want to maintain the light texture.
- Combine wet and dry ingredients: Gradually add the wet ingredients to the dry ingredients while mixing on low speed. Scrape down the sides of the bowl to ensure everything is incorporated. Continue to mix until the batter is smooth and well-combined. The batter will be fairly liquid, which is normal; this helps achieve a moist cake.
- Pour batter into pans: Once the batter is mixed, evenly divide it between the prepared cake pans. Use a spatula to smooth the top if needed. It’s essential to ensure both pans have equal amounts of batter for even baking.
- Bake: Place the pans in the oven and bake for approximately 30-35 minutes. Start checking for doneness around the 30-minute mark by inserting a toothpick into the center of each cake. If it comes out clean or with a few moist crumbs, your cake is ready.
- Cool the cakes: Once baked, remove the pans from the oven and allow them to cool for about 10-15 minutes. After this, carefully transfer the cakes to a wire rack to cool completely. This will help avoid a soggy bottom while the cooling process allows the cake to settle.
- Frosting the cake: After the cakes have cooled completely, use your favorite chocolate frosting to frost the cake. Start by placing one layer on a cake plate, spreading a generous amount of frosting in the center, and then place the second layer on top. Ice the top and sides of the cake. For a decorative touch, you can use chocolate shavings or fresh berries on top.
- Serving: Slice the cake into generous portions and serve. The rich chocolate taste combined with a creamy frosting is truly mouthwatering. Enjoy with a glass of milk, or for the adults, a lovely cup of coffee or tea!
This method not only guides you through creating a stunning cake but also allows you to revel in the sensory experience of baking. The rich aromas and textures all come together to create that delightful end product.
Variations & Substitutions
Gluten-Free Variation: If you’re gluten-intolerant, you can easily adapt this recipe by replacing all-purpose flour with a high-quality gluten-free all-purpose flour blend. Be sure to check that the blend includes xanthan gum, as this ingredient will help maintain the cake’s structure. The texture may vary slightly, but the rich chocolate flavor will remain just as delightful. It’s an excellent way to ensure that everyone can indulge in this classic treat, regardless of dietary restrictions.
Dairy-Free Variation: For those seeking a dairy-free version, you can substitute the buttermilk with plant-based milk (such as almond or soy milk) mixed with a teaspoon of apple cider vinegar to add acidity. Additionally, choose a dairy-free butter for your frosting. The flavor might shift slightly, but the richness will still be apparent. Many people enjoy an alternative that enables them to savor the cake without discomfort.
Vegan Variation: To make this a vegan-friendly delight, replace the eggs with flaxseed meal (1 tablespoon flaxseed meal + 2.5 tablespoons water per egg). Also, use almond milk or coconut milk instead of buttermilk and opt for a plant-based egg substitute in your frosting. The result will yield a cake that’s just as enjoyable, with a slight nuttiness from the flaxseed. Your vegan friends will thank you for including them in the celebration!
Different Frosting Options: While chocolate frosting is a classic, why not experiment? Cream cheese frosting offers a tangy contrast to the sweetness of the cake, or you could try a ganache finish for a glossy look. For a fruity twist, consider topping with a raspberry or strawberry frosting to balance out the chocolate richness. Choosing different frostings allows you to personalize the cake to your taste and mood.
Layering with Fruits: You can enhance your Mother’s Day Classic Chocolate Cake by layering it with fresh fruits like strawberries, bananas, or cherries. Adding fruit layers can create a delightful contrast in textures and flavors, completing the cake with a fresh burst. The moisture from fruits pairs beautifully with chocolate, offering a balanced richness in every bite.
Common Mistakes to Avoid
One of the most common mistakes when baking a cake is overmixing the batter. This can lead to a dense and tough cake, rather than the fluffy texture we all desire. Mixing until just combined is key; ingredients should be blended without overworking the gluten in the flour.
Another potential pitfall is not properly measuring your ingredients, particularly flour. Using too much flour can yield a dry cake. Always spoon flour into your measuring cup, then level it off with a knife for accuracy. Additionally, be sure to sift your dry ingredients, as this helps avoid clumps, ensuring a smooth batter.
It’s also important to monitor the baking time closely. Each oven varies, so while 30-35 minutes is the general guideline, your cake might take less or more time. Checking for doneness with a toothpick is a reliable method. If it comes out with moist crumbs but not wet batter, your cake is ready—trust that toothpick!
One final caution is the temperature of ingredients. It’s best to use room temperature eggs and buttermilk to help your batter mix smoothly and evenly, resulting in a more uniform bake. Chilled ingredients could lead to an uneven rise, compromising your cake’s texture.
Storage, Freezing & Reheating Tips
Storing your Mother’s Day Classic Chocolate Cake properly can help retain its freshness. If you plan to serve it within a couple of days, keep the cake covered at room temperature. If you anticipate longer storage, wrap the cake in plastic wrap and then aluminum foil and place it in the refrigerator. This will help maintain the moisture while preventing the cake from absorbing unwanted odors from the fridge.
For freezing, slice the cake and wrap individual slices securely in plastic wrap, then place them in a freezer-safe container, being sure to mark the date. You can freeze the cake for up to three months. When it comes time to enjoy, remove the slices from the freezer and allow them to thaw in the refrigerator or at room temperature for about 2-3 hours.
When reheating, if you prefer a warm slice, pop it in the microwave for about 10-15 seconds. Be cautious not to overheat, as it could dry out the cake. Additionally, you can serve the cake with a scoop of vanilla ice cream or a dollop of whipped cream for an added indulgence.
Always remember that food safety is essential. If your cake has been left out at room temperature for several hours, it’s best to discard any uneaten portions to avoid potential harm.
Frequently Asked Questions
Can I make this cake ahead of time? Yes, absolutely! You can bake the cake a day or two in advance. Make sure to store it properly as outlined, and frost it just before serving. This can save you time on the day of your event while still delivering a freshly frosted cake.
Why is my cake sinking in the middle? A sinking cake is often caused by underbaking or too much leavening agent. Always ensure your toothpick comes out with only a few moist crumbs, and check that your leavening agents are fresh and properly measured.
Can I use a different size pan? Yes, you can use different-sized pans, but keep in mind that this could affect the baking time. A larger pan will bake faster, while a smaller pan will take longer. Always check for doneness.
How can I adjust the sweetness of the cake? If you prefer a less sweet cake, simply reduce the amount of granulated sugar in the recipe. You can start by cutting back by about 1/4 cup and see how it suits your taste.
Can I use a different flavor of frosting? Absolutely! While chocolate frosting complements the cake, you can get creative and use cream cheese frosting, vanilla buttercream, or even a fruit-flavored frosting to add a unique twist. Choose what best suits your guests’ preferences!
Conclusion:
The Mother’s Day Classic Chocolate Cake stands as a testament to love, joy, and sweet memories. It’s not just a dessert, but a celebration of cherished moments with our loved ones. With its rich flavor and moist texture, this cake will undoubtedly impress those who take a bite.
So gather your ingredients, follow the steps outlined, and create a masterpiece that you can proudly share with friends and family. Make it your own with various adaptations, and most importantly, enjoy this delightful baking experience. Your kitchen will soon be filled with warmth, laughter, and the wonderful aroma of baked chocolate. Happy baking and enjoy sharing this classic treat!
[Read also: Easy Dessert Recipes for Beginners]