Prep time: 20 minutes
Cook time: 30 minutes
Total time: 50 minutes
Servings: 12
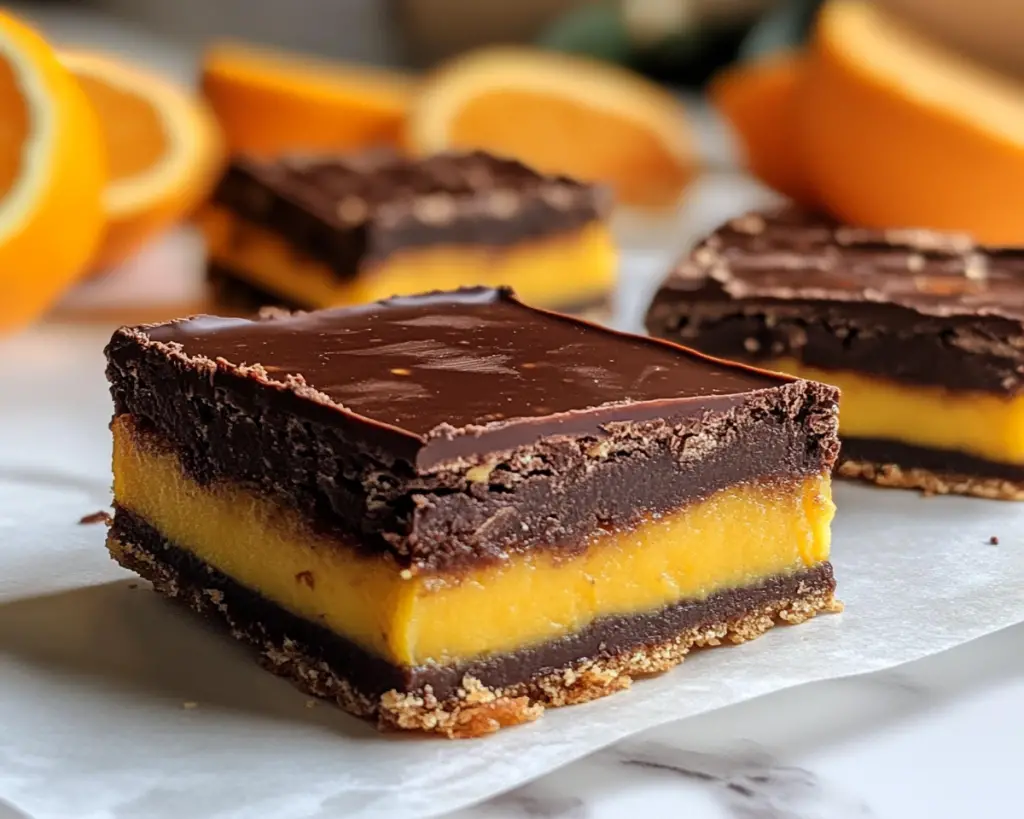
Imagine walking into a cozy kitchen, the air filled with the enticing aroma of fresh oranges and rich dark chocolate. This is the kind of experience that Zesty Orange & Dark Chocolate Dessert Bars deliver. They are not merely a dessert; they are a celebration of flavors that invoke nostalgia and delight. Picture biting into a soft, chewy bar, the burst of citrus dancing harmoniously with the deep, bittersweet notes of chocolate. This recipe is special because it fuses two beloved flavors in a luscious, easy-to-make treat.
As you delve into this recipe, you will learn not only how to create these bars but also tips on customization, serving suggestions, and storage advice. Whether you’re an experienced baker or just starting in the kitchen, this guide walks you through every step.
What Is Zesty Orange & Dark Chocolate Dessert Bars?
Zesty Orange & Dark Chocolate Dessert Bars are a delightful treat characterized by their unique combination of flavors and textures. Their origin lies in the intersection of comfort food and gourmet dessert, making them a staple for both casual get-togethers and special occasions. The primary ingredients, orange zest and dark chocolate, work together to create a symphony of flavors that intrigues the palate.
With a chewy base and a rich chocolate layer, these bars entice with their vibrant, sunny flavor. The fresh orange not only adds a bright touch but also diminishes the richness of the chocolate, creating a balanced dessert that feels indulgent without being overwhelming. The texture is important; think of it as firm yet soft enough to melt in your mouth. Each bite reveals layers of flavor, making every serving an exciting experience.
In essence, these dessert bars are a modern twist on classic desserts, appealing to both young and mature audiences. They can be adapted according to preferences, making them perfect for any gathering, from family dinners to holiday feasts. With the right ingredients and a bit of love, these bars can become a cherished recipe in your home.
Why You’ll Love This
There are countless reasons you will adore Zesty Orange & Dark Chocolate Dessert Bars. First and foremost, their taste is incredibly appealing; the citrus brightness from the orange zest pairs beautifully with the deep, rich flavors of dark chocolate, making them irresistible. You’ll find that each bite is a play of flavors that can satisfy even the most discerning sweet tooth.
Secondly, the ease of preparation cannot be overlooked. You don’t need advanced baking skills to whip up these delightful bars. In just a few simple steps, you can create an elegant dessert that looks and tastes like it took hours to make. This is an excellent choice for busy parents or those new to baking, as the process is user-friendly and forgiving.
If you’re budget-conscious, this recipe is also a winner. It utilizes common ingredients that are not only affordable but also versatile for other recipes. Lastly, the bars are adaptable; you can easily modify them according to dietary preferences or available ingredients. You could replace dark chocolate with milk chocolate or even incorporate spices like cinnamon for a unique twist. This flexibility allows you to customize your dessert to suit any occasion or personal taste.
Ingredients You’ll Need
- Unsalted Butter: This is the base fat in the recipe, contributing to the rich texture. You can substitute with coconut oil for a dairy-free variation.
- Granulated Sugar: Adds sweetness, balancing the bitter notes of the dark chocolate. Feel free to use a sugar substitute if you’re looking for a lower-calorie option.
- Brown Sugar: The molasses content provides depth and contributes to the chewy texture. Light or dark brown sugar works; dark will give a richer flavor.
- Eggs: Binding agents that provide moisture and structure. For a vegan option, you can use flax eggs or applesauce.
- All-Purpose Flour: Forms the base of the dessert bars. Gluten-free flour blends would work as well if you are following a gluten-free diet.
- Dark Chocolate: The star ingredient! For the best flavor, choose a high-quality dark chocolate of at least 70% cocoa.
- Orange Zest: Adds the zesty flavor and aroma characteristic of this dessert; it can be substituted with lemon zest for a different citrus twist.
- Baking Powder: Provides lift and contributes to the soft texture of the bars. Ensure it is fresh for the best results.
- Salt: Enhances all the flavors; don’t skip it, as it brings balance to the sweetness.
Each ingredient plays a vital role in crafting the perfect dessert bar. Make sure to consider substitutions based on dietary restrictions or personal preferences to achieve the ideal outcome for your family and friends.
How to Make
To create these delightful dessert bars, follow these step-by-step instructions:
- Preheat your oven: Begin by preheating your oven to 350°F (175°C). This step is essential as it ensures that your bars will cook evenly. Grease a 9×9-inch baking pan or line it with parchment paper for easy removal after baking.
- Melt the butter: In a small saucepan over low heat or in the microwave, melt the unsalted butter. You want it to be fully melted but not bubbling. Let it cool slightly before combining it with the sugars to avoid scrambling the eggs.
- Mix sugars and eggs: In a large bowl, whisk together the granulated sugar and brown sugar with the melted butter until well combined. Beat in the eggs one at a time, mixing until smooth and creamy.
- Add flour and other dry ingredients: In a separate bowl, combine the all-purpose flour, baking powder, and salt. Gradually add this mixture to your wet ingredients, folding carefully to combine without overmixing, which can lead to a dense texture.
- Incorporate chocolate and orange zest: Gently fold in the dark chocolate and orange zest until they are evenly distributed throughout the batter. This is where the magic happens, as the aromatic zest melds beautifully with the rich chocolate.
- Transfer to the baking pan: Pour the batter into your prepared baking pan, spreading it evenly. Smooth the top with a spatula to ensure even baking.
- Bake: Place the pan in the preheated oven and bake for 25-30 minutes. You’ll know it’s done when the edges are firm and the center is set yet still slightly soft. It will continue to firm up as it cools.
- Cool and cut: Once baked, allow the dessert bars to cool in the pan for about 10 minutes before transferring them to a wire rack to cool completely. Once cool, slice into squares and serve!
As you follow these steps, make sure to take note of the textures and aromas. When you see the edges turning golden brown and smell that heavenly scent of oranges and chocolate, you know you’re on the right track.
Variations & Substitutions
Vegan Variation: If you’re looking for a vegan option, you can easily adapt this recipe. Use plant-based butter and replace the eggs with flax eggs (1 tablespoon of flaxseed meal mixed with 2.5 tablespoons of water per egg). The core flavors will remain unchanged, and you can still achieve that delightful chewy texture.
Nutty Addition: For those who enjoy a crunch in their desserts, consider adding chopped nuts like walnuts or almonds to the batter. Simply fold in ½ cup of your chosen nuts along with the chocolate and zest. This variation enhances the textural contrast and adds healthy fats to the bars.
Spiced Up: You can introduce a layer of warmth by adding spices. Try incorporating 1 teaspoon of cinnamon or nutmeg for a cozy twist. This variation is particularly lovely in the fall and winter months when spices can evoke a sense of comfort and nostalgia.
Citrus Swap: If you’re not a fan of oranges or wish to change things up, consider swapping in lemon or lime zest. The tartness of these citrus fruits will bring a different flavor profile, offering a refreshing twist on this classic recipe. Just be cautious with the quantity; you might want to use a bit less zest to avoid overpowering the other flavors.
Chocolate Variety: Experimenting with the type of chocolate can completely change the dessert’s character. If you prefer a milder flavor, you could substitute semi-sweet chocolate. Alternatively, mixing in white chocolate can lead to a creamier dessert that still retains the brightness of the orange zest.
All these variants allow you to customize the recipe based on your preferences and dietary needs. Feel free to experiment and find the perfect adaptation that suits your taste.
Common Mistakes to Avoid
Baking can sometimes be unpredictable, which is why avoiding common mistakes is critical for great results. One of the biggest errors is overmixing the batter. This can lead to dense bars rather than the soft, chewy texture you desire. Always fold your ingredients just until combined.
Another common mistake is not measuring ingredients accurately. For baking, precision matters. Use a kitchen scale where possible, especially for flour, as scooping it can compact the ingredient and throw off the ratios.
Also, don’t skip the step of letting the bars cool in the pan before slicing. Attempting to cut them too soon will lead to messy, crumbling bars. Lastly, ensure you are using fresh baking powder, as old leavening agents will not provide the necessary rise, resulting in flat dessert bars.
Storage, Freezing & Reheating Tips
To store your Zesty Orange & Dark Chocolate Dessert Bars, ensure they are completely cool. Place them in an airtight container at room temperature for up to 3 days. If you want to keep them longer, consider freezing. Wrap each bar in plastic wrap and place them in a freezer-safe container or bag. They can last for up to 3 months in the freezer.
When you’re ready to enjoy your frozen bars, remove them from the freezer and let them thaw at room temperature for about 30 minutes before serving. If you prefer, you can gently reheat them in the microwave for about 10-15 seconds, which will revive their soft, gooey texture.
For optimal food safety, always label your stored items with the date so you can keep track of how long they have been stored. Remaining mindful of food safety will help ensure a delicious experience every time you indulge in these delightful bars.
Frequently Asked Questions
Can I make these bars gluten-free?
Absolutely! You can substitute the all-purpose flour with a gluten-free flour blend. Just ensure the blend you choose is meant for baking, as this will help retain the desired texture in your dessert bars.
What is the best way to cut these bars?
For clean cuts, use a sharp knife and make sure the bars are completely cool. If you want even neater edges, consider running the knife under hot water before cutting. This will help to minimize crumbling and give you beautifully shaped squares.
Can I use milk chocolate instead of dark chocolate?
Yes, you can use milk chocolate, but be aware that the bars will be sweeter and lack the depth of flavor that dark chocolate provides. If using milk chocolate, you might want to reduce the amount of sugar slightly to balance it out.
How do I know when the bars are done baking?
The best way to tell if the bars are done is to check the edges; they should appear firm and slightly puffed, while the center may still seem soft. A toothpick inserted should come out with a few moist crumbs, indicating they are perfectly baked.
Can I add a glaze or frosting to these bars?
Certainly! A drizzle of orange icing or a simple chocolate ganache can elevate these dessert bars further. To make a glaze, mix powdered sugar with fresh orange juice until you reach your desired consistency, and drizzle it on top after the bars have cooled completely.
Conclusion:
In summary, Zesty Orange & Dark Chocolate Dessert Bars are not only mouthwatering but also versatile and easy to make. They bring a delightful burst of flavor that can brighten any occasion. Whether you make them just for yourself or share them with loved ones, their irresistible taste and texture are sure to impress. I encourage you to try this recipe, customize it to your liking, and share it with family and friends. You won’t regret it! Happy baking, and enjoy every bite!