Prep time: 15 minutes
Cook time: 3 hours
Total time: 3 hours 15 minutes
Servings: 6
When you’re looking for a comforting, satisfying meal that will warm you to your very core, few dishes can compete with fall-off-the-bone tender meats. Whether it’s a savory braised beef, succulent chicken, or flavorful pork, nothing tops the experience of taking a bite and having the meat practically melt in your mouth. This style of cooking captures the essence of home-cooked meals and provides a sense of nostalgia that can take you back to family gatherings and cherished recipes passed down through generations.
In this recipe, you will learn the secrets to achieving that perfect tenderness through slow cooking, flavorful marinades, and the right cooking techniques. Each step is designed to ensure that your meat not only cooks evenly but also absorbs every ounce of flavor possible. Prepare to impress your family and friends with a dish that seems like it took hours of effort but is surprisingly simple to execute.
By the end of this guide, you will be able to create your own fall-off-the-bone tender masterpiece, no matter what cut of meat you choose. Plus, you’ll receive tips and variations that can suit different dietary needs while still keeping the recipe intuitive and approachable.
What Is Fall Off the Bone Tender?
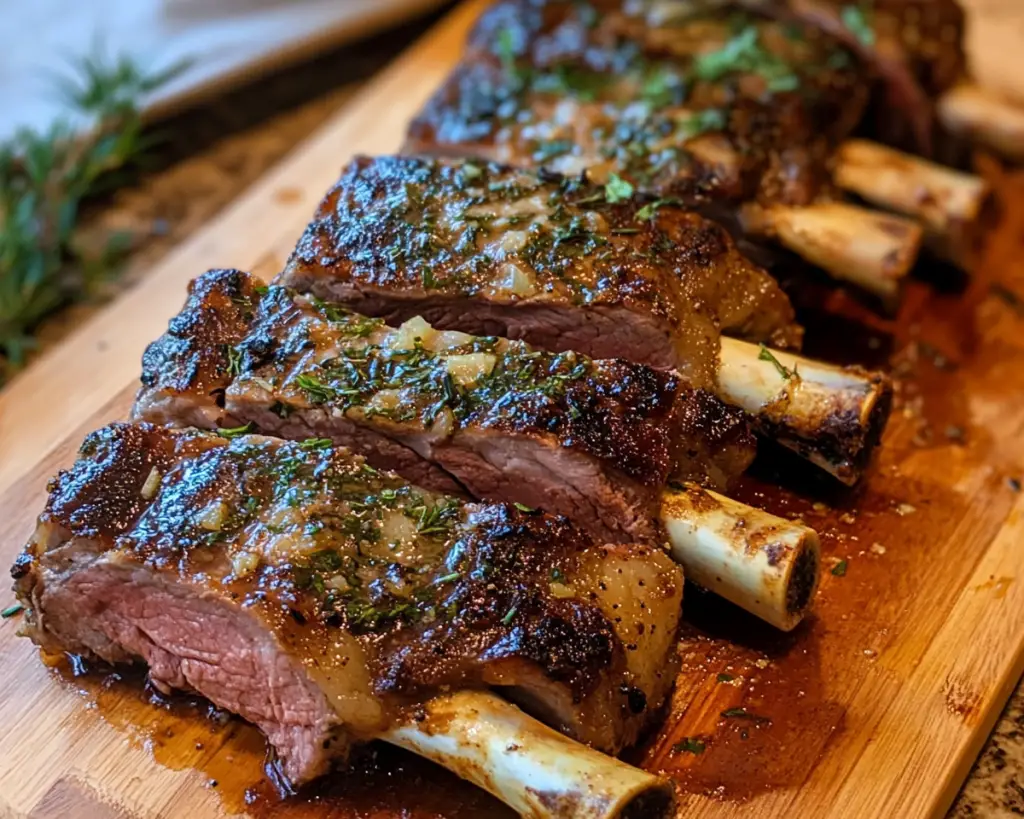
Fall-off-the-bone tender refers to a cooking technique where the meat becomes so exquisitely tender that it easily pulls away from the bone, sometimes with little to no effort. This texture is often achieved through methods such as braising, slow cooking, or even pressure cooking, which breaks down the connective tissues and collagen in the meat.
Typically, this technique is associated with tougher cuts of meat, such as chuck roast, pork shoulder, or even chicken thighs. These cuts contain more fat and connective tissue, which means they require longer cooking times to become tender. As they cook slowly, the fat melts away and the collagen transforms into gelatin, enriching the meat and giving it a luscious, melt-in-your-mouth quality.
The flavor profile of fall-off-the-bone tender meat can vary widely depending on the ingredients and cooking methods used. You might find yourself enjoying the rich tastes of herbs and spices in a slow-cooked beef stew, the zesty flair of a marinated pork shoulder, or the comfortingly familiar flavors of a roasted chicken. What’s essential is that tenderness is paramount, making every bite a delight.
Why You’ll Love This Fall Off the Bone Tender Recipe
There are countless reasons to adore this fall-off-the-bone tender recipe. Firstly, the **taste** is truly unbeatable; as the meat roasts or simmers, it absorbs the flavors of the accompanying spices and ingredients, creating a mouthwatering dish that will have your guests coming back for more.
The **ease** of this recipe is another key advantage. You can prepare it ahead of time and let it cook while you tend to other tasks or simply relax. This makes it a perfect choice for busy parents or anyone with a tight schedule. You can even make it a part of your **meal prep** routine, portioning it out for quick dinners throughout the week.
In terms of **cost**, using tougher cuts of meat is often easier on the wallet compared to premium cuts. These cuts don’t sacrifice flavor; in fact, slow cooking brings out their richness and character, allowing you to serve an impressive meal without breaking the bank.
This recipe can also cater to various **dietary needs**. By selecting your protein carefully and adjusting side dishes, you can create a version suitable for nearly any dietary preference, such as low-carb, keto, or even gluten-free!
By avoiding some common misunderstandings about cooking methods, it’s easy to create a restaurant-quality dish at home without any pre-cooking skills. This recipe is perfect for beginners in the kitchen; it’s about layering flavors and having patience. You’ll soon find yourself craving this dish not just for dinner but for special occasions too.
Ingredients You’ll Need
- 2–3 lbs of meat (choose your preferred cut, such as beef chuck roast, pork shoulder, or chicken thighs; these cuts work best for tenderness)
- 1 large onion (adds sweetness and flavor; can substitute with shallots or leeks)
- 4 cloves of garlic (minced, providing an aromatic flavor that complements the meat)
- 2 cups of broth (beef or chicken broth enhances the depth of flavor; you can also use vegetable broth for a lighter option)
- 1 tablespoon of olive oil (for browning the meat, can substitute with vegetable, canola, or avocado oil)
- 2 teaspoons of salt (adjust according to taste; essential for flavor)
- 1 teaspoon of black pepper (freshly ground, enhances flavor and adds a little heat)
- 2 teaspoons of dried herbs (such as thyme, rosemary, or oregano for additional flavor)
- 1 cup of vegetables (such as carrots and celery, adding nutrition and flavor; optional but recommended)
Each ingredient contributes significantly to the overall taste of the dish. The meat is the star; it should be the best quality possible based on your budget. Always check for marbling in beef cuts; the more fat, the more tenderness you can expect. Onions and garlic serve to build the flavor foundation and can be adjusted based on your preferences. Pick your broth carefully, as a lower-sodium option helps control the salt content while still providing necessary moisture during cooking.
Lastly, seasoning is critical to your final product. Don’t shy away from experimenting with fresh herbs instead of dried ones, as they can offer a vibrant contrast to the meat’s rich flavor.
How to Make Fall Off the Bone Tender
- Prep the Ingredients: Begin by chopping your onion and mincing the garlic. Depending on your chosen protein, you may want to trim any excess fat from the meat. This will help reduce the grease during cooking, ensuring a cleaner-tasting dish.
- Season the Meat: Generously season the meat with salt, pepper, and herbs. Ensure that the seasoning covers every side evenly. This step is crucial as it provides the foundational flavor for your dish.
- Heat the Oil: In a large pot or Dutch oven, heat the olive oil over medium-high heat. Once hot, carefully place the seasoned meat into the pot, searing it on all sides until a golden-brown crust forms. This should take about 3-4 minutes per side. Don’t rush this step; it adds depth to the flavor.
- Add Aromatics: Once the meat is nicely browned, remove it from the pot and set it aside. In the same pot, add the onions and cook until softened, about 3-5 minutes. Then, add the minced garlic and sauté for an additional minute, ensuring it doesn’t burn.
- Build the Base: Return the browned meat to the pot, and if using, add your chopped vegetables now. Pour in the broth, scraping the bottom of the pot to deglaze and lift any flavorful bits stuck to the bottom. These bits are packed with umami and essential for the final flavor.
- Braise the Meat: Cover the pot with a lid or aluminum foil and reduce the heat, allowing the pot to simmer gently. If you’re using an oven, preheat it to 300°F (150°C) and transfer the pot into the oven, cooking for approximately 2.5 to 3 hours. Check for doneness periodically; the meat should easily pull apart when it’s finished.
- Finish and Serve: Once your meat is done cooking, remove it from the pot and let it rest for 10 minutes before slicing or shredding. Utilize the leftover cooking liquid to create a sauce by straining and reducing it over medium heat until thickened. Serve with your favorite sides, such as mashed potatoes, rice, or crusty bread.
Remember, patience is key in this process. Allowing the meat to cook low and slow is what transforms it into a tender, flavor-packed delight. This is also where taste tests come into play! Adjust salt and seasoning towards the end; it can significantly change the final product depending on your family’s preferences.
3 Variations & Substitutions
Variation 1: BBQ Pulled Pork
If you’re a fan of BBQ flavors, transform your pork shoulder into delicious pulled pork. Instead of broth, use a mixture of apple cider vinegar, tomato sauce, and your favorite BBQ sauce for deeper flavor. This variation pairs perfectly with coleslaw and burger buns, creating delicious sandwiches that will be a hit at gatherings.
Variation 2: Herb-Crusted Chicken
For a more sophisticated twist, use chicken thighs with plenty of fresh herbs like rosemary, thyme, and parsley. Begin the same way, browning the chicken, and then add a splash of white wine to deglaze the pan after sautéing the onions. Finish off by finishing in the oven to create a savory herb-crusted taste that pairs beautifully with roasted vegetables.
Variation 3: Mediterranean Lamb Shanks
For an elegant meal, consider using lamb shanks. Season heavily with cumin, coriander, and paprika. Add chopped tomatoes and chickpeas to the braising liquid for a Mediterranean flair. Cooking this dish low and slow allows the flavors to meld and results in lamb that falls off the bone with every forkful, making it the perfect dish for special occasions.
Each of these variations utilizes the same core cooking methods while allowing you to explore different flavor elements. Feel free to experiment with spices and herbs that resonate with you or fit the occasion.
Common Mistakes to Avoid
Creating fall-off-the-bone tender meat may seem straightforward, but certain common pitfalls can lead to disappointing results. One crucial mistake is attempting to rush the cooking process. Tenderizing meat requires time to break down the fibers properly; don’t turn up the heat in hopes of speeding things along.
Another common misstep is not seasoning the meat well. Under-seasoning can lead to a bland final product. Remember, the exterior of your meat should have a good layer of seasoning to enhance its flavor profile.
Lastly, avoid lifting the lid too often while cooking. Each time you open the lid, steam escapes, and this can significantly increase cooking time. Keep the lid on whenever possible to retain moisture and heat for ideal cooking conditions.
Storage, Freezing & Reheating Tips
To store any leftover fall-off-the-bone meat, allow it to cool completely before transferring it to airtight containers. Store in the refrigerator for up to 3-4 days, ensuring safety and freshness.
If you prefer longer storage, you can freeze the meat, but it’s best to do so without the sauce. Place the meat in freezer-safe bags or containers, pressing out excess air. This typically lasts up to 3 months in the freezer.
When it comes to reheating, avoid microwaving as it can lead to uneven reheating. Instead, place the meat in a covered skillet over low heat, adding a splash of broth or sauce to revive its moisture. Alternatively, you can place it back in the oven at a low temperature until warmed through.
Frequently Asked Questions
Can I use boneless meat instead of bone-in?
Yes, you can use boneless cuts for your fall-off-the-bone tender recipes. However, keep in mind that bone-in cuts typically provide more flavor and moisture during the cooking process. If you use boneless cuts, try to select a fattier cut and adjust the cooking time accordingly since they may cook faster.
How do I know when my meat is done?
The best way to check if your meat is done is to use a fork or meat thermometer. For meats like chicken, it should reach an internal temperature of around 165°F (74°C). For beef or pork, when you insert a fork, the meat should pull apart easily without resistance.
Can I cook this in a slow cooker?
Absolutely! This recipe works perfectly in a slow cooker. Just follow the initial steps of browning the meat, then transfer everything to the slow cooker. Cook on low for 6-8 hours, or on high for 3-4 hours, allowing the flavors to develop beautifully.
What should I serve with fall-off-the-bone tender meat?
There are myriad sides that work beautifully! Classic choices include mashed potatoes, rice, or a fresh side salad. You can also serve it alongside roasted vegetables, crusty bread, or polenta for a more gourmet touch. Feel free to mix and match based on your preferences!
What if my meat is still tough after cooking?
If you find that after cooking, your meat is still tough, it likely needs more time. Every cut of meat can vary based on size and freshness, leading to different cooking times. Simply cover it again and continue cooking in small increments until the desired tenderness is reached.
Conclusion:
With this comprehensive guide, you’re now equipped to make fall-off-the-bone tender dishes that will impress anyone at your dinner table. Remember the key steps: quality meat, generous seasoning, and allowing time for those rich flavors to develop. Don’t hesitate to customize according to your tastes and share your culinary creations with others. Try this recipe today, and you might just find it becomes a staple in your home cooking repertoire. It’s time to roll up your sleeves and enjoy the incredibly rewarding experience of creating melt-in-your-mouth tender meats right in your kitchen!