**Prep time:** 30 minutes
**Cook time:** 15 minutes
**Total time:** 45 minutes
**Servings:** About 24 cookies
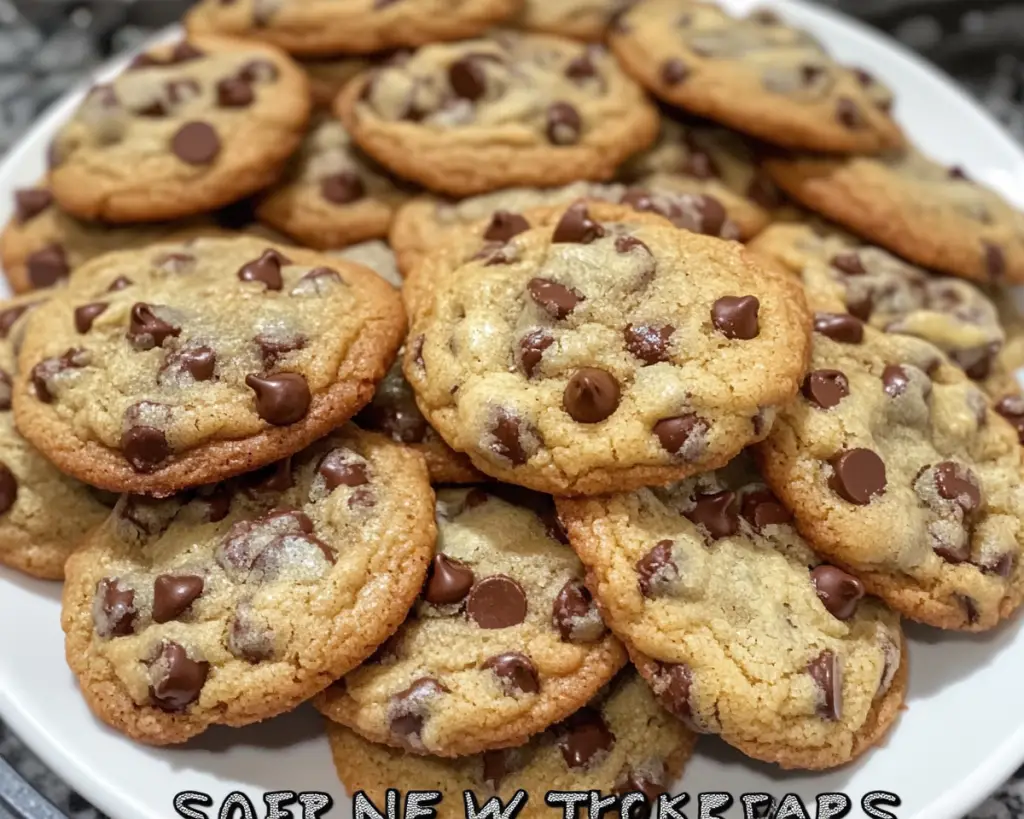
Did you ever bite into a freshly baked chocolate chip cookie and feel an instant wave of joy wash over you? The kind of cookie that reminds you of childhood days, where each bite is warm, delicious, and filled with gooey chocolate? That’s what you can expect when you dive into making Soft and Chewy New York Times Chocolate Chip Cookies!
This recipe, inspired by the iconic New York Times Chocolate Chip Cookies, is a game-changer for cookie lovers everywhere. Known for their delightful texture, balanced sweetness, and elevated flavors, these cookies have earned a reputation as “the best.” What sets them apart? They’re thick, soft in the center, chewy on the edges, and oozing with melted chocolate.
Keep reading, and I’ll share all the secrets that make these cookies special, including tips to ensure you get the perfect cookie every time. From the ingredients you’ll need to step-by-step instructions and variations, I’ve got you covered!
What Is Soft and Chewy New York Times Chocolate Chip Cookies?
When we talk about Soft and Chewy New York Times Chocolate Chip Cookies, we refer to a specific style of cookie that was popularized by the New York Times in a now-famous recipe by Jacques Torres. The distinction of these cookies lies not only in their *texture* but also in their *rich flavor* derived from high-quality ingredients and a slightly longer resting time for the dough, which deepens the taste.
These cookies are usually characterized by their slightly shiny surface, a thick and pillowy structure, and decadent chocolate chunks that provide little moments of bliss in each bite. The *brown sugar* combined with *granulated sugar* creates a perfect caramelized flavor, while the use of *high-quality chocolate* elevates the experience to something truly extraordinary.
One unique aspect of this recipe is the inclusion of a rest period for the dough, which allows the flavors to meld beautifully, giving you an irresistibly soft cookie that’s chewy on the outside yet tender on the inside. This resting time, often recommended at least 24 hours but up to 72 hours, is what transforms an ordinary cookie into an exceptional treat.
Why You’ll Love This Soft and Chewy New York Times Chocolate Chip Cookies
If you’re looking for a cookie that satisfies both hunger and nostalgia, this recipe is a winner. Here’s why you will love these cookies:
– **Outstanding Taste:** The rich, buttery flavor combined with the depth of brown sugar and the quality of chocolate creates an indulgent and satisfying cookie you’ll crave time and time again.
– **Texture Perfection:** You’ll love the contrast between the crunchy edges and the soft, gooey center that offers a delightful bite every time.
– **Simplicity Meets Elegance:** While they seem gourmet, these cookies are incredibly easy to make, requiring no special techniques or equipment. They are perfect for busy parents and beginners alike who want a foolproof recipe.
– **Versatile Dessert:** These cookies fit any occasion, whether you’re hosting a potluck, celebrating a birthday, or just want a cozy treat at home.
– **Customizable:** You can easily switch up the type of chocolate or even add in ingredients like nuts or dried fruit for a personal touch.
– **Meal Prep Friendly:** The dough can be made ahead of time and even frozen for later, ensuring fresh cookies are always at your fingertips.
Don’t worry if you’ve had trouble with cookies in the past; this recipe is straightforward and forgiving, so you can find success even if you’re new to baking.
Ingredients You’ll Need
Here’s a handy list of everything you’ll need to create these dreamy cookies, along with the roles each ingredient plays:
– **2 ¼ cups (280g) all-purpose flour:** This forms the base of the cookies. For gluten-free options, substitute with a gluten-free blend that measures the same.
– **1 teaspoon baking soda:** This is a leavening agent that helps the cookies rise slightly and creates a light texture.
– **1 teaspoon salt:** Salt enhances the flavor of the cookies and balances the sweetness.
– **1 cup (2 sticks) unsalted butter, at room temperature:** Provides moisture, richness, and flavor. Using unsalted allows you to control the saltiness.
– **¾ cup (150g) granulated sugar:** Adds sweetness and contributes to the cookie’s crispness.
– **¾ cup (165g) packed light or dark brown sugar:** Brings moisture, chewiness, and a slight caramel flavor to the cookies.
– **2 large eggs:** Serve as binders, helping the cookies hold their shape and providing structure.
– **2 teaspoons pure vanilla extract:** Adds depth of flavor to the cookies. Always choose a quality extract for the best taste.
– **2 cups (about 340g) semi-sweet or dark chocolate chips or chunks:** The star ingredient! High-quality chocolate makes a significant difference. Feel free to use bittersweet or milk chocolate based on your preference.
– **Flaky sea salt (optional):** Sprinkle on top right before baking for a touch of salinity and to accentuate the sweetness of the chocolate.
How to Make Soft and Chewy New York Times Chocolate Chip Cookies
Follow these detailed steps to bake the perfect batch of cookies:
1. **Prepare Your Equipment:** Start by preheating your oven to 350°F (175°C). Line two baking sheets with parchment paper to ensure the cookies don’t stick and maintain even baking.
2. **Mix the Dry Ingredients:** In a medium bowl, whisk together the all-purpose flour, baking soda, and salt. This helps to evenly distribute the leavening agents and the salt throughout the flour, ensuring consistent baking.
3. **Cream the Butter and Sugars:** In a large mixing bowl, beat together the unsalted butter, granulated sugar, and brown sugar using an electric mixer on medium speed until the mixture is light and fluffy, about 2-3 minutes. The air incorporated during this stage is crucial for a light texture.
4. **Add the Eggs and Vanilla:** Next, add the eggs, one at a time, mixing well after each addition. Pour in the vanilla extract and mix until combined. The batter should be smooth and creamy at this stage.
5. **Combine Wet and Dry Mixtures:** Slowly add the flour mixture to the wet ingredients, mixing on low speed just until no streaks of flour remain. Be careful not to overmix, as this can lead to a tough cookie.
6. **Fold in the Chocolate:** Using a spatula or wooden spoon, gently fold in the chocolate chips or chunks until evenly distributed throughout the dough.
7. **Chill the Dough:** For the best flavor and texture, wrap the cookie dough in plastic wrap and refrigerate for at least 24 hours (up to 72 hours). Chilling allows the flavors to deepen and the texture to improve, leading to that truly exceptional cookie.
8. **Scoop the Dough onto Baking Sheets:** When ready to bake, scoop generous mounds of dough (about 3 tablespoons each) onto the prepared baking sheets, spacing them about 2-3 inches apart. You can sprinkle a little flaky sea salt on each dough mound if desired.
9. **Bake:** Bake in the preheated oven for 12-15 minutes, or until the edges are golden brown and the centers are set but still soft. The cookies will continue to bake slightly once removed from the oven.
10. **Cool and Enjoy:** Allow the cookies to cool on the baking sheets for about 5 minutes before transferring them to wire racks to cool completely. This step helps the cookies firm up just enough to hold their shape as you transfer them.
Feel free to enjoy these warm, gooey cookies fresh from the oven, or store them for later!
7 Variations & Substitutions
This classic cookie recipe is versatile, allowing you to experiment and customize based on your taste and dietary preferences. Here are some variations you might want to try:
1. **Nutty Twist:** Add 1 cup of chopped walnuts or pecans to the dough for added crunch and flavor. Nuts also provide healthy fats, making these cookies slightly more nutritious.
2. **Stuffed Cookies:** For a surprising center, try stuffing your cookies with mini peanut butter cups or caramel candies. Simply scoop a bit of dough, place your treat in the center, and encase it with more dough before baking.
3. **Dark Chocolate Delight:** Swap out the semi-sweet chocolate for dark chocolate chunks for an intense chocolate flavor. The slight bitterness of dark chocolate pairs beautifully with the sweetness of the cookie.
4. **White Chocolate & Macadamia:** Replace the chocolate chips with an equal amount of white chocolate chips and stir in 1 cup of chopped macadamia nuts for a tropical twist.
5. **Oatmeal Variation:** Add 1 cup of rolled oats to the dough for a chewy texture and a heartier cookie. This variation gives a nod to the classic oatmeal cookie while still maintaining that chocolate chip goodness.
6. **Gluten-Free Option:** Use a 1:1 gluten-free baking flour in place of regular all-purpose flour. Make sure to check the label to ensure it contains xanthan gum or add it separately to achieve similar results as gluten versions.
7. **Vegan Alternative:** Substitute the butter with coconut oil and the eggs with flax eggs (1 tablespoon ground flaxseed mixed with 2.5 tablespoons water = 1 egg) or a commercial egg replacer. Use dairy-free chocolate chips to maintain the vegan status.
Each of these variations offers a unique twist on the classic recipe, allowing you to tailor the cookies to fit your preferences or dietary needs. Experimenting is part of the fun!
Common Mistakes to Avoid
To ensure your cookies turn out perfectly delicious, avoid these common pitfalls:
– **Overmixing the Dough:** Mixing too much after adding the flour can lead to tough cookies. Mix just until the flour is combined for soft, chewy results.
– **Skipping the Chill Time:** Don’t rush and skip the chilling step; this is crucial for the dough to develop flavor and prevent spreading during baking. Allowing the dough to sit in the refrigerator for at least 24 hours gives the best results but even 1 hour can make a difference.
– **Incorrect Oven Temperature:** If your oven is too hot, your cookies will spread too quickly and may result in crispy edges while leaving the inside undercooked. Invest in an oven thermometer to ensure accurate readings.
– **Not Measuring Flour Correctly:** Use the spoon-and-level method to correctly measure flour. Scooping flour directly from the bag can compress it and lead to too much flour, resulting in dry cookies.
– **Baking on an Unlined Sheet:** Always use parchment paper or a silicone baking mat to prevent sticking and promote even baking.
By being mindful of these common missteps, you can create cookies that not only taste great but also showcase your baking skills!
Storage, Freezing & Reheating Tips
Once you’ve baked these delectable cookies, storing them properly is key to maintaining their freshness:
– **Storage:** Store uneaten cookies in an airtight container at room temperature for up to one week. The cookies will remain soft and chewy when sealed well.
– **Freezing Unbaked Dough:** You can freeze the cookie dough for up to 3 months. Portion out dough balls and place them on a parchment-lined baking sheet until frozen solid. Transfer to an airtight freezer bag, and when ready to bake, simply add about 2 extra minutes to the baking time without thawing.
– **Freezing Baked Cookies:** Freeze the baked cookies by laying them flat in a single layer on a baking sheet. Once frozen, store them in an airtight container or freezer bag. To thaw, simply leave them at room temperature for about 30 minutes before enjoying. You can also reheat them in the microwave for a few seconds to regain their fresh-baked feel.
– **Reviving Leftovers:** If the cookies become a bit dry after a few days, you can revive them by placing a slice of bread in the container. The cookies will absorb moisture from the bread, bringing them back to life!
Frequently Asked Questions
1. **Can I use chocolate chips instead of chocolate chunks?**
Absolutely! Chocolate chips are a great alternative and will still melt beautifully in the cookies. However, chocolate chunks or bars tend to provide a better melt and texture, giving you pockets of gooey chocolate.
2. **Why should I let the dough rest?**
Resting the dough allows time for the flour to hydrate fully and for flavors to meld, leading to a more delicious cookie with better texture. This simple step is key in achieving that iconic New York-style chocolate chip cookie taste.
3. **How do I know when my cookies are done?**
A good rule of thumb is to check the cookies when the edges are lightly golden brown and the centers still look slightly underbaked. They will continue to cook on the baking sheet after being removed from the oven, ensuring a soft center.
4. **What’s the secret to chewy cookies?**
The use of brown sugar, sufficient butter, and ensuring the cookies aren’t overbaked are all key aspects to achieving that perfect chewy texture. Chilling the dough before baking also plays a critical role in developing chewiness.
5. **Can I add more chocolate?**
Definitely! If you love chocolate, feel free to increase the amount of chocolate chips or even mix different types (like milk and dark) together. Just ensure that the dough doesn’t become too wet; keep other ingredients in mind to maintain the right consistency.
In conclusion, Soft and Chewy New York Times Chocolate Chip Cookies are more than just a treat—they’re an experience. They are comforting, indulgent, and incredibly addictive. Whether you’re baking for yourself, loved ones, or special occasions, these cookies will undoubtedly impress and delight anyone lucky enough to enjoy them. Don’t hesitate to try this recipe yourself; once you do, you’ll be excited to share it with friends and family. So gather your ingredients, roll up your sleeves, and create the ultimate cookie that will bring smiles and happy memories!
Happy baking!