**Prep time:** 20 minutes
**Cook time:** 0 minutes
**Total time:** 20 minutes
**Servings:** 8
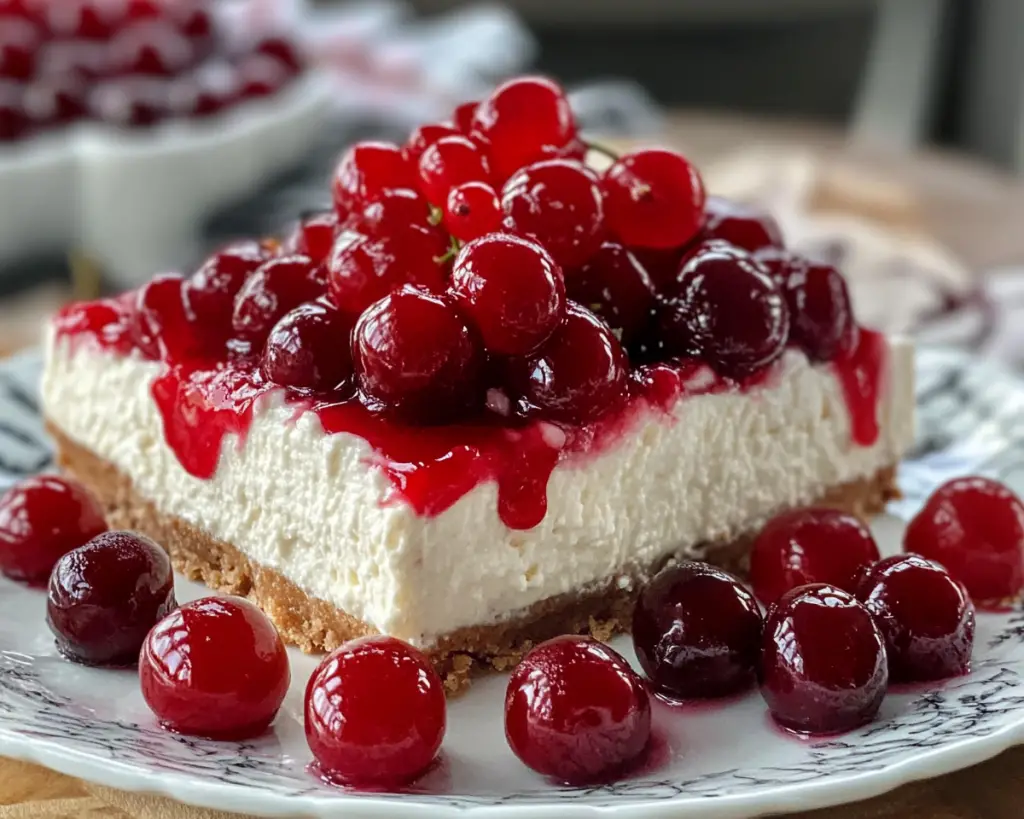
Cherry cheesecake is a classic dessert that captures the essence of summer with its vibrant flavors and creamy texture. The best part? You don’t even need to bake it. This Easy No-Bake Cherry Cheesecake recipe is perfect for busy parents, beginners in the kitchen, or anyone looking for a quick dessert that doesn’t compromise on taste. Let’s dive into how you can whip up this delightful treat in just 20 minutes!
The No-Bake Cherry Cheesecake is special for its rich, creamy filling made from cream cheese and sweetened condensed milk, all sitting on a buttery graham cracker crust. Topped with luscious cherry pie filling, this cheesecake will make your taste buds sing. You will appreciate not only the simplicity in preparation but also the pleasure of indulging in this creamy delight without the fuss of baking.
In this article, you’ll learn about the specific ingredients needed, step-by-step instructions for making the cheesecake, fun variations, storage tips, and answers to frequently asked questions. So, let’s get started!
What Is No-Bake Cherry Cheesecake?
No-Bake Cherry Cheesecake is a dessert that’s known for its creamy texture, sweet flavor, and the delightful contrast between the richness of the cheesecake and the tartness of the cherries on top. This dessert hails from traditional cheesecake recipes but skips the baking step, making it a simpler option for home cooks. The key ingredients include a smooth cream cheese base and a Graham cracker crust, with cherries typically used as a topping.
The dessert can be prepared in various ways, including using different flavored filling or crust options. The texture is creamy and silky due to the cream cheese and whipped topping, while the crust often brings a satisfying crunch. The topping of cherry pie filling – or fresh cherries, depending on your preference – adds a pop of color and an enticing sweetness, making this dish a feast for the eyes as well.
This no-bake version is particularly favored in the summer months when the last thing anyone wants to do is turn on the oven. You can make this dessert ahead of time, serving it chilled, which makes it an ideal addition to barbecues, potlucks, or family gatherings.
Why You’ll Love This No-Bake Cherry Cheesecake
You’ll adore this No-Bake Cherry Cheesecake for several reasons.
1. **Ease of Preparation**: The ease of making this dessert is one of its biggest draws. You can have it ready in just 20 minutes, which is a game changer for busy lifestyles. Whether you are a novice in the kitchen or have limited time to whip up a dessert, this recipe does not require any complicated techniques or hours of baking.
2. **No-Bake Convenience**: With no need for baking, you can avoid turning on the oven, which is savings in both time and energy. The no-bake aspect adds to the appeal, especially during hot weather when everyone wants to keep their kitchens cool.
3. **Versatility**: You can easily customize your cheesecake. Try using different fruit toppings like blueberries, strawberries, or even lemon curd based on your personal preferences or seasonal availability.
4. **Ideal for Special Occasions**: Whether it’s a birthday, holiday gathering, or just a Sunday family dinner, this cheesecake shines on any dessert table, impressing guests with its textures and flavors.
5. **Flavorful and Refreshing**: The combination of the creamy cheesecake and tart cherry topping creates a well-rounded dessert experience. It strikes a balance that appeals to both sweet and tart palates.
Let’s explore what you’ll need to make this delightful dessert.
Ingredients You’ll Need
To create the Easy No-Bake Cherry Cheesecake, gather the following ingredients:
– **2 cups Graham cracker crumbs**
The foundation of your crust. They provide a sweet and crunchy base. If you prefer, you can substitute with Oreo crumbs for a chocolate twist.
– **1/2 cup unsalted butter, melted**
This binds the crust together. You can also use coconut oil for a dairy-free option.
– **8 oz cream cheese, softened**
The main ingredient for the cheesecake filling, offering a rich and creamy texture. You can substitute with mascarpone cheese for a different flavor profile.
– **1 cup powdered sugar**
For sweetness and to balance the tanginess of the cream cheese. Granulated sugar works too, but powdered sugar will create a smoother texture.
– **1 teaspoon vanilla extract**
Adds a wonderful aroma and depth of flavor. Pure vanilla extract is recommended over imitation for the best taste.
– **1 1/2 cups whipped topping**
This lightens up the cheesecake filling and incorporates air, making it fluffy. You can use homemade whipped cream for a fresher alternative.
– **1 can cherry pie filling**
The go-to topping that completes your cheesecake. Feel free to use fresh cherries with some sugar to showcase seasonal fruit.
Now that you have your ingredients, let’s get into the step-by-step process of creating this heavenly dessert.
How to Make No-Bake Cherry Cheesecake
### Step 1: Prepare the Crust
1. Start by crushing the Graham crackers. You can do this by placing them in a zip-top bag and crushing them with a rolling pin, or using a food processor for a finer crumb. You’ll want about 2 cups of crumbs – enough to form a solid layer for your crust.
2. In a mixing bowl, combine the crushed Graham crackers and melted butter. Stir until all the crumbs are fully coated with butter, and the mixture resembles wet sand.
3. Press the crumb mixture firmly into the bottom of a 9-inch pie dish or springform pan using your hands or the back of a measuring cup. Be sure to press it down evenly to avoid a crumbly crust later.
4. Place the crust in the refrigerator while you prepare the filling, allowing it to set slightly.
### Step 2: Make the Cheesecake Filling
1. In a large mixing bowl, beat the softened cream cheese using an electric mixer until it’s smooth and creamy. This usually takes about 2-3 minutes. Ensure you scrape the sides of the bowl to incorporate all the cream cheese.
2. Gradually add the powdered sugar and continue mixing until fully incorporated and there are no lumps.
3. Next, add the vanilla extract and mix it in until combined.
4. Gently fold in the whipped topping. This step is crucial because it will help incorporate air and achieve that light, fluffy texture. Use a spatula and fold until there are no white streaks remaining.
### Step 3: Assemble the Cheesecake
1. Take your prepared crust out of the refrigerator. Spoon the cheesecake filling onto the crust and spread it evenly using a spatula.
2. Smooth out the top and give it a gentle shake to level it off.
3. Cover the cheesecake with plastic wrap and refrigerate for at least 4 hours or overnight. The longer it sets, the firmer it will become, which makes it easier to slice.
### Step 4: Top and Serve
1. Once the cheesecake has set, remove it from the refrigerator. Spread the cherry pie filling evenly over the top of the cheesecake.
2. Slice it into wedges and serve chilled. You can garnish with whipped cream or fresh cherries if desired.
This cheesecake is best enjoyed chilled and can be accompanied by a cup of coffee or tea. Each bite will melt in your mouth, and the cherry topping will pop with flavor.
5 Variations & Substitutions
1. **Different Fruit Toppings**: While cherry pie filling is classic, consider switching it up! Try blueberry, strawberry, or even a combination of mixed berries. You can use fresh fruits or canned alternatives, adjusting the sugar added depending on the fruit’s tartness. Fresh raspberries can add a tart contrast that enhances the sweetness of the cream cheese.
2. **Chocolate Cherry Cheesecake**: For a chocolate twist, add 1/4 cup of cocoa powder to the cheesecake filling. You can also substitute half of the Graham cracker crumbs with Oreo crumbs to create a chocolate crust that pairs beautifully with the cherry topping.
3. **Vegan No-Bake Cherry Cheesecake**: Swap out the cream cheese with vegan cream cheese, the butter in the crust with coconut oil, and replace the whipped topping with whipped coconut cream or silken tofu blended until smooth. This variation maintains a similar taste and texture while catering to a vegan diet.
4. **Lemon Cherry Cheesecake**: For a citrusy kick, add the zest and juice of one lemon to the cheesecake filling. This adds a refreshing flavor that pairs well with the sweetness of the cherries, giving a more balanced profile.
5. **Nutty Crust**: Incorporate ground nuts like almonds or pecans into the crust for a nutrient boost and a deeper flavor. Simply mix 1 cup of crushed nuts with your Graham cracker crumbs and follow the same instructions for assembling the crust.
Common Mistakes to Avoid
1. **Not Softening the Cream Cheese**: One of the most common mistakes is not allowing the cream cheese to soften. Using cold cream cheese can lead to lumps in your filling. **Tip**: Always let it sit at room temperature for at least 30 minutes before starting to mix.
2. **Overmixing the Filling**: While it’s essential to blend the ingredients thoroughly, overmixing can introduce too much air, resulting in a cheesecake that’s too light and not holding its shape. Mix until smooth and just combined.
3. **Skipping the Chilling Time**: Patience is key! Rushing the chilling process can result in a runny cheesecake that doesn’t hold its shape. **Tip**: Allow at least 4 hours or overnight for the best results.
4. **Incorrect Crust Ratio**: Having too little or too much butter in the crust can lead to a crust that doesn’t hold together or is overly greasy. Make sure to measure accurately.
5. **Ignoring Food Safety**: Always keep the cheesecake refrigerated until you are ready to serve it. Leaving it out at room temperature for an extended period can lead to spoilage.
Storage, Freezing & Reheating Tips
After preparing your No-Bake Cherry Cheesecake, here are some tips for storage and longevity:
– **Refrigeration**: The cheesecake can be kept tightly covered in the refrigerator for up to 5 days. This makes it an excellent make-ahead dessert.
– **Freezing**: If you want to prepare it further in advance, slice the cheesecake and freeze individual pieces. Wrap them tightly in plastic wrap and then aluminum foil. This way, you can thaw only what you need later on. It can last for up to 2 months in the freezer.
– **Thawing**: When you’re ready to enjoy the frozen cheesecake, move it to the refrigerator to thaw overnight. Avoid thawing it at room temperature to prevent compromising its texture.
Always remember to keep any leftovers tightly covered to maintain freshness and prevent absorbing any odors from the refrigerator.
Frequently Asked Questions
1. **Can I use low-fat cream cheese?**
Yes, you can substitute low-fat cream cheese in this recipe. However, keep in mind that it may alter the texture slightly, making it less creamy compared to using full-fat cream cheese. It should still work well for the no-bake cheesecake.
2. **Do I need to use whipped topping, or can I make my own?**
You can absolutely make your own whipped cream for this recipe! Just whip heavy cream until stiff peaks form and gently fold it into the cream cheese mixture as you would with the whipped topping. This adds a fresh flavor to your cheesecake.
3. **How can I make the cheesecake gluten-free?**
To make a gluten-free No-Bake Cherry Cheesecake, substitute the Graham crackers with gluten-free digestives or any gluten-free cookie of your choice. Be sure to also check the whipped topping and any other processed ingredients for gluten-free labels.
4. **Can I use different flavored cream cheese?**
Yes! Different flavored cream cheese can add a unique twist to your cheesecake. Think of using strawberry or blueberry cream cheese for an added layer of flavor. Just be mindful that it may affect the overall sweetness of the cheesecake.
5. **What if I can’t find cherry pie filling?**
If cherry pie filling isn’t available, you can easily make your own by simmering fresh or frozen cherries with sugar until they release their juices. Thicken it with a little cornstarch mixed with water if necessary. This homemade topping is delicious and fresh!
In conclusion, this Easy No-Bake Cherry Cheesecake is a delightful dessert that you’ll be glad you made. It embodies a perfect balance of sweetness and tanginess while being incredibly simple to prepare. Whether it’s a casual family dinner or a festive celebration, this dessert is sure to impress.
You can also make it your own with the various flavor and topping options. So grab your ingredients, roll up your sleeves, and treat yourself to a slice of this creamy goodness today! Don’t forget to share your experience and any unique twists you gave this recipe, as I would love to hear your thoughts. Happy baking!