Garlic bread is one of those universally loved foods that can elevate any meal, whether it’s a casual dinner, a weekend feast, or an intimate gathering. With its warm, buttery, garlicky aroma wafting through the kitchen, it can instantly transport you to your favorite Italian restaurant or family gathering. In this article, we’ll dive deep into creating a comforting and delicious easy homemade garlic bread that’s sure to be a hit for busy parents, eager beginners, and even budget-conscious cooks!
By the time you’re done reading, you will not only understand what garlic bread is but also how to make it perfectly every time, along with a few delightful variations to cater to your taste preferences. So let’s get started on this mouthwatering journey!
What Is Garlic Bread?
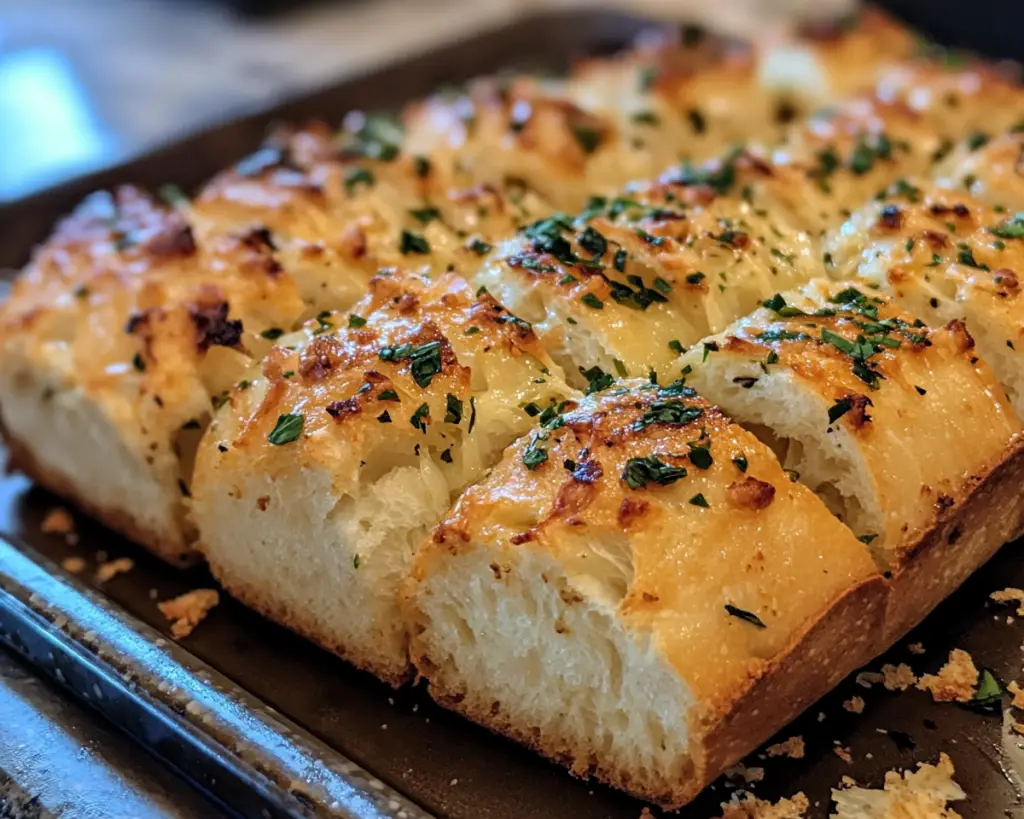
Garlic bread is a simple yet delightful accompaniment to many dishes, particularly Italian cuisine. Traditionally, it consists of toasted bread — usually a baguette or Italian loaf — slathered in a mixture of **butter** and **garlic**, often topped with **parsley** for freshness. The bread, when toasted, absorbs the garlic’s rich flavors, resulting in a crispy texture paired with a creamy, buttery taste.
Aside from its classic appeal, garlic bread offers a sense of comfort; it’s often associated with family dinners, cozy gatherings, or pizza nights. The aromatic, savory scent of garlic mingling with warm bread creates an inviting atmosphere that brings everyone to the table.
In some variations of garlic bread, you can find additional ingredients like **cheese** or **spices**, contributing to various flavor profiles. It’s a versatile dish that can be as simple or as extravagant as you desire.
Why You’ll Love This Garlic Bread
There are countless reasons to love homemade garlic bread, and here’s why this recipe will become a staple in your kitchen:
1. **Taste:** The combination of rich butter and savory garlic creates a mouthwatering taste sensation that perfectly complements any meal. Whether you’re serving spaghetti, an Italian salad, or even soup, garlic bread adds an irresistible flavor.
2. **Ease:** This garlic bread recipe is incredibly straightforward and quick to prepare. With just a handful of ingredients, you can have warm, toasty bread ready in no time, making it perfect for busy weeknights or last-minute gatherings.
3. **Cost-Effective:** Making garlic bread at home is significantly cheaper than buying pre-made versions from stores or restaurants. Butter, garlic, and bread are pantry staples that most of us already have on hand.
4. **Versatility:** You can adapt this garlic bread recipe to suit dietary preferences or taste variations. Whether you want it to be vegan, cheesy, or spicy, there’s a way to fit garlic bread into nearly everyone’s preferences.
5. **Wholesome Comfort Food:** Homemade garlic bread brings warmth and comfort to the table. It’s an easy way to add a homemade touch to any meal, ensuring your loved ones feel cherished with each bite.
However, cooking garlic bread can come with a few common misconceptions. One of the biggest mistakes is using too much garlic, which can become overwhelming. A well-balanced garlic flavor should enhance the bread without overpowering its other ingredients. Additionally, some might be tempted to skip toasting the bread properly, leading to a less satisfying texture. Perfect garlic bread is crispy on the outside, soft on the inside — a textural contrast that adds to its appeal.
Ingredients You’ll Need
To make the best homemade garlic bread, you’ll need the following ingredients:
– **1 loaf of Italian or French bread**: This serves as the foundational element. Using a crusty bread allows for a satisfying crunch when toasted. If you prefer, you can use sourdough or ciabatta for a different flavor.
– **½ cup unsalted butter**: At room temperature, the butter serves as the base for your garlic spread. Unsalted butter ensures you can control the saltiness of your dish.
– **4-6 cloves of garlic**: This is the star ingredient of the recipe. Freshly minced garlic is vital for the best flavor. You can adjust the amount according to your personal preference.
– **2 tablespoons fresh parsley, chopped**: This adds a delightful freshness and a touch of color to your garlic bread. If you don’t have fresh parsley, dried parsley can be used, but fresh is always preferable.
– **⅓ teaspoon salt**: Use this to enhance the flavors of your garlic bread. You can skip it if you’re looking to reduce sodium.
– **Freshly ground black pepper (optional)**: This adds a bit of heat and complexity to the flavor. Use according to your taste preference.
– **Grated Parmesan cheese (optional)**: For those who enjoy cheesy garlic bread, adding parmesan or mozzarella can take your creation to the next level.
– **Red pepper flakes (optional)**: For a spicy kick, feel free to sprinkle in some red pepper flakes to tantalize your taste buds.
Each of these ingredients plays a crucial role in achieving that delicious garlic flavor, creating a perfect balance between the bread, butter, and garlic.
How to Make Garlic Bread
Let’s walk through the steps to create your easy homemade garlic bread, ensuring you achieve that ultimate flavor and texture.
1. **Preheat the Oven**: Begin by preheating your oven to 375°F (190°C). This step is essential for achieving that beautifully crispy exterior on your garlic bread.
2. **Prepare the Garlic Butter Mixture**: In a medium bowl, combine the softened **unsalted butter**, minced **garlic**, chopped **parsley**, **salt**, and optional **black pepper**. Using a fork or hand blender, thoroughly mix these ingredients until they are well combined. The mixture should be smooth and creamy.
3. **Slice the Bread**: Take your loaf of Italian or French bread and place it on a cutting board. Using a serrated knife, slice the bread in half lengthwise. If you prefer smaller pieces, you can opt to cut it into individual slices. Just remember that the cooking time may vary depending on the size.
4. **Spread the Garlic Butter**: Generously spread the garlic butter mixture onto the cut sides of the bread. Ensure even coverage to maximize flavor. If you’re adding cheese, sprinkle the grated parmesan or mozzarella evenly over the buttered surface.
5. **Wrap in Foil (Optional)**: For softer garlic bread, wrap the loaf in aluminum foil before placing it in the oven. If you prefer a crispier texture, you can skip this step and place the bread directly on the baking sheet instead.
6. **Bake**: Place the bread on a baking sheet and put it in the preheated oven. Bake for about **10-15 minutes**. If wrapped, remove the foil halfway through to allow the top to crisp up. Keep an eye on your bread to avoid burning; you’re looking for a golden-brown color.
7. **Serve Warm**: Once the garlic bread is beautifully toasted and aromatic, take it out of the oven. Allow it to cool for a minute or two, then slice it into pieces if you haven’t already. Serve immediately, and watch as your guests devour this delicious creation!
Baking garlic bread may seem straightforward, but there are some additional tips to consider for the best outcome. For instance, using room temperature butter is pivotal to ensure smooth spreading. If you’re in a hurry, you can microwave the butter for about 10-15 seconds, but be careful not to melt it completely. Also, remember that the subtle balance of garlic should shine in your bread — taste your garlic mixture before spreading it on the bread to ensure it meets your preference!
5 Variations & Substitutions
Garlic bread is wonderfully adaptable. If you’re feeling adventurous, here are five creative variations and substitutions to consider:
1. **Cheesy Garlic Bread**: To make cheesy garlic bread, simply add shredded mozzarella or parmesan cheese to the butter mixture before spreading it on the bread. This creates a delicious gooey texture that’s irresistible. Bake until bubbly and golden.
2. **Herbed Garlic Bread**: Enhance the flavors by adding a mix of dried herbs (like **oregano**, **basil**, and **thyme**) to your garlic butter. This variation works especially well with Italian dishes, complementing the flavors perfectly.
3. **Vegan Garlic Bread**: Substitute the butter with vegan butter or olive oil. Ensure you use a plant-based bread for a completely vegan-friendly option. This keeps the rich flavors intact while catering to dietary preferences.
4. **Spicy Garlic Bread**: Add heat by incorporating **red pepper flakes** or finely diced jalapeños into the butter mixture. Ideally, let the garlic butter sit for a few minutes to allow the spice to infuse before spreading it on the bread.
5. **Sweet Garlic Bread**: For a delightful twist, consider caramelizing the garlic in butter until it’s golden brown before adding it to your mixture. The sweetness of caramelized garlic offers a unique and unexpected flavor profile that pairs wonderfully with a sweet or savory Italian dish.
Each of these variations brings a unique flair to your garlic bread while ensuring it’s delicious and perfect for any meal.
Common Mistakes to Avoid
To achieve the best garlic bread, it’s crucial to avoid some common pitfalls. Here’s a list of what typically goes wrong and how to fix it:
1. **Using Too Much Garlic**: While garlic is the star of this dish, using too much can overpower your meal. Stick to 4-6 cloves and taste your garlic butter mixture before spreading it onto the bread. You can always add a bit more if you desire, but it’s hard to mask overly garlicky flavors.
2. **Not Preheating the Oven**: Skipping the preheating step can lead to uneven cooking. The heat needs to be consistent right from the start to achieve that perfect crispy crust while keeping the inside soft.
3. **Wrong Bread Choice**: Opting for soft sandwich bread will result in soggy or overly soft garlic bread. Choose crusty Italian or French bread to achieve those desirable textural contrasts.
4. **Skipping the Parmesan**: For cheesy garlic bread, not using enough cheese will yield an unsatisfying final product. Generously apply it to ensure those cheesy smothered flavors really shine through.
5. **Overtoasting the Bread**: Nothing is more disappointing than burned garlic bread. Keep a close eye on the bread as it toasts, particularly near the end of the baking time. Remember, every oven is different, so checking it a couple of times can save you from disaster.
By avoiding these mistakes, you’ll be well on your way to impressing even the most discerning of garlic bread lovers.
Storage, Freezing & Reheating Tips
Garlic bread can be enjoyed fresh out of the oven or stored for later.
– **Refrigeration:** If you have leftovers, allow the garlic bread to cool completely, then store it in an airtight container or wrap it tightly in plastic wrap. It can be kept in the refrigerator for about **4-5 days**.
– **Freezing:** To freeze garlic bread, wrap individual servings in aluminum foil or plastic wrap and place them in a freezer-safe bag. Properly stored, garlic bread can last up to **3 months** in the freezer. Be sure to label and date the packages for reference.
– **Reheating:** To reheat leftover garlic bread, you can either bake it in the oven at **350°F (175°C)** for about **10 minutes** or microwave individual pieces for **15-30 seconds**. Baking will help restore crispiness, while the microwave is a quicker option.
Always ensure to check the consistency of your garlic bread when reheating: if it starts to look dry, consider adding a small dab of butter before reheating. Just like fresh garlic bread, reheated bread should have that desirable crunch!
Frequently Asked Questions
1. **Can I use store-bought garlic butter?**
Yes, store-bought garlic butter is a valid option for convenience, but homemade garlic butter gives you control over the flavor profile. If you use store-bought, check for additional seasonings to ensure they match your preferences.
2. **What’s the best bread for garlic bread?**
The best bread options are typically Italian or French loaves, which offer a sturdy crust and soft interior. Other options like ciabatta, sourdough, or even baguettes can work well; just ensure you avoid overly soft sandwich bread.
3. **Can I add other toppings to garlic bread?**
Absolutely! You can incorporate various toppings like mozzarella cheese, roasted red peppers, or even sun-dried tomatoes. Let your creativity shine and customize your garlic bread to complement your meals.
4. **How can I make it gluten-free?**
For a gluten-free garlic bread, choose gluten-free bread varieties available on the market. Ensure the other ingredients, like butter and herbs, are also labeled gluten-free for safe consumption.
5. **Can I make garlic bread ahead of time?**
Yes, you can prepare the garlic butter mixture and apply it to your bread, then wrap it in foil and refrigerate for up to **24 hours** before baking. When ready to serve, bake directly from the refrigerator, just add a few extra minutes to the baking time.
In conclusion, this easy homemade garlic bread recipe is a delightful and comforting side dish that can be enjoyed in countless variations. With its irresistible aromas, mouthwatering flavor, and golden-brown texture, it’s bound to be a hit at any gathering. Don’t hesitate to customize this recipe to fit your tastes, and make it a regular feature in your meal planning. Try it out, savor it, and share it with your loved ones — garlic bread truly makes every meal better. Now, gather your ingredients, preheat that oven, and let the aroma of fresh garlic bread create a warm atmosphere in your home. Happy baking!
[Read also: Easy Dessert Recipes for Beginners]