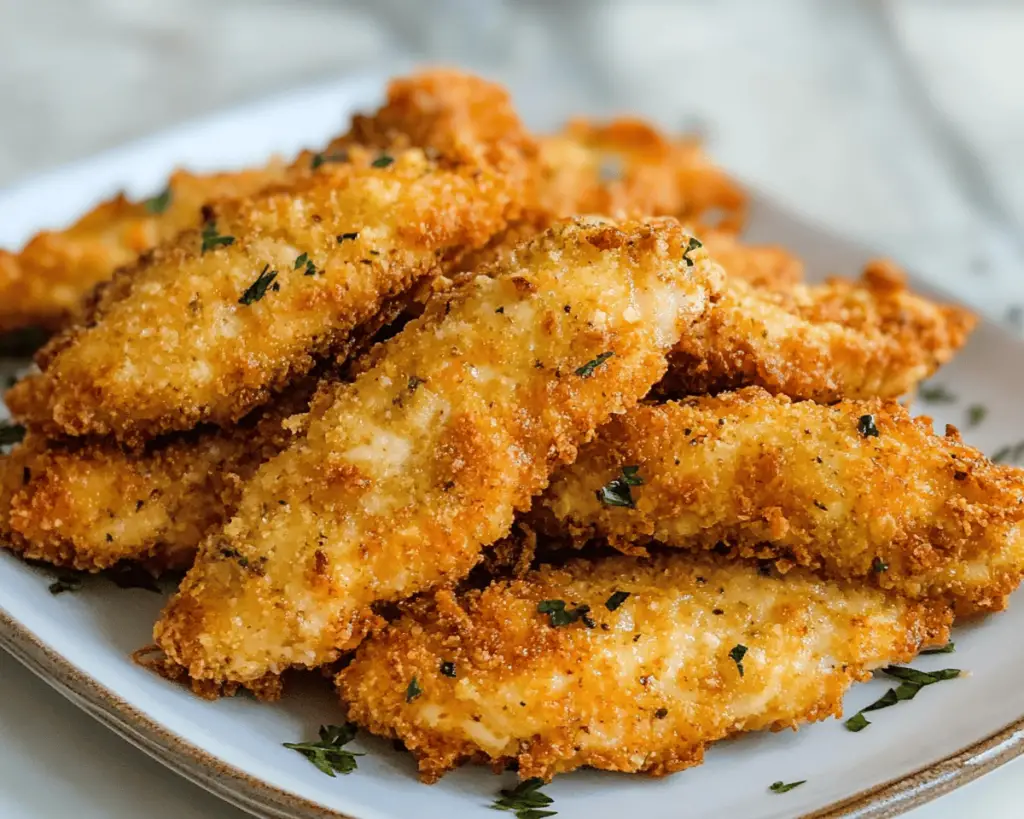
I’ve always believed that the simplest meals often evoke the most joy. There’s something magical about chicken tenders—those crunchy bites of goodness that seem to transport you back to childhood. You know the feeling, right? That warm, fuzzy sense of home and nostalgia that fills your heart just when you see a plate of them?
I remember the first time I made chicken tenders. I was in college, juggling classes, part-time jobs, and the occasional social life. Honestly, I was not the most skilled cook back then—my idea of fancy was boiling water for instant ramen. But one evening, with a craving for something comforting and a packet of chicken breasts in the fridge, I decided it was time to step up my game. With just three basic ingredients—chicken, breadcrumbs, and oil—I whipped up an easy batch of chicken tenders. They turned out surprisingly well and my friends declared me a culinary genius. I mean, I wouldn’t go that far, but that moment ignited a love for home cooking that still burns brightly today.
When you think about chicken tenders, you can get lost in memories of family dinners, fast food cravings, and summer barbecues. Truly, they’re like the warm hug of the food world. You can coat them, fry them, or bake them. You can dip them in sauces, load them on a sandwich, or serve them just as they are with a side of whatever you have on hand. And even on the busiest of days, knowing that I can whip up some chicken tenders in no time makes me feel like a culinary superhero—cape optional.
And here’s a little tip before we dive in: this recipe doesn’t need to be perfect! It’s about the experience, the love you put into it, and enjoying the little things. So grab your apron, roll up your sleeves, and let’s get cooking!
### What Goes Into 3 Ingredients Easy Chicken Tenders?
Let’s break it down. This recipe is as straightforward as it gets, and those three ingredients are:
1. **Chicken Breast**: I usually go for boneless, skinless chicken breasts because they yield tender, juicy bites. You can use chicken thighs if you prefer dark meat; it’s all about what you like! Honestly, if you’ve got leftovers lying around, shred them up and use them here!
2. **Breadcrumbs**: I’m a huge fan of *panko breadcrumbs* because they give that extra crunch we all crave, but any breadcrumbs you have on hand will work just fine. I once used crushed up crackers when I didn’t have any breadcrumbs, and guess what? They tasted fantastic!
3. **Oil**: This is where it gets interesting. I typically use canola or vegetable oil for frying because they have a high smoke point, but olive oil can be a beautiful twist for the flavor if you’re baking them. Just remember, no one’s judging! Use what’s in your pantry.
### Is 3 Ingredients Easy Chicken Tenders Actually Good for You?
Now let’s get real for a moment. These chicken tenders are not exactly health food, especially if you’re frying them in oil. But here’s the thing: it’s all about balance. You can easily bake these bad boys to make them a bit healthier—trust me, they still taste awesome!
Plus, there’s something so special about cooking at home. You know exactly what’s going into your food, and that’s a huge win in my book. Honestly, you might even feel a bit like a nutritionist by loading them up with some veggies on the side. Air-fried or baked, a plate of chicken tenders paired with a massive salad packs a powerful punch.
### Here’s What You’ll Need
– 1 lb **boneless, skinless chicken breasts**
– 1 cup **breadcrumbs** (panko, regular, or crushed crackers)
– 1/2 cup **oil** (for frying, or a little less for baking)
### How to Make 3 Ingredients Easy Chicken Tenders Step-by-Step
Okay, now it’s time to get those hands dirty! This part is fun (and a little messy), so let’s dive right into the cooking.
1. **Preheat your oil**: If you’re frying, grab a large skillet, pour in the oil, and heat it over medium heat. You want it hot but not smoking—think hot bath, not sauna.
2. **Prep the chicken**: While the oil is heating, slice your chicken breasts into strips. Sometimes I use my trusty kitchen shears—seriously, they’re amazing for cutting meat and I’d recommend trying them out. Aim for strips about an inch wide; they don’t have to be perfect because, really, who’s measuring?
3. **Coat the chicken**: Pour your breadcrumbs into a shallow dish or a plate. Dip each chicken strip into the breadcrumbs, making sure to coat it evenly. I usually do a little pat and shake action to get those crumbs to stick. If you want to get fancy, you can even toss in some spices or grated cheese into the breadcrumbs for an extra kick!
4. **Fry away**: Once your chicken is well coated and your oil is shimmering, add the strips to the skillet. Be careful not to crowd them—give them some space to breathe and get that crispy coat. Fry for about 3–4 minutes on each side. I always hover around the stove, flipping them over cautiously. You’ll know they’re ready when they turn that lovely golden brown color!
5. **Drain**: Remove the tenders from the oil and place them on a plate lined with paper towels. This helps soak up that excess grease, so they’re not swimming in oil by the time they reach your plate.
6. **Bake if you prefer**: If you’re opting for the healthier route, preheat your oven to 400°F (200°C). Place your coated chicken strips on a baking sheet lined with parchment paper and lightly spray them with oil. Bake for about 15–20 minutes, flipping halfway through, until golden and cooked through. Bonus: you don’t have to hover over the stove!
### Little Extras I’ve Learned Along the Way
Alright, now I have to share some secrets I’ve learned during this culinary adventure. You know those moments when you take a risk and it pays off? Here’s a few tips to get your tenders just right:
– **Marinate for extra flavor**: Sometimes, when I want to elevate my game, I’ll marinate the chicken in some buttermilk or yogurt ahead of time. Not only does it add flavor, but it keeps the meat tender, which is like hitting the jackpot for your taste buds!
– **Spice it up**: On days when I’m feeling adventurous, I’ll mix in some garlic powder, paprika, or even a splash of hot sauce to the breadcrumbs. It turns the flavor game up to eleven, and trust me, the adults in the house will love it.
– **Dipping sauce is key**: Honestly, what’s chicken tenders without a good dipping sauce? I’ve always got a bottle of honey mustard handy, but BBQ sauce, ranch, or even sriracha works too. Don’t be shy with the dipping!
– **Baking sheet magic**: If you want to experiment with spices and toppings, try a baking sheet with a good non-stick spray. It holds everything in place and makes flipping easy without a mess.
– **Kid-friendly? Heck yeah!**: I can’t tell you how many times these chicken tenders have saved me during dinner calamities with my kiddos. This recipe is a guaranteed win that even picky eaters love. Mix in some fun shapes using cookie cutters for a little extra pizzazz!
To wrap this all up, these chicken tenders aren’t just about satisfying hunger; they’re about creating memories. They remind me of laughter-filled gatherings, late-night munchies, and even post-work meals when I just need something comforting (and maybe a glass of wine).
This one means a lot to me. It’s simple, easy, and lets you have a hand in creating something delicious, all while enjoying a little bit of home. If you try this recipe, let me know how yours turn out! I’d love to hear your twists and how you make them your own. And who knows, maybe we can swap tips one day over a cozy meal. Happy cooking!