Prep time: 20 minutes
Cook time: 15 minutes
Total time: 35 minutes
Servings: 4
Have you ever craved a dish that combines comfort with flavor and is still easy to whip up? Picture this: gooey, melted cheese enveloping tender chicken, all wrapped neatly in a soft tortilla. That’s exactly what you will get with these Cheesy Chicken Wraps. This recipe makes me nostalgic for cozy family dinners where everyone gathers around the table to share stories, laughter, and delicious food.
What makes these wraps truly special is not just their hearty flavor but also their versatility. You can customize them to fit your dietary preferences, making them suitable for the entire family. In this article, you will not only learn the step-by-step process to create these delicious wraps but also tips, variations, and answers to common questions that will help elevate your cooking game.
What Is What Makes These Cheesy Chicken Wraps Taste So Good?
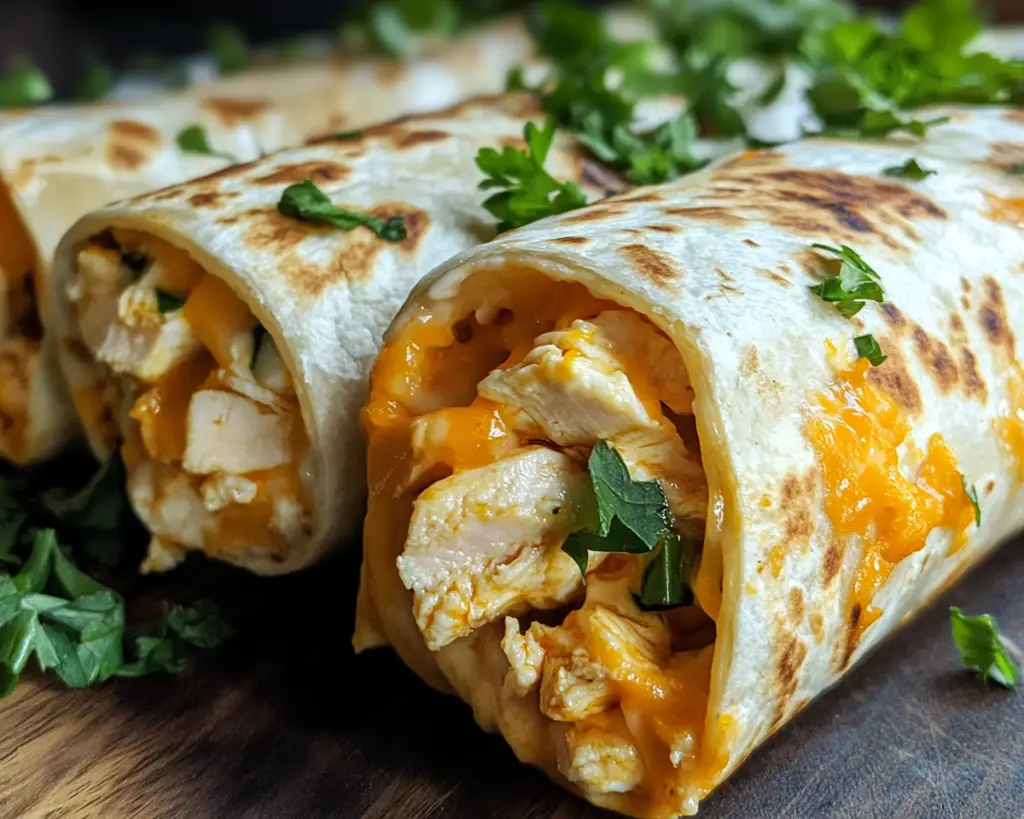
Cheesy Chicken Wraps are a delightful culinary invention that blends convenience with taste. Originating from simple, budget-friendly meals, they have gained popularity for their ability to satisfy diverse palates. The primary ingredients include juicy chicken breast, a medley of cheeses, and fresh vegetables, all rolled together in a tortilla, creating a harmonious blend of flavors. As you bite into these wraps, the first thing you notice is the satisfying crunch of the toasted tortilla, followed by the melty, savory notes of cheese. The chicken adds a hearty texture while fresh vegetables contribute a crispness that balances the richness.
One of the secrets to making these wraps taste phenomenal lies in the *seasoning*. By enhancing the chicken with spices and herbs, every bite bursts with flavor. The wraps can also be customized further with various dips and sauces, such as creamy ranch or zesty salsa, elevating the overall experience. Whether you are serving these as a quick weeknight dinner or a fun lunch option for the kids, the combination of cheese and chicken, wrapped in a tortilla, never fails to impress.
Why You’ll Love This
You’ll fall in love with these Cheesy Chicken Wraps for several compelling reasons. First and foremost, they are incredibly *tasty*. The combination of melted cheese with tender chicken creates a flavor explosion in every bite. Furthermore, this recipe is *easy to prepare*, making it perfect for busy parents or beginner cooks looking for a straightforward yet impressive dish.
Another advantage is its *cost-effectiveness*. Using pantry staples and fresh ingredients, this dish doesn’t break the bank while still delivering that “wow” factor. Plus, due to its versatility, you can adapt it for various dietary preferences, such as being gluten-free or dairy-free, with minor tweaks. These wraps are not only a crowd-pleaser but also a canvas for creativity in the kitchen.
Many people believe that making gourmet meals requires extensive cooking skills or time, but that’s a misconception. These wraps can be prepared in under 40 minutes, making them perfect for weeknight meals. The best part is that you can use leftover chicken or even rotisserie chicken, which saves time and reduces waste.
Ingredients You’ll Need
To create these mouthwatering Cheesy Chicken Wraps, you will need the following ingredients:
- Chicken breast: About 1 pound, boneless and skinless. This is the main protein source. You can substitute with cooked shredded chicken or turkey for shortcuts.
- Tortillas: 4 large flour or whole wheat tortillas. Whole wheat tortillas add extra fiber, making the dish healthier.
- Cheese: 1 cup of shredded cheese (cheddar and mozzarella work best). Feel free to mix it up with pepper jack or feta based on your preference.
- Bell peppers: 1 cup, chopped. They add a nice crunch and sweetness, complementing the cheese.
- Onion: 1 medium onion, diced. Use red or yellow onions for a slightly different flavor.
- Garlic: 2 cloves, minced. This enhances the flavor profile significantly.
- Cumin: 1 teaspoon. An excellent addition for warmth and depth.
- Salt and pepper: to taste. Essential for bringing out the flavors of the dish.
- Cooking oil: 1 tablespoon olive or vegetable oil. This will help in browning the chicken.
When preparing these ingredients, make sure to chop the vegetables into small pieces for even cooking. This can save you time and ensure every bite is packed with flavor. Always taste as you go; it’s a simple way to ensure optimal seasoning for your preferences.
How to Make
Now, let’s dive into the step-by-step instructions to create these delicious Cheesy Chicken Wraps:
- Prepare the Chicken: Start by dicing your chicken breast into small, bite-sized pieces. This cut will help it cook quickly and evenly. Season the pieces with salt, pepper, and cumin to enhance the flavor. You can also marinate the chicken in a bit of lime juice for added zest.
- Cook the Chicken: Heat a large skillet over medium-high heat and add the cooking oil. Once the oil is hot, add the chicken pieces in a single layer. Cook for about 6-8 minutes, stirring occasionally, until the chicken is fully cooked and no longer pink. Ensure that your skillet is spacious enough to avoid steaming the chicken.
- Add Vegetables: Once the chicken is cooked, add the diced onion, bell peppers, and minced garlic to the skillet. Stir everything together and cook for an additional 3-4 minutes, until the vegetables are tender and fragrant. This adds a lovely aroma to the dish and also infuses the chicken with extra flavor.
- Prepare the Tortillas: While the chicken and vegetables are cooking, take the tortillas and warm them in a separate skillet or microwave, just until they are soft and pliable. Warming them makes them easier to roll without tearing.
- Assemble the Wraps: Place a warm tortilla on a flat surface. Spoon about ¼ of the chicken and vegetable mixture in the center of the tortilla. Top it generously with shredded cheese. You can customize the cheese based on what you have; mozzarella adds creaminess, while cheddar gives a sharp kick.
- Wrap Them Up: Fold in the sides of the tortilla and then roll it up from the bottom, tucking it in snugly as you go. Ensure that the filling doesn’t spill out. You want to create a firm, secure wrap so everything stays intact while cooking.
- Toast the Wraps: Place the assembled wraps seam-side down in the skillet over medium heat. Cook for about 2-3 minutes on each side until they turn golden brown and crispy. If you like an extra cheesy touch, you can sprinkle cheese on top of the wraps while they are toasting.
- Serve: Once golden, remove the wraps from the skillet and let them cool for a minute. Slice them in half diagonally and serve warm with your choice of dips like guacamole, salsa, or a creamy ranch dressing. The melted cheese is best enjoyed while hot!
Cooking these Cheesy Chicken Wraps involves not only a combination of flavors but also various textures. The crispy tortilla exterior contrasts beautifully with the warm, gooey interior, creating an experience that is both satisfying and savory.
Variations & Substitutions
Vegetarian Option: For a vegetarian twist, consider replacing the chicken with grilled vegetables such as zucchini, mushrooms, and eggplant. You can also add a protein-rich ingredient like black beans or chickpeas. This variation increases the fiber content while offering a hearty texture, making it appealing to vegetarians and meat-eaters alike.
Spicy Kick: If you prefer a little heat, include sliced jalapeños or give the wraps a spicy twist with hot sauce. You can also opt for pepper jack cheese instead of the regular mozzarella or cheddar. This variation is great for those who enjoy bold flavors, and it pairs well with a cooling avocado dip.
Buffalo Style: Turn your wrap into Buffalo Chicken Wraps by tossing the chicken with Buffalo sauce. Add a bit of blue cheese, crispy celery, and carrots as fillings for added flavor and crunch. This is a terrific option for game day or any casual gathering with friends.
Gluten-Free Option: To make these wraps gluten-free, switch out the flour tortillas for corn tortillas or gluten-free options available at most grocery stores. Ensure that all other ingredients, including the cheese, comply with gluten-free standards. This allows those with gluten sensitivities to enjoy the dish without compromising taste.
Each of these variations allows for a thoughtful adjustment to the Cheesy Chicken Wraps based on dietary preferences, ensuring that everyone can indulge in this dish happily.
Common Mistakes to Avoid
While preparing Cheesy Chicken Wraps may seem straightforward, there are a few *common mistakes* to watch out for.
One major pitfall is overcooking the chicken; being vigilant during the cooking process is crucial. If you cook it longer than necessary, it may become dry and chewy. Always check for doneness by cutting into a piece to ensure there’s no pink inside.
Another issue is overstuffing the wraps. It’s tempting to load the ingredients high, but this can lead to bursting tortillas. Aim for a balanced amount of chicken, cheese, and vegetables to ensure they wrap elegantly without spilling.
Lastly, be careful with the heat while toasting the wraps. A too-high temperature can burn the tortillas before the cheese melts. A medium heat setting allows for an even browning and helps meld the flavors together without ruining the texture.
Storage, Freezing & Reheating Tips
To properly store leftovers, allow the wraps to cool completely before placing them in an airtight container. They can be refrigerated for up to 3 days. For longer storage, consider freezing the wraps. Wrap each one in plastic wrap and place them in a freezer-safe bag or container. They can be frozen for up to 3 months without losing much quality.
When reheating, the microwave is an option for a quick fix but may lead to soggy wraps. Instead, consider using an air fryer or an oven. For the oven, preheat to 350°F (175°C) and place the wraps on a baking sheet until they are heated through, typically around 15-20 minutes. If using an air fryer, set it to 350°F (175°C) for 5-7 minutes for a crisp exterior.
When reheating frozen wraps, it’s best to thaw them in the refrigerator overnight before following the reheating instructions. This ensures even heating while maintaining quality.
Frequently Asked Questions
Can I make Cheesy Chicken Wraps ahead of time?
Absolutely! You can prep the filling in advance and assemble the wraps just before cooking. However, I recommend making them right before serving for the best flavor and texture. If you prefer, you can also prepare and freeze them, as mentioned earlier.
What can I serve with Cheesy Chicken Wraps?
These wraps pair wonderfully with various dips and sides. You could serve them with salsa, guacamole, or a side salad. Adding chips or a simple vegetable platter makes for a well-rounded meal that everyone will love.
How can I adapt this recipe to be dairy-free?
You can use dairy-free cheese or leave out the cheese entirely, opting for a flavorful avocado spread or hummus as a substitute. Choosing nutritional yeast as a sprinkle adds a cheesy flavor without the dairy.
Is this recipe kid-friendly?
Definitely! Kids generally love the cheesy goodness tucked inside a tortilla. It’s also a great way to sneak veggies into their meals. Encourage them to choose their favorite fillings, letting them personalize their wraps and create a fun cooking experience.
What should I do with leftover chicken?
If you have leftover chicken, it’s perfect for this recipe. Shredded or diced leftover chicken from a previous meal can easily be used, making this dish a go-to option for efficient meal prep and reducing food waste.
Conclusion:
These Cheesy Chicken Wraps are not only a simple and delightful dish but also a versatile canvas for various flavors and ingredients. Whether you’re making these for a busy weeknight dinner or for a fun gathering, they are guaranteed to please any crowd. I encourage you to try this recipe, customize it to your liking, and share it with friends and loved ones. Dive into the flavors, indulge in the textures, and make culinary memories that will last a lifetime. So, roll up your sleeves, gather your ingredients, and let the delicious rolling begin!


