Prep time: 20 minutes
Cook time: 30 minutes
Total time: 50 minutes
Servings: 12 servings
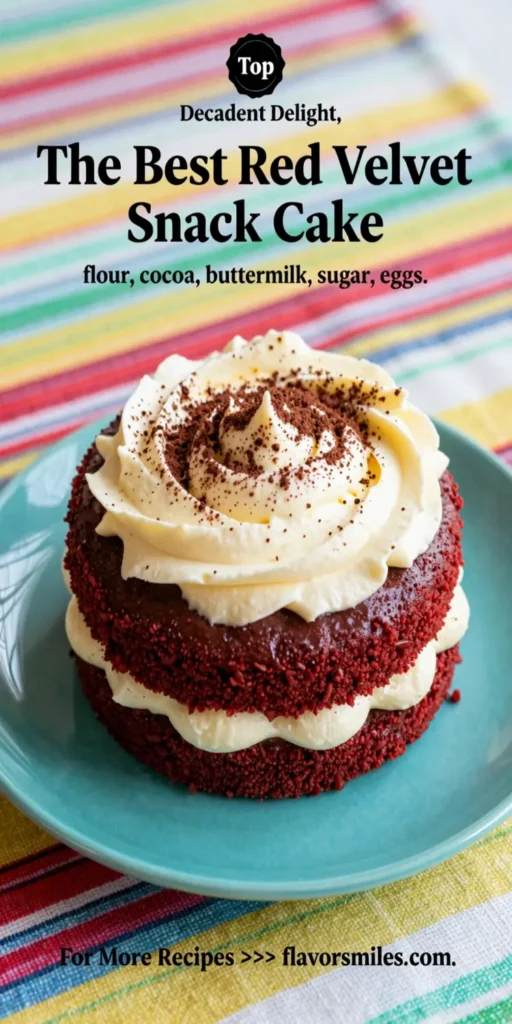
The Best Red Velvet Snack Cake is a delightful twist on the traditional red velvet cake, perfect for sharing with family and friends or enjoying as a sweet treat any time of day. This cake is incredibly moist, flavorful, and topped with a luscious cream cheese frosting, making it a crowd favorite at any gathering.
What Is The Best Red Velvet Snack Cake?
The Best Red Velvet Snack Cake is a simplified version of the classic red velvet cake but in a more casual, approachable form. It combines the iconic red hue and subtle cocoa flavor that make red velvet so beloved, but it’s designed for easy enjoyment. This snackable cake is perfect for potlucks, birthday parties, or simply as an afternoon pick-me-up. You can easily cut it into squares or strips, making it an excellent choice for serving to a group.
Why You’ll Love This
There are numerous reasons to fall in love with this Red Velvet Snack Cake. First and foremost is its unique flavor combination of light chocolate notes with a hint of buttermilk tang. The cakes have a moist texture and a vibrant red color that is visually appealing. The cream cheese frosting adds a rich contrast that elevates the cake, creating a perfect balance of sweetness and tartness. Plus, it’s incredibly simple to make, which is perfect whether you’re a busy parent juggling work and family, a kitchen beginner, or someone prepping snacks for the week. This cake is both delicious and easy on the pocket, making it a wise and delightful choice.
Ingredients You’ll Need
- 2 cups all-purpose flour: This provides the base for your cake, giving it the structure needed to maintain its shape while also being soft enough to enjoy.
- 1 ½ cups granulated sugar: This sweetens the cake and helps create that perfectly moist texture.
- 1 teaspoon baking soda: This is your leavening agent, crucial for the cake to rise and become fluffy.
- 1 teaspoon baking powder: Another leavening agent that provides a light crumb and enhances the cake’s rise.
- ½ teaspoon salt: Enhances all the flavors in the cake and balances the sweetness.
- 1 teaspoon cocoa powder: Just a hint is needed for that chocolate flavor without overpowering the classic taste of red velvet.
- 1 cup vegetable oil: Keeps the cake incredibly moist; feel free to swap with melted butter for a richer flavor.
- 1 cup buttermilk: This ingredient adds tenderness and a subtle tartness that defines red velvet cake.
- 2 large eggs: Provide structure and richness to the cake.
- 1 tablespoon red food coloring: The signature ingredient that provides that iconic red hue.
- 1 teaspoon vanilla extract: Enhances the overall flavor of the cake.

How to Make
- Preheat your oven to 350°F (175°C). Grease and flour a 9×13 inch baking pan. This ensures that your cake doesn’t stick and comes out perfectly.
- In a large mixing bowl, whisk together the all-purpose flour, sugar, baking soda, baking powder, salt, and cocoa powder until combined. This is important for getting even distribution of all dry ingredients.
- In another bowl, mix the vegetable oil, buttermilk, eggs, red food coloring, and vanilla extract. This step awakens these ingredients and makes sure they blend well before joining forces with the dry ingredients.
- Pour the wet ingredients into the dry ingredients. Mix until just combined, being careful not to overmix. A few lumps are okay; they will bake out. Overmixing can lead to a dense cake.
- Pour the batter into the prepared baking pan. Smooth the top with a spatula for an even bake. Bake in the preheated oven for about 30 minutes, or until a toothpick poked in the center comes out clean. While baking, enjoy the fragrant aroma drifting through your kitchen!
- Once baked, let the cake cool in the pan for 10 minutes before transferring it to a wire rack to cool completely. This cooling step is crucial before frosting the cake.
- While the cake cools, prepare the cream cheese frosting. Beat softened cream cheese with butter and vanilla until fluffy. Gradually add powdered sugar until well incorporated. This creates a perfect creamy texture that complements the cake beautifully.
- Once cooled, frost the cooled cake evenly with the cream cheese frosting. Now your cake is ready to slice into squares and serve!
Variations & Substitutions
Red Velvet Cupcakes: For a fun twist, transform this snack cake into cupcakes. Use the same batter and pour it into cupcake liners instead of a baking pan. Bake for 20-25 minutes and top with your cream cheese frosting. Perfect for portion control or for kid’s parties!
Gluten-Free Red Velvet Snack Cake: If you or someone you know is gluten intolerant, substitute all-purpose flour with a 1:1 gluten-free flour blend. This ensures that everyone can enjoy the delicious flavors without any gluten concerns.
Chocolate Chip Red Velvet Cake: Add ½ cup of mini chocolate chips to the batter for extra pockets of chocolatey goodness. This option is sure to satisfy any chocolate lover!
Vegan Red Velvet Snack Cake: To make this cake vegan, replace eggs with flax eggs (1 tablespoon of flaxseed meal mixed with 2.5 tablespoons of water per egg), use a plant-based milk for the buttermilk, and substitute oil instead of butter in the frosting. This variation is as delightful while catering to plant-based diets.
Common Mistakes to Avoid
One common mistake is not measuring ingredients accurately. Use proper measuring cups and spoons to ensure your cake has the right consistency. Too much or too little of a key ingredient like flour or sugar can affect the end product.
Another mistake is overbaking. Keep an eye on the cake as it approaches the 30-minute mark. Every oven is different, and this cake can go from perfectly done to dry quickly!
Lastly, be careful not to skip the cooling time before frosting. If you frost the cake while it’s still warm, the frosting can melt and slide off, ruining the beautiful look you’re going for.
Storage, Freezing & Reheating Tips
To store the Red Velvet Snack Cake, cover it tightly with plastic wrap or aluminum foil to keep it fresh. It can be kept at room temperature for about 1–2 days. If you wish to store it longer, placing it in the refrigerator is advisable, where it will keep well for up to a week.
For longer storage, this cake can be frozen. Wrap pieces of the cake tightly in plastic wrap and then place them in an airtight container. It can be frozen for up to three months. To thaw, transfer the cake to the refrigerator overnight.
When it’s time to enjoy again, bring it back to room temperature or warm it gently in the microwave for a few seconds to soften.
Frequently Asked Questions
Can I use regular milk instead of buttermilk?
Absolutely! If you don’t have buttermilk on hand, there is a quick substitute. Combine 1 cup of regular milk with 1 tablespoon of white vinegar or lemon juice, let it sit for 5–10 minutes, and you’ll have an effective buttermilk substitute.
Is it necessary to use food coloring?
While the classic red velvet cake does rely on red food coloring for its distinctive look, it is not strictly necessary. If you prefer to avoid food dyes, you can omit the coloring entirely. The cake will still taste fantastic, just without the vibrant hue.
Can I make this cake ahead of time?
Yes, you can make the cake a day or two in advance. Just ensure you wrap it in foil or plastic wrap after it cools completely to keep it fresh. You can frost it just before serving for the best look and taste.
How should I store leftover cake?
To keep the cake fresh, store leftovers in an airtight container at room temperature for a couple of days. If you’re not eating it within that timeframe, it’s best to refrigerate or freeze the cake as noted previously.
What if I cannot find cake flour?
You can make your own cake flour by combining all-purpose flour with cornstarch. For every cup of all-purpose flour, remove 2 tablespoons of flour and replace it with 2 tablespoons of cornstarch. This will give you a lighter flour that mimics the properties of cake flour.
Conclusion: Embrace the fun and flavor of The Best Red Velvet Snack Cake! Whether you’re serving it at a party, enjoying it as an afternoon treat, or using it to impress guests, this cake is bound to be a hit. Its moist texture, delightful flavor, and perfect frosting will keep your friends and family coming back for more, creating lasting memories around the table. Enjoy making this cake and bring a smile to everyone’s face!