Prep time: 20 minutes
Cook time: 30 minutes
Total time: 50 minutes
Servings: 16 brownies
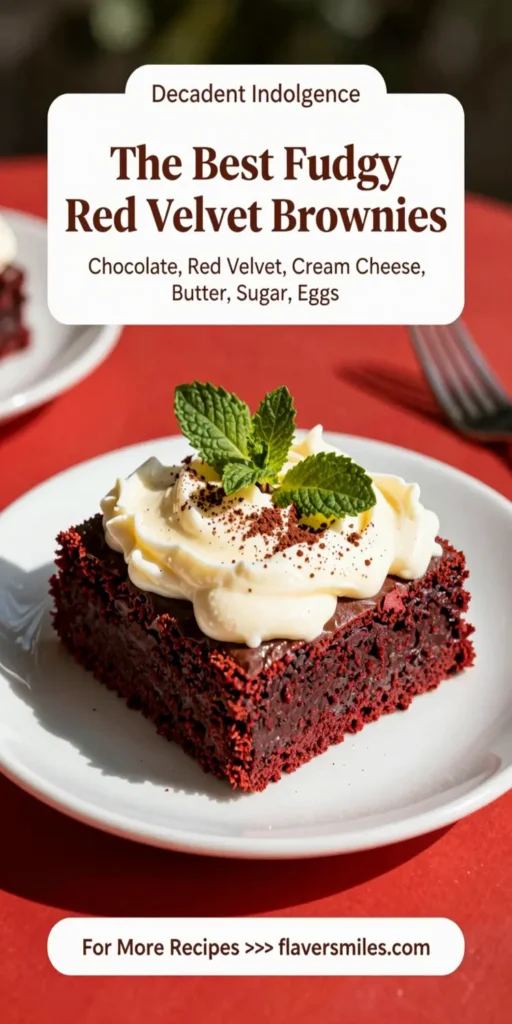
Are you ready to indulge in a rich, decadent chocolate experience? The Best Fudgy Red Velvet Brownies will transform your dessert game. With their luxuriously moist texture and stunning reddish hue, these brownies are sure to impress your family and friends at any gathering or special occasion.
What Is The Best Fudgy Red Velvet Brownies?
Fudgy Red Velvet Brownies are a delightful cross between classic brownies and the iconic red velvet cake. Made with cocoa powder and a hint of buttermilk, these brownies carry all the characteristics of their cake counterpart—richness, color, and a hint of tanginess—without the need for complicated frosting and layers. The unique red hue comes from a mixture of cocoa and red food coloring, making them visually stunning and a feast for the eyes as much as for the palate.
Why You’ll Love This
One of the best things about these brownies is their **unforgettable flavor**. The combination of rich chocolate and subtle vanilla notes makes each bite a delightful journey. They are perfect for various occasions, whether you are hosting a birthday party, celebrating a holiday, or enjoying a cozy movie night with loved ones. Not only do they taste amazing, but they come together quickly and easily, making them ideal for **busy parents** or **kitchen beginners** who want to create an impressive dessert without spending hours in the kitchen.
Additionally, these brownies are a great way to impress guests without breaking the bank. The ingredients are simple and budget-friendly, yet the result feels gourmet. With their expansive appeal, these brownies can even become your go-to treat for **meal prep** or **healthy eating** celebrations—just control the portion size!
Ingredients You’ll Need
- 1 cup (2 sticks) unsalted butter, melted: This provides richness and moisture, crucial for achieving that fudgy texture.
- 1 cup granulated sugar: The main sweetener that balances the cocoa’s bitterness.
- 1 cup brown sugar: Adds depth of flavor and helps keep the brownies moist.
- 4 large eggs: These act as binders, giving structure to the brownies while adding richness.
- 2 teaspoons vanilla extract: Enhances flavor and adds an aromatic quality to the brownies.
- 1 ½ cups all-purpose flour: Provides structure while still allowing the brownies to be soft and fudgy.
- ¾ cup unsweetened cocoa powder: Gives the brownies their chocolate flavor, mixing beautifully with the red hue.
- 1 teaspoon baking soda: Helps the brownies rise and achieve a light texture.
- ½ teaspoon salt: Enhances the other flavors, emphasizing the richness of the chocolate.
- 2 tablespoons red food coloring: The signature ingredient that gives these brownies their stunning color.
- Optional: 1 cup chocolate chips: For an extra hit of chocolate and texture; these are entirely up to your preference!
How to Make
- Preheat your oven to 350°F (175°C). Line a 9×13 inch baking pan with parchment paper, allowing some overhang for easy removal later. This will ensure an easy cleanup and make removing the brownies effortless.
- In a medium bowl, combine the melted unsalted butter, granulated sugar, and brown sugar. Whisk until the mixture is smooth and well-blended. The heat from the melted butter will help dissolve the sugars, assisting in creating a fudgier texture.
- Add in the eggs, one at a time, whisking after each addition. Follow this by mixing in the vanilla extract. Keep whisking the mixture until everything is combined and smooth. You want to incorporate a bit of air but not too much—just enough to heighten the fudginess.
- In a separate bowl, whisk together the all-purpose flour, cocoa powder, baking soda, and salt. Slowly add these dry ingredients to the wet mixture, mixing gently until fully incorporated. The batter will be thick; don’t overmix, or your brownies may turn out tough.
- Add the red food coloring into the batter, stirring well to achieve an even hue. Be careful with the amount; start with less and gradually add more until you reach your desired shade. If you are using chocolate chips, fold them in at this stage.
- Spread the batter evenly into the prepared baking pan. Use a spatula to ensure an even layer across the pan. Then, smooth the top for a beautiful finish when baked.
- Bake in the preheated oven for 25-30 minutes. You’ll know they’re done when the edges are set, but the center remains slightly soft. A toothpick inserted into the center should have a few moist crumbs attached but should not be wet. This is key to achieve that fudgy texture.
- Remove from the oven and let the brownies cool in the pan for about 10 minutes. Then, lift them out using the parchment overhang and place them on a wire rack to cool completely before cutting into squares.
Variations & Substitutions
Nutty Red Velvet Brownies: If you enjoy a bit of crunch in your desserts, consider adding chopped nuts such as walnuts or pecans. Simply fold in about ¾ cup of your preferred nuts along with the chocolate chips. This will add a delightful contrast in texture to the fudgy interior.
Cheesecake Swirl Red Velvet Brownies: For a tangy twist, prepare a simple cheesecake mixture using 8 oz of cream cheese, 1 egg, ½ cup granulated sugar, and 1 tablespoon of vanilla extract. Pour half of the brownie batter into the pan, add dollops of the cheesecake mixture, then pour the remaining brownie batter on top. Use a knife to swirl the mixtures together before baking.
Gluten-Free Red Velvet Brownies: If you need a gluten-free option, simply substitute all-purpose flour with a 1:1 gluten-free baking blend. Ensure that all other ingredients, especially baking powder and chocolate chips, are also gluten-free.
Dark Chocolate Red Velvet Brownies: For a more intense chocolate flavor, replace the unsweetened cocoa powder with dark cocoa powder. This will yield a more complex flavor profile, perfect for chocolate lovers.
Less Sweet Version: If you prefer less sweetness, you can reduce both sugars by ¼ cup each without compromising too much on the texture. Just be prepared for a slightly less sweet experience.
Common Mistakes to Avoid
Overmixing the Batter: This can lead to tough brownies. Be careful to mix just until the ingredients are combined to maintain the fudgy texture.
Not Measuring Ingredients Properly: Accurate measuring is critical in baking. Use a scale or the spoon-and-level technique to ensure you have the right quantities, particularly for the flour, which can easily become packed down.
Overbaking: Keep an eye on your brownies as they bake. Remove them from the oven when they are slightly underbaked in the center, as they will continue to firm up while cooling.
Storage, Freezing & Reheating Tips
These brownies store wonderfully! After they cool completely, you can place them in an airtight container at room temperature for up to 3 days. If you want to keep them longer, consider freezing them. To freeze, wrap individual brownies in plastic wrap, then in aluminum foil; they can be kept frozen for up to 3 months.
When you are ready to enjoy them again, thaw them in the refrigerator overnight, or for a warm treat, reheat individual brownies in the microwave for about 15-20 seconds.
Frequently Asked Questions
Can I make these brownies without cocoa powder?
No, cocoa powder is essential for the chocolate flavor and texture in these brownies. If you want a chocolate-free version, consider making a white chocolate brownie instead.
What type of food coloring is best?
Gel food coloring works best for intense color without altering the brownie’s consistency. Avoid liquid coloring as it can add additional moisture.
How do I know when my brownies are done?
Check for a slightly set edge and a soft center. A toothpick should come out with a few moist crumbs attached, indicating that the brownies are fudgy and moist.
Can I use coconut oil instead of butter?
Yes, you can substitute melted coconut oil for the butter if you prefer a dairy-free option. This will also add a subtle coconut flavor to the brownies.
How can I make these brownies more festive?
To elevate your brownies for special occasions, consider adding colorful sprinkles on top before baking or drizzling melted white chocolate over the squares once cooled for a beautiful finish.
Conclusion: These Best Fudgy Red Velvet Brownies are not just a dessert; they’re an experience waiting to happen! With their rich texture, stunning color, and chocolatey goodness, they are bound to be your new favorite. Regardless of the occasion, these brownies will surely steal the show, leaving everyone craving more. Happy baking!