Prep time: 30 minutes
Cook time: 40 minutes
Total time: 1 hour 10 minutes
Servings: 12
Indulging in a slice of homemade Strawberry Vanilla Layer Cake is like a ticket to a delightful picnic in the sunny outdoors. This cake is not just a dessert; it is a celebration of flavors, textures, and memories. Imagine biting into layers of fluffy vanilla cake intertwined with vibrant, juicy strawberries and rich vanilla frosting. The aroma of freshly baked cake and sweet strawberries dancing in the air makes it an irresistible treat.
This recipe brings together the simplicity of vanilla cake and the freshness of strawberries, making it perfect for any occasion, be it birthdays, family gatherings, or a cozy evening at home. You will learn how to create this delightful dessert from scratch, including tips for perfect layers, frosting techniques, and how to adapt the recipe to your dietary needs.
What Is Strawberry Vanilla Layer Cake?
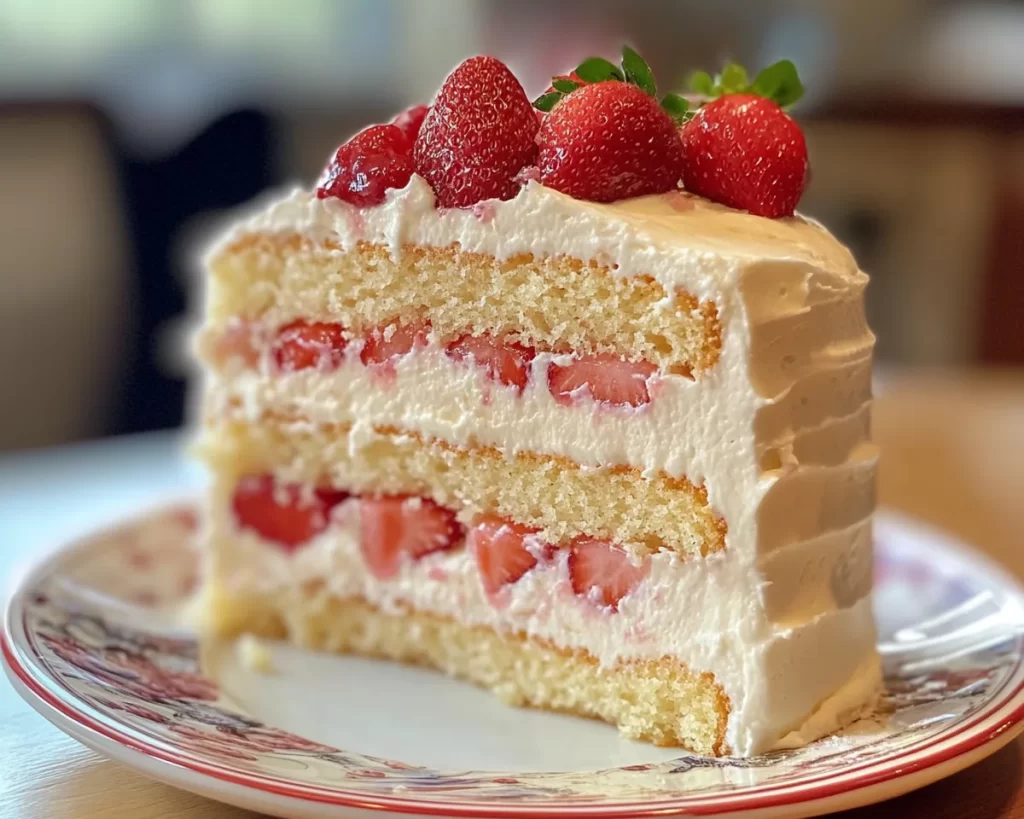
Strawberry Vanilla Layer Cake is a classic dessert that combines the lightness of vanilla sponge cake with the luscious sweetness of strawberries. Originating from traditional baking practices, this cake has become a staple in many households. The magic lies in the balance between the delicate sponge and the fruity filling, resulting in a harmonious blend of flavors that pleases the palate.
The cake layers are typically fluffy and moist, providing the perfect canvas for the vibrant strawberry filling. This is where you can truly explore the essence of the strawberries—fresh, sweet, and slightly tart. The frosting, made from creamy vanilla, enhances the cake’s flavor while adding richness. As you slice into this cake, the contrast between the soft layers and the juicy fruit creates a delightful experience.
For those who are passionate about baking, this cake represents both challenge and joy. Mastering the layering technique can elevate your baking skills, and exploring variations or substitutions allows for creativity in the kitchen. Whether you use store-bought or fresh strawberries, the final outcome remains a show-stopping dessert that is sure to impress.
Why You’ll Love This
You will absolutely love this Strawberry Vanilla Layer Cake for several reasons. First and foremost, the taste is simply sensational. The light and fluffy vanilla cake serves as the perfect backdrop for the sweet, jewel-like strawberries. As you take a bite, the combination of flavors bursts in your mouth, creating a delightful experience. Furthermore, the recipe is quite easy to follow, making it accessible for both seasoned bakers and beginners in the kitchen.
This cake is not only an indulgence; it can also be a healthier dessert option. You can use fresh strawberries, minimizing the need for excess sugar while maximizing flavor. Additionally, the ingredients are typically budget-friendly, proving that you don’t need to break the bank to create something exquisite. Lastly, this cake is highly versatile. You can serve it at various occasions, from formal birthday parties to casual family dinners. You could even customize it to different taste preferences, such as incorporating chocolate or vanilla bean.
One common misconception is that layer cakes are complicated and time-consuming. In fact, with a little organization in your kitchen, you’ll find that it is quite straightforward. The most important part is to be patient as each layer and step comes together, leading to a beautifully crafted dessert that will wow your family and friends.
Ingredients You’ll Need
To make Strawberry Vanilla Layer Cake, you will need the following ingredients:
- 2 cups all-purpose flour: This is the primary structure for your cake. Always measure your flour correctly by spooning it into the measuring cup and leveling it off.
- 1 ½ cups granulated sugar: This not only sweetens the cake but also helps to create a tender crumb.
- ½ cup unsalted butter, softened: Butter adds richness and flavor; use unsalted to control the saltiness of your batter.
- 1 cup whole milk: Milk adds moisture. If you prefer a lighter batter, opt for low-fat or even almond milk.
- 3 large eggs: Eggs act as a binding agent and contribute to the cake’s structure.
- 1 tablespoon baking powder: This is crucial for leavening your cake, helping it rise beautifully.
- 1 teaspoon vanilla extract: Use pure vanilla extract for the best flavor. It enriches the entire cake.
- 3 cups fresh strawberries, sliced: These are the star of the show, delivering fresh flavor and color.
- 1 cup heavy cream: For making the frosting, it adds a luscious texture.
- ½ cup powdered sugar: This sweetens the frosting without being too gritty, creating a smooth finish.
Each ingredient plays a vital role in ensuring your cake turns out perfectly. Consider substituting some ingredients based on availability and dietary needs. For example, if someone is lactose intolerant, there are dairy-free substitutes for the milk and butter that will work well.
How to Make
Creating your Strawberry Vanilla Layer Cake is a delightful journey. Follow these detailed steps:
- Preheat your oven: Start by preheating your oven to 350°F (175°C). This ensures that your cake bakes evenly. While the oven heats, prepare your pans. Grease and flour two 9-inch round cake pans to prevent sticking.
- Mix the dry ingredients: In a medium bowl, whisk together the all-purpose flour and baking powder. This step is essential; it ensures that the baking powder is evenly distributed throughout the flour, giving your cake a consistent rise.
- Cream the butter and sugar: In a large mixing bowl, cream the softened butter and granulated sugar together until light and fluffy, about 3-5 minutes using an electric mixer. This process is vital for incorporating air into the batter, leading to a light texture.
- Add the eggs and vanilla: Beat in the eggs one at a time, ensuring each is fully incorporated before adding the next. Then mix in the vanilla extract. The batter should be smooth and creamy.
- Alternate adding dry ingredients and milk: Gradually add in the flour mixture, alternating with the milk, starting and ending with the flour. Mix until just combined. Overmixing at this stage can lead to a dense cake, so mix just until there are no visible flour pockets.
- Pour the batter into prepared pans: Divide the batter evenly between the two prepared pans. Use a spatula to smooth the top, ensuring an even bake.
- Bake the cakes: Place the pans in the preheated oven and bake for 25-30 minutes, or until a toothpick inserted into the center comes out clean. Keep an eye on them as the baking time may vary with different ovens.
- Cool the cakes: Once baked, remove the pans from the oven and allow them to cool in the pans for about 10 minutes. Then, gently remove them from the pans and transfer them to a wire rack to cool completely. Cooling is essential before frosting!
- Prepare the frosting: In a mixing bowl, whisk together the heavy cream and powdered sugar until soft peaks form. If you prefer a thicker frosting, continue beating until stiff peaks form, being careful not to overmix it into butter.
- Assemble the cake: Place one layer of cake on a serving platter. Spread a generous amount of frosting on top, then add a layer of sliced strawberries. Place the second cake layer on top and frost the top and sides of the entire cake. Ensure that the strawberries are evenly distributed to provide tangy contrast to the sweet frosting.
- Chill and serve: Refrigerate the cake for at least 30 minutes to allow the frosting to set. This also brings the flavors together beautifully. Slice and serve, then enjoy every delicious bite!
Baking a cake from scratch is both fulfilling and enjoyable. As you embark on each step, enjoy the aromas and the anticipation building up. With a little patience and care, you’re bound to create a stunning cake.
Variations & Substitutions
Chocolate Strawberry Layer Cake: If you’re a chocolate lover, consider using chocolate cake instead of vanilla. You can achieve this by substituting half of the all-purpose flour with cocoa powder. The rich chocolate flavor will beautifully complement the strawberries, providing a decadent twist that chocolate enthusiasts will adore.
Dairy-Free Version: If you’re avoiding dairy, you can easily substitute all dairy ingredients with lactose-free or plant-based alternatives. Use almond milk or oat milk in your batter and replace the butter with coconut oil or a dairy-free buttery spread. This variation doesn’t sacrifice flavor, and it’s perfect for those on a non-dairy diet.
Gluten-Free Strawberry Vanilla Layer Cake: For a gluten-free option, swap the all-purpose flour with a 1:1 gluten-free baking flour blend. Be cautious to ensure that the baking powder used is gluten-free as well. The rest of the ingredients remain the same, allowing those with gluten sensitivities to indulge without concern.
Mixed Berry Layer Cake: Want to elevate it further? Mix in blueberries or raspberries along with or instead of the strawberries. This variation not only enhances the flavor profile but also adds a beautiful color contrast to the cake, making it visually enticing.
Each variation offers a unique take on the classic Strawberry Vanilla Layer Cake. Feel free to experiment and find your perfect version that aligns with your taste preferences or dietary needs.
Common Mistakes to Avoid
One common mistake when baking layer cakes is overmixing the batter. This can lead to a dense cake rather than a light and fluffy one. Ensure that you stop mixing as soon as the flour is incorporated. Another mistake is not allowing the cakes to cool adequately before frosting. If they are too warm, the frosting can melt and slide off, which does not look appealing and can create a mess.
Using the wrong cake pans is another pitfall. Always use the appropriate size pans to ensure even baking. If your pans are too small, the batter could overflow, and if they are too large, your cake may become flat. Also, avoid opening the oven door multiple times during baking; this can cause temperature fluctuations that may affect how your cake rises.
Finally, do not skip the chilling step after frosting. Allowing the cake to set in the refrigerator will help the frosting firm up and keep the layers intact when slicing. If you omit this step, you may end up with a messy cake that doesn’t maintain its structure.
Storage, Freezing & Reheating Tips
Proper storage of your Strawberry Vanilla Layer Cake is essential to keep it fresh. If you have leftover cake, store it in an airtight container at room temperature for up to two days. If you want to keep it longer, refrigerate it, where it can last for up to a week. Be sure to cover it with plastic wrap or a cake dome to prevent drying out.
For freezing, wrap the cake tightly in plastic wrap and aluminum foil before placing it in the freezer. This method prevents freezer burn and helps maintain its moisture. The cake can last up to three months in the freezer. When you’re ready to enjoy it, simply thaw it in the refrigerator overnight. It’s best not to refreeze the cake once thawed, as this can lead to a deterioration in quality.
Reheating should generally be avoided, as this dessert is best enjoyed at room temperature. However, if you prefer a warm slice, you can place a slice in the microwave for about 10-15 seconds, but be careful not to overdo it to retain the texture.
Frequently Asked Questions
Can I use frozen strawberries instead of fresh ones?
Yes, you can use frozen strawberries, although fresh ones are recommended for their flavor and texture. If using frozen, make sure to thaw them and drain excess liquid to prevent a soggy cake. If you choose frozen strawberries, the flavor may be slightly muted, but they will still contribute to a lovely layer.
How can I make the cake more visually appealing?
You can enhance the visual appeal of your Strawberry Vanilla Layer Cake by decorating it with whole strawberries on top or adding edible flowers. Additionally, you might consider using a piping bag to create swirls of frosting. Polishing the edges can also give it a refined finish.
Is it necessary to use vanilla extract in the frosting?
While vanilla extract adds depth to the frosting, it can be omitted if you prefer to keep it plain or wish to focus solely on the strawberry flavor. However, the subtle undertones of vanilla do complement the freshness of the strawberries beautifully.
Can this cake be made ahead of time?
Absolutely! This cake can be prepared a day in advance. Just make sure to store it properly in the refrigerator, and allow it to reach room temperature before serving. The flavors will even deepen overnight, making it even tastier.
What should I do if my cakes domed while baking?
It’s normal for cakes to dome slightly. To achieve a flat top, you can either trim off the dome with a serrated knife once the cakes have cooled or use a cake leveler tool designed for this purpose. Trimming gives you a flatter surface to work with when layering.
Conclusion:
In summary, the Strawberry Vanilla Layer Cake is a delightful dessert that stands out for its flavor, ease of preparation, and versatility. Whether you’re an experienced baker or just starting, this cake can be a fun and rewarding experience in the kitchen. I encourage you to try out this recipe, customize it to your liking, or even make it with your family and friends. Feel free to share your results and feedback. Happy baking!


