Prep time: 30 minutes
Cook time: 45 minutes
Total time: 1 hour 15 minutes
Servings: 12 servings
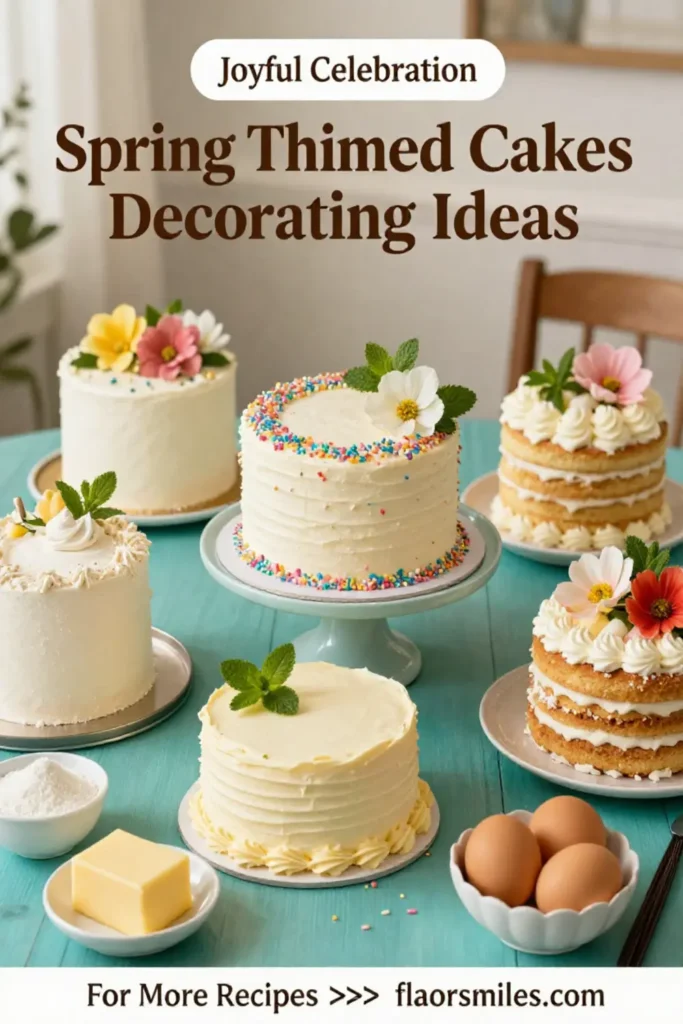
Spring is a wonderful season filled with vibrant colors, fresh blooms, and the promise of joyful celebrations. One perfect way to embody this season’s cheerful spirit is through delightful spring-themed cakes. Whether it’s a birthday, a baby shower, or simply a gathering with friends, these creatively decorated cakes can be the highlight of your event.
Cakes decorated with spring themes not only taste delicious, but they also offer a visual feast for the eyes – think floral patterns, pastel colors, and playful designs. If you’re looking to impress your guests with your baking and decorating skills, you’re in the right place. Let’s dive into how you can create stunning spring-themed cakes that will leave everyone in awe.
What Is Spring Themed Cakes Decorating Ideas for a Joyful Celebration?
Spring-themed cake decorating embraces the essence of the season, focusing on elements that celebrate renewal, nature, and vibrancy. Imagine floral motifs, delicate butterflies, and even pastel colors like soft pinks, yellows, and greens adorning your cake. This kind of decoration creates an inviting atmosphere, perfect for cozy gatherings, picnics, or festive occasions. Not limited to adults, spring-themed cakes are equally appealing to children, making them a versatile choice for any celebration.
Decorating cakes with a spring theme often involves using fresh flowers, edible glitter, and buttercream icing in shades inspired by the natural world. You can also incorporate seasonal flavors like lemon, strawberry, or lavender to make each bite resonate with spring. Whether you’re a baking novice or an experienced home baker, the decorating possibilities are endless, ensuring your cake is as delightful to look at as it is to eat.
Why You’ll Love This
There are so many reasons to get excited about spring-themed cake decorating! Firstly, it allows for **boundless creativity**. You can choose from various themes – whether it’s a **garden party** look with edible flowers, or a **picnic cake**, designed to mimic a classic picnic spread. Additionally, these themes are incredibly adaptable; you’ll find that you can modify them to suit various occasions, making them a valuable skill in any home baker’s repertoire.
Not only do these cakes look stunning, but they can also be a **joyful activity** to do with family or friends. Baking and decorating can create memorable moments, whether you’re working together on a baby shower cake or a family birthday treat. As you navigate through the steps, you’ll develop your baking and decorating skills, leading to a satisfying end result that you can proudly present.
Lastly, let’s be honest: everyone loves a beautifully decorated cake. The compliments and delighted faces of your guests will be well worth the effort, turning any gathering into a special occasion.
Ingredients You’ll Need
For a spring-themed cake, here’s a list of ingredients:
- Flour: 2 ½ cups – The base of your cake, providing structure and texture.
- Granulated sugar: 1 ½ cups – To add sweetness and improve the texture.
- Baking powder: 1 tablespoon – This helps the cake rise and become fluffy.
- Salt: ½ teaspoon – Enhances the flavor by balancing the sweetness.
- Unsalted butter: 1 cup (at room temperature) – Adds moisture and rich flavor.
- Eggs: 4 large – Provides structure and moisture.
- Vanilla extract: 2 teaspoons – For added flavor depth.
- Milk: 1 cup – Keeps the batter wet and adds richness.
- Food coloring: Various colors – For an eye-catching and festive design.
- Edible flowers: (like pansies or violets) – For a beautiful decoration.
- Buttercream frosting: For icing the cake – Choose colors that match your spring theme.
How to Make
- Preheat your oven to 350°F (175°C). Grease and flour two 9-inch round cake pans, ensuring an easy release after baking.
- In a large bowl, whisk together the flour, baking powder, and salt, mixing well to combine. Set this mixture aside while you prepare the wet ingredients.
- In another bowl, cream the unsalted butter and granulated sugar until it becomes light and fluffy. This process usually takes about 3 to 5 minutes using a hand mixer. The air incorporation will lead to a lighter cake.
- One at a time, beat in the eggs, ensuring each is fully incorporated before adding the next. Add the vanilla extract during this step too, allowing it to mix well with the creamed butter and sugar.
- Gradually add the dry ingredients to the wet mixture, alternating with milk. Start and end with the flour mixture, mixing until just combined. Be careful not to overmix; you want a tender cake.
- If using food coloring, divide the batter into multiple bowls, adding different colors to create a marbled or layered effect. A gentle swirl with a spatula can give a lovely design.
- Pour the batter evenly into the prepared cake pans. Bake in the preheated oven for about 25-30 minutes, or until a toothpick inserted in the center comes out clean.
- Once baked, allow the cakes to cool in the pans for 10 minutes before transferring to a wire rack to cool completely.
- Once the cakes are completely cooled, level off the tops with a serrated knife for a flat surface. Frost the top of one cake with buttercream, placing the second cake on top. Ice the entire cake, smoothing the sides and top.
- Decorate generously with edible flowers, additional frosting, or any other decorations inspired by spring. Be creative and remember to have fun!
Variations & Substitutions
Fruit-Infused Cake: For a refreshing twist, consider infusing your cake batter with pureed fruits, like strawberries or lemons. This not only enhances the flavor but also adds moisture to the cake, making each bite more delightful. You can also incorporate dried fruits like cranberries for added texture. Enhance your frosting by using cream cheese or whipped cream for a tangy and light touch, complementing the fruity notes perfectly.
Gluten-Free Option: If you or your guests have dietary restrictions, you can substitute the all-purpose flour with a gluten-free flour blend. Ensure that it contains a binding agent like xanthan gum, which will help mimic the texture of regular cake. Additionally, using almond flour can impart a unique flavor that pairs beautifully with spring fruit flavors.
Healthier Sweetener: Consider using natural sweeteners like honey or maple syrup instead of granulated sugar. These options bring a rich flavor and can elevate the overall taste profile. Keep in mind, you’ll need to adjust the moisture content, adding a bit more flour or reducing the milk accordingly.
Buttercream Alternatives: If you’re looking for a lighter frosting option, try using whipped coconut cream or Greek yogurt mixed with a touch of honey. This alternative will give you a similar vibe while cutting down on sugars and fats, making your cake a healthier delight.
Common Mistakes to Avoid
When baking and decorating your spring-themed cake, watch out for a few common pitfalls.
Overmixing the Batter: This can lead to a dense cake. Mix until just combined to ensure a lighter texture.
Not Preheating Your Oven: Always preheat your oven before baking. A proper temperature is crucial for achieving the right rise and texture.
Insufficient Cooling Time: Trying to frost a warm cake can lead to melting frosting and a chaotic decorating experience. Always allow your cake to cool completely on a wire rack before frosting.
Neglecting Measurements: Be precise with ingredient measurements. Baking is a science; even slight variations can alter the outcome.
Storage, Freezing & Reheating Tips
To keep your cake fresh, it’s essential to store it properly. After decorating, if you have remaining cake, slice it into portions and store it in an airtight container at room temperature for up to three days or refrigerate it for up to one week.
For longer storage, wrap the whole or sliced cake in plastic wrap, followed by aluminum foil, and freeze it. It will stay good for up to three months. To serve, thaw it in the refrigerator overnight and bring it back to room temperature before serving.
If you notice that the cake has dried out during storage, a quick fix is to drizzle simple syrup over it before serving. This easy mix of sugar and water can offer extra moisture.
Frequently Asked Questions
Can I make a spring-themed cake in advance?
Absolutely! You can bake the cakes up to three days ahead of time. Simply wrap each cooled layer in plastic wrap and store them in the fridge. For best results, frost your cake the day you plan to serve it.
What type of frosting works best for spring-themed cakes?
Buttercream frosting is a popular choice due to its smooth texture and ease of decorating. You can also opt for whipped cream frosting or cream cheese frosting for a different flavor profile. Just make sure that whatever frosting you choose can hold up under room temperature, especially if you’re decorating with edible flowers.
How do I ensure my cake is moist?
Moist cakes often come from an appropriate balance of wet to dry ingredients. Including ingredients like yogurt or sour cream can add moisture, while avoiding overbaking is crucial.
Can I use fresh flowers for decoration? Are they safe to eat?
Yes, using edible flowers such as pansies, violets, or nasturtiums can add beauty to your cake. However, make sure to thoroughly wash them and only use flowers that haven’t been treated with pesticides to ensure they are safe for consumption.
What’s the best way to transport my decorated cake?
Consider using a sturdy cake carrier to transport your decorated cake. If you are worried about ruining your decorations, transport the layers separately and assemble them at your destination. If necessary, keep a small container of frosting handy for touch-ups.
Conclusion: Creating a spring-themed cake is a delightful way to celebrate the beauty of the season. With the right ingredients, thoughtful decoration, and by avoiding common mistakes, you can bake a masterpiece that will be cherished by all. Take your time, enjoy the process, and don’t forget to share your beautiful creation with your loved ones! Happy baking!