Prep time: 20 minutes
Cook time: 15 minutes
Total time: 35 minutes
Servings: 4
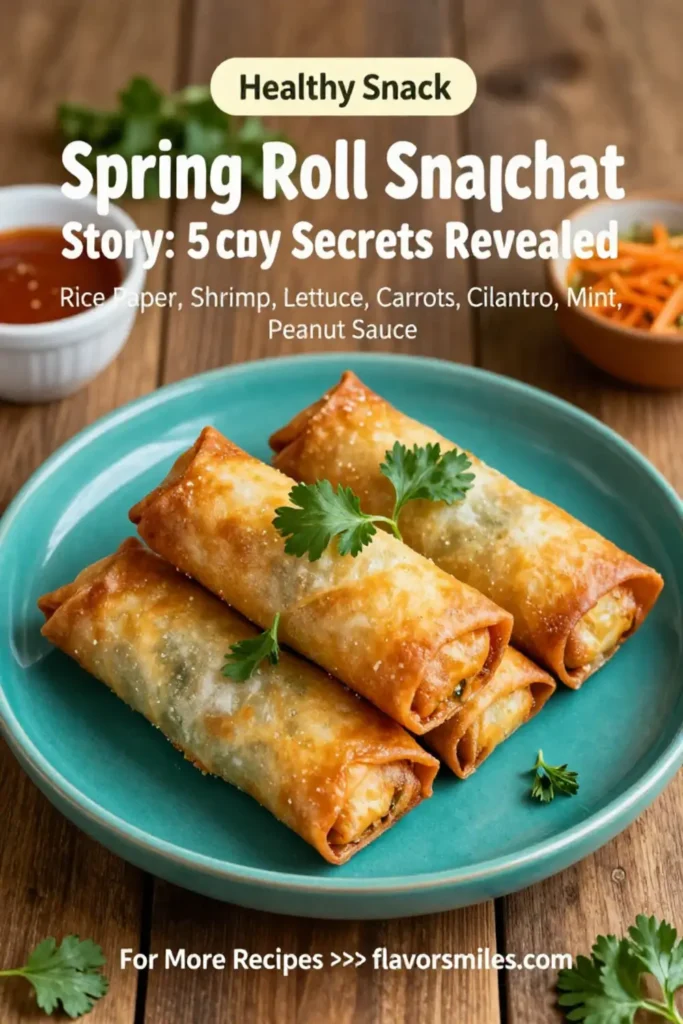
Spring Roll Snapchat Story: 5 Crispy Secrets Revealed is here to bring a refreshing twist to your snack game! This recipe combines the crunch of traditional spring rolls with colorful vegetables and a choice of protein, ensuring that you have a delightful bite in every mouthful. Whether you are preparing these for a family gathering, party, or a casual evening snack, your loved ones will certainly be asking for more. With its tantalizing flavors and textures, these spring rolls are not just a treat; they’re a celebration of creativity and taste!
What Is Spring Roll Snapchat Story: 5 Crispy Secrets Revealed?
Spring rolls are a popular dish across various Asian cuisines, typically characterized by a thin skin stuffed with assortment of fillings. The Spring Roll Snapchat Story flips this concept by introducing various fillings and cooking methods to achieve the perfect crunch, all while beautifully presented for your Snapchat stories! Each spring roll can hold any combination of fresh vegetables, savory proteins, and bold flavors. This recipe showcases the top five secret techniques to achieve the ideal crispy texture and satisfying crunch with every bite.
Why You’ll Love This
There are countless reasons to fall in love with these spring rolls. First, they are incredibly versatile; you can customize the filling based on what you have on hand or your family’s preferences. Second, the crispy exterior paired with fresh, crunchy vegetables creates a delightful contrast in texture. Third, they are perfect for meal prep, allowing you to make a large batch that can be enjoyed throughout the week. Finally, these spring rolls are eye-catching and photograph beautifully, making them perfect for sharing on social media.
Ingredients You’ll Need
- Spring roll wrappers: 12 pieces – They serve as the base for your rolls; make sure to choose a fresh package for the best results.
- Shredded cabbage: 2 cups – Cabbage adds a satisfying crunch and some nutrition. You can use green, red, or napa cabbage based on your preference.
- Carrots: 1 cup, shredded – Bringing a sweet flavor and bright color to the rolls, carrots are crucial for that fresh taste.
- Bell pepper: 1 cup, thinly sliced – Choose any color; these add color and a bit of sweetness to your rolls.
- Cilantro: ½ cup, chopped – This herb will give your spring rolls a refreshing flavor that enhances the overall dish.
- Protein (chicken, shrimp, tofu, or pork): 1 cup, cooked and chopped – The protein makes the rolls more filling and satisfying.
- Garlic cloves: 2, minced – Fresh garlic adds a robust flavor that elevates the entire dish.
- Salt: ½ teaspoon – Essential for bringing out flavors in each ingredient.
- Pepper: ½ teaspoon – Used for a gentle kick of spice.
- Oil for frying: About 2 cups – Use a neutral oil like vegetable or canola oil for frying to get that crispy finish.
How to Make
- Start by prepping all your ingredients. Wash and chop the vegetables as directed, making sure to keep everything around the same size for even cooking. Having everything ready makes the rolling process much smoother.
- In a large bowl, combine the shredded cabbage, carrots, bell pepper, cilantro, and your choice of protein. Add the minced garlic along with the salt and pepper, mixing everything together thoroughly.
- Next, take a spring roll wrapper and place it on a clean, flat surface. Spoon 2 tablespoons of the filling onto the lower third of the wrapper. Be careful not to overfill, as it will make rolling tricky.
- Fold the sides of the wrapper over the filling, then roll it up tightly from the bottom. Make sure to tuck in the sides as you roll to create a neat bundle. Repeat the process until all the wrappers and filling are used.
- Heat the oil in a deep pan over medium heat until it reaches 350°F (175°C). You can test if it’s hot enough by dropping a small piece of bread into the oil; if it sizzles, it’s ready.
- Carefully add the spring rolls to the hot oil, ensuring you don’t overcrowd the pan. Fry them for about 3 to 4 minutes, turning occasionally until they are golden brown and crispy.
- Once cooked, remove the spring rolls from the oil and place them on paper towels to drain excess oil. Serve warm with your favorite dipping sauce like sweet chili or soy sauce.
Variations & Substitutions
Vegetarian Spring Rolls: Replace the protein with additional vegetables like mushrooms, zucchini, or even avocado. You can also add vermicelli noodles for extra texture and heartiness! Adjust the seasonings to your liking to create a delightful vegetarian option.
Shrimp Spring Rolls: For seafood lovers, consider using boiled shrimp. Cut them in half lengthwise or leave them whole depending on your texture preference. Pair with a spicy dipping sauce made from sriracha and mayonnaise for an added zing.
Spicy Chicken Spring Rolls: Incorporate some heat by marinating your chicken in chili paste or adding finely chopped jalapeños to the filling mix. Serve with a creamy sauce to balance the spice.
Asian-Inspired Spring Rolls: Mix in some cooked noodles and peanuts for a unique texture twist. You can also try adding Asian spices like five-spice powder for a more aromatic flavor.
Baked Spring Rolls: For a healthier option, instead of frying, brush the rolls with oil and bake them in an oven at 425°F (220°C) until golden brown, about 20-25 minutes. This method provides a crispy texture without excessive oil.
Common Mistakes to Avoid
When making spring rolls, avoid overfilling them. Overfilling can make it nearly impossible to roll them tightly and may lead to breakage while frying. Additionally, ensure your spring roll wrappers are fresh and not dried out, as this can result in a tough texture. Also, avoid frying at a temperature that is too low, as this can make the rolls greasy instead of crispy. Lastly, an often overlooked point is letting them rest briefly after frying so that they maintain their crispy texture.
Storage, Freezing & Reheating Tips
To store your spring rolls, place them in an airtight container and refrigerate for up to 3 days. If you want to freeze them, make sure to wrap each roll tightly in plastic wrap and then in aluminum foil. They can be frozen for up to 2 months. When you are ready to eat them, thaw them in the refrigerator overnight before frying or baking. For reheating, bake them in a preheated oven at 375°F (190°C) for about 10-15 minutes to restore their crunch.
Frequently Asked Questions
Can I make spring rolls ahead of time?
Yes, you can prepare the filling and roll the spring rolls in advance. Keep them in an airtight container in the refrigerator before frying. However, it’s best to fry them just before serving to enjoy their crispy texture.
What sauces pair well with spring rolls?
Spring rolls pair well with a variety of sauces! Classic choices include sweet chili sauce, soy sauce, peanut sauce, or spicy mayo. Feel free to experiment and find your favorite combination!
How do I make my spring rolls crispy?
To achieve that perfect crispiness, ensure your oil is hot enough during frying. If the oil is not hot, the rolls will absorb more oil and become soggy. Additionally, using fresh wrappers also helps in achieving a crispy bite.
Can I bake spring rolls instead of frying them?
Definitely! To bake, brush the rolls with a little oil and place them in a preheated oven at 425°F (220°C) for about 20-25 minutes until they are golden and crisp. Baking is a healthier alternative to frying but still delivers wonderful flavor!
What’s the best way to serve spring rolls?
Spring rolls are best served immediately after frying while they are still warm and crispy. Arrange them on a platter and provide a variety of dipping sauces for your guests to enjoy.
Conclusion: In summary, the Spring Roll Snapchat Story: 5 Crispy Secrets Revealed offers an exciting take on a beloved dish that is as delicious as it is versatile. By following the steps outlined here, you can create crispy, flavorful spring rolls that are sure to impress. Don’t hesitate to get creative with your fillings and enjoy experimenting with different flavors! Whether served at a gathering or simply enjoyed as a snack, these spring rolls will undoubtedly be a hit. Happy cooking!