Prep time: 20 minutes
Cook time: 30 minutes
Total time: 50 minutes
Servings: 4 servings
When spring arrives, the sun shines brighter, and fresh fruit becomes bountiful. There’s nothing quite like indulging in vibrant desserts made with seasonal produce. One such delightful treat is the Strawberry Vanilla Custard Cups, a perfect blend of creamy custard and sweet strawberries. This recipe is not only easy to make but also wonderfully satisfying and visually appealing. Ideal for picnics, brunches, or as a refreshing end to any meal, this dessert embodies the essence of spring.
What Is Spring Desserts: Strawberry Vanilla Custard Cups in 7 Steps?
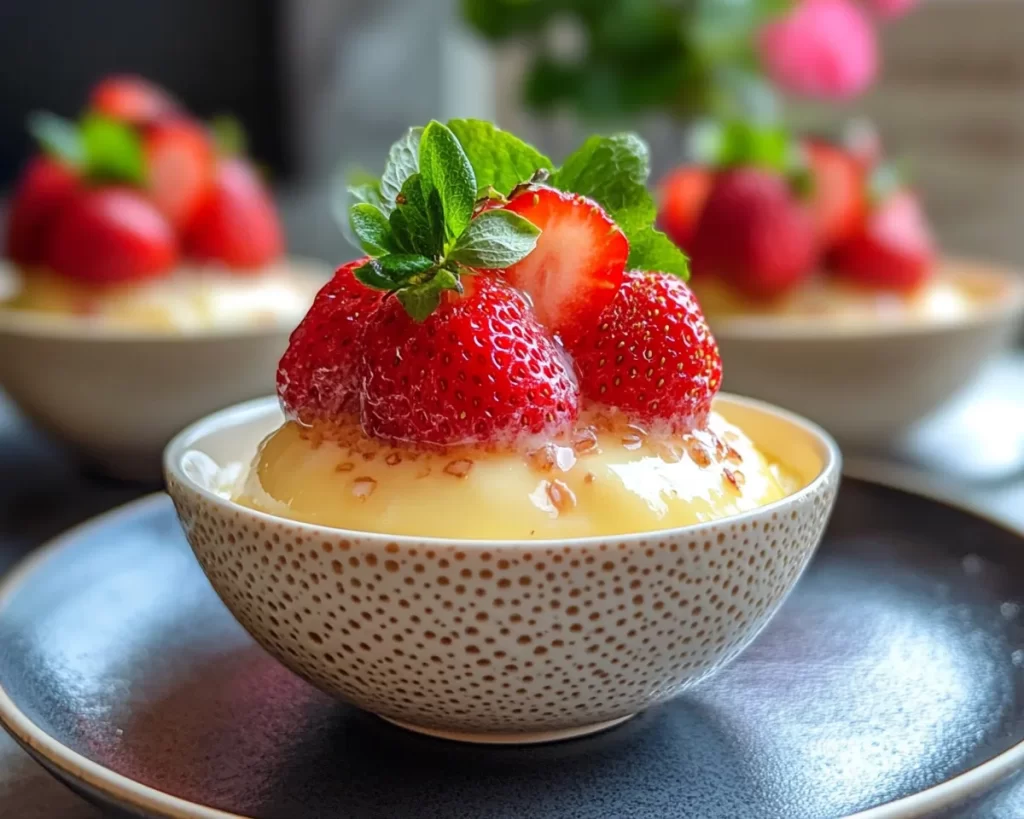
The Strawberry Vanilla Custard Cups are a light and airy dessert that combines the rich creaminess of vanilla custard with the natural sweetness of fresh strawberries. The layers of custard and berries create a beautiful presentation, making it suitable for any occasion. Each spoonful brings a burst of strawberry flavor complemented by the smooth, rich custard. This dessert not only satisfies your sweet tooth but also showcases the fresh, seasonal ingredients that spring has to offer.
Why You’ll Love This
One of the reasons you’ll love this dessert is its simplicity. It requires only a handful of ingredients and minimal cooking skills. Whether you are a busy parent or a kitchen beginner, this recipe can easily fit into your schedule. Additionally, the contrast between the creamy custard and fresh strawberries creates an irresistible flavor combination. It’s not overly heavy, making it a suitable treat for warmer days. Sharing this dessert with family and friends will surely impress them, showcasing your culinary prowess without the fuss.
Ingredients You’ll Need
To create these delightful Strawberry Vanilla Custard Cups, you will need the following ingredients:
- 2 cups of whole milk: This provides the creaminess needed for the custard.
- 1/2 cup of granulated sugar: Sweetens the custard perfectly, balancing out the strawberries’ tartness.
- 1/4 cup of cornstarch: Acts as a thickening agent, giving the custard its desired consistency.
- 3 large egg yolks: Enrich the custard and add a silky texture.
- 2 teaspoons of vanilla extract: Adds a warm, aromatic flavor to the custard.
- 1 pint of fresh strawberries: Naturally sweet, they crown the custard beautifully.
- Fresh mint leaves for garnish: This will add a pop of color and a refreshing touch.
How to Make
1. **Prepare the custard base.** In a medium saucepan, whisk together the granulated sugar, cornstarch, and a pinch of salt. Gradually stir in the whole milk until everything is well combined. Heat the mixture over medium heat, stirring constantly, until it starts to thicken, around 10 minutes. It’s important to avoid boiling the mixture; you want it to gently thicken.
2. **Incorporate the egg yolks.** In a separate bowl, whisk the egg yolks. Temper the yolks by adding a small amount of the hot milk mixture while whisking continuously. This helps prevent the yolks from scrambling. Once combined, slowly whisk the tempered yolk mixture back into the saucepan, stirring constantly. Cook for an additional 2-3 minutes until the custard is thick and smooth.
3. **Add the vanilla.** Once thickened, remove the saucepan from the heat and stir in the vanilla extract. Pour the custard through a fine mesh strainer into a bowl to ensure it’s super smooth and free of any lumps. Cover the surface of the custard with plastic wrap to prevent a skin from forming, and let it cool to room temperature.
4. **Prepare the strawberries.** While the custard is cooling, clean and slice the fresh strawberries. If desired, sprinkle a little sugar over them to enhance their natural sweetness, then allow to sit for about 10-15 minutes. This brings out their juices and intensifies the flavor.
5. **Assemble the cups.** Once the custard has cooled, you can start layering your dessert. In individual serving cups, add a layer of custard at the bottom, followed by a layer of sliced strawberries. Repeat the layers as needed, finishing with a layer of custard on top.
6. **Chill before serving.** Cover the assembled cups with plastic wrap and refrigerate for at least 2 hours. This allows the flavors to meld beautifully and gives the custard a chance to set fully.
7. **Garnish and serve.** Just before serving, garnish each cup with a few fresh mint leaves for a touch of color and freshness. Your Strawberry Vanilla Custard Cups are ready to enjoy!
Variations & Substitutions
Chocolate Strawberry Custard Cups: If you’re a chocolate lover, consider adding some unsweetened cocoa powder to your custard base. Mix in about 1/4 cup of cocoa powder along with the cornstarch for a chocolatey twist. Layer with strawberries for a fantastic contrast of flavors.
Vegan Strawberry Custard: For a plant-based version, replace whole milk with almond milk or coconut milk and use cornstarch for thickening without eggs. Sweeten with maple syrup instead of granulated sugar, and you’ll have a delightful dish suitable for vegan diets.
Lemon Strawberry Custard: Add zest from one lemon into the custard mix for a tangy citrus lift. This adds a refreshing zing that pairs perfectly with the sweet strawberries, making this variation a favorite for those who enjoy citrus flavors.
Common Mistakes to Avoid
Make sure to **avoid boiling** the custard mixture. Boiling can cause the custard to curdle rather than thicken smoothly. Maintain medium heat and stir constantly to prevent this. Another common mistake is **not whisking eggs properly**. Always temper the egg yolks before adding them to the hot mixture. This step is crucial to achieving a velvety texture. Lastly, **skipping the chilling step** can result in a runny custard. Allow enough time for the custard to set in the refrigerator for the best results.
Storage, Freezing & Reheating Tips
To store any leftover Strawberry Vanilla Custard Cups, cover them tightly with plastic wrap or transfer them to airtight containers. They can be kept in the refrigerator for up to three days. If you wish to freeze the custard, it’s best to do so without any strawberries. Freeze the custard in an airtight container for up to one month. Thaw it in the refrigerator before serving. As for reheating, the vanilla custard does not need heating but make sure to mix well after thawing to restore its smooth texture.
Frequently Asked Questions
Can I use frozen strawberries instead of fresh? Yes, you can use frozen strawberries, but be aware that they may release more liquid as they thaw. This can affect the texture of the layers. If using frozen strawberries, consider draining any excess juice before layering them into the cups.
How do I know when the custard is thick enough? You will know the custard is thick enough when it coats the back of a spoon and leaves a clear trail when you run your finger through it. This usually happens after about 10-12 minutes of cooking on medium heat. Always keep stirring to prevent any lumps.
Can I make this recipe ahead of time? Absolutely! In fact, making the custard and letting it chill in the refrigerator overnight helps to enhance the flavors. You can assemble the dessert cups up to one day in advance, making it a convenient option for gatherings.
What can I serve with custard cups? You can serve the custard cups with a side of whipped cream, crumbled cookies, or additional fresh fruits like blueberries or raspberries to enhance the flavor and texture experience.
Is it necessary to strain the custard? While straining is not mandatory, it is highly recommended. Straining the custard ensures it is smooth, removing any lumps or curdled bits, giving you a silky-smooth texture for your dessert.
Conclusion: Strawberry Vanilla Custard Cups are a quintessential spring dessert that showcases the beauty and freshness of the season. This recipe is easy to follow and yields delightful results that can impress any crowd. With minimal ingredients and a few simple steps, you can create a stunning dessert that’s light, creamy, and bursting with flavor. Enjoy the sweet taste of spring with every delicious spoonful!