Prep time: 20 minutes
Cook time: 30 minutes
Total time: 50 minutes
Servings: 4
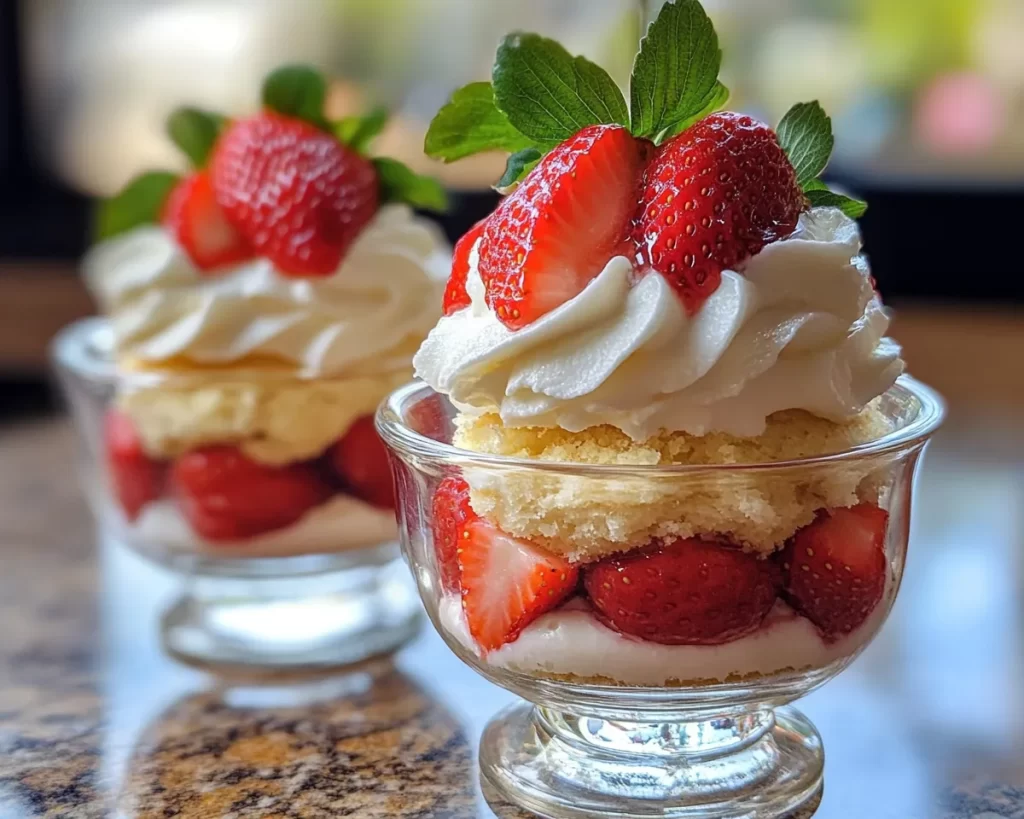
The arrival of spring evokes feelings of warmth, renewal, and a craving for **fresh**, delectable desserts. One of the quintessential treats that epitomizes this vibrant season is the Strawberry Shortcake Cups. This delightful dessert features layers of fluffy vanilla sponge cake, sweet whipping cream, and luscious, juicy strawberries. Perfect for a family gathering or an evening treat, these cups allow you to indulge in the flavors of spring in a single bite.
The beauty of Strawberry Shortcake Cups lies not only in their incredible taste but also in their versatility. You can tailor the recipe to suit your dietary preferences and use seasonal ingredients available in your area. This dessert is not only a feast for the palate but also a visual delight, making it a fantastic centerpiece for your dessert table. In this article, you’ll discover a simplified way to create this traditional dessert, learn tips for enhancing its flavor, explore various variations, and troubleshoot common pitfalls so you can create the perfect treat every time.
What Is Spring Desserts: Strawberry Shortcake Cups?
Strawberry Shortcake Cups are an updated, elegant twist on the classic strawberry shortcake, typically served as a layered cake. Originating from the *British scone*, which was filled with strawberries and whipped cream, the modern version has evolved into a beloved dessert in the United States. With this version, you get a **light**, airy sponge cake cradling **sweet** sliced strawberries and a generous dollop of rich, creamy whipped cream, all perfectly served in individual cups for easy enjoyment.
The texture is a delightful interplay of softness from the sponge cake and cream, contrasted by the juicy crunch of strawberries. Each bite brings a rush of flavors—from the **sweetness** of the ripe strawberries to the subtle notes of **vanilla** in the cake. It’s a refreshing dessert, especially as the weather warms up. Not only is it visually stunning, but it’s also easy to prepare, making it an excellent option for both new and experienced bakers.
Why You’ll Love This
This Strawberry Shortcake Cups recipe is adored not just for its taste but also for its **convenience**. The ease of assembling the cups makes them a favorite for busy parents or anyone looking for quick yet satisfying desserts. The entire process can be done in about 50 minutes, and the layers require minimal baking skills.
Additionally, this recipe can be budget-friendly. Strawberries can be affordable in the spring season, especially when purchased directly from local farmers. You can also make substitutions based on what you have on hand, allowing you to save money without sacrificing taste. Many mistakenly believe that shortcakes require excessive time and ingredients, but with this recipe, you’ll find it’s accessible and rewarding.
Moreover, the dessert is versatile. You can easily adapt the ingredients for different dietary restrictions. For example, gluten-free or dairy-free variations make it inclusive for various diets. By making simple adjustments, you can provide everyone with a taste of this seasonal delight.
Ingredients You’ll Need
- Fresh Strawberries: 2 cups, hulled and sliced. Strawberries play a crucial role in adding a burst of natural sweetness and vibrant color. If strawberries aren’t in season, feel free to substitute them with raspberries or blueberries.
- Sugar: ½ cup, divided. Sugar enhances the natural sweetness of the strawberries while also sweetening the whipped cream. You can use coconut sugar or a sugar substitute if necessary.
- Vanilla Extract: 1 teaspoon. This adds an aromatic flavor that elevates the dessert. Ensure you use pure vanilla extract for the best results.
- Whipping Cream: 1 cup. Heavy cream is ideal, as it whips up beautifully and holds its shape while providing a rich, creamy topping. Non-dairy cream can be used for a dairy-free alternative.
- Baking Powder: 1 teaspoon. This leavening agent helps the sponge cake rise, making it light and fluffy.
- All-Purpose Flour: 1 cup. It forms the base of the sponge cake. You can swap it with almond flour or gluten-free flour if necessary.
- Eggs: 2 large. Eggs provide moisture and structure to the cake, helping it hold its shape. For a vegan option, use **flaxseed meal** mixed with water as an egg replacement.
- Salt: ¼ teaspoon. A pinch of salt balances the sweetness and enhances the overall flavor of the cake.
Each ingredient plays a vital role in crafting the dessert’s harmonious flavor and texture.
How to Make
- Begin by preheating your oven to 350°F (175°C). This ensures an optimal temperature for baking your sponge cake. While the oven warms, gather all your ingredients and prepare your baking pan—grease and flour or line it with parchment paper for easy removal later.
- In a mixing bowl, combine the flour, baking powder, and salt. This step ensures an even distribution of the leavening agent. Stir these dry ingredients until well blended; this mixture forms the base for your cake, contributing to its light texture.
- In another large mixing bowl, beat the eggs and sugar together using a hand mixer or stand mixer. Beat until the mixture becomes pale in color and doubles in volume—this should take about 3-5 minutes. This step incorporates air into the batter, making it light and fluffy once baked.
- Gently fold in the dry mixture into the egg-sugar blend, alternating with milk (or lactose-free substitute if appropriate) and vanilla extract. Make sure not to overmix, as this could lead to a denser cake. Fold until just combined to maintain airiness.
- Pour the batter into your prepared baking pan. Bake in the preheated oven for about 20-25 minutes or until a toothpick inserted into the center comes out clean. As it bakes, your kitchen will fill with an aromatic smell that signals the cake is coming together.
- Once baked, remove the cake from the oven and let it cool completely in the pan for about 10 minutes. Then, transfer it to a wire rack to cool down fully. This cooling step is essential to prevent excessive moisture from forming, which can lead to sogginess.
- While the cake cools, prepare your strawberries. In a separate bowl, mix the hulled and sliced strawberries with half of your remaining sugar. Allow them to sit for about 10-15 minutes; this process macerates the berries, enhancing their sweetness and releasing their natural juices.
- In another bowl, beat the whipping cream with the remaining sugar and vanilla extract until soft peaks form. Be careful not to over-whip, as this could result in curdled cream. The goal is to achieve a silky, smooth texture that complements the cake and strawberries perfectly.
- To assemble, cut the sponge cake into small cubes or rounds. In serving cups, layer the cake, followed by a generous scoop of strawberries and a dollop of whipped cream. Repeat the layers as desired, finishing with whipped cream on top for an elegant presentation.
- Chill the assembled Strawberry Shortcake Cups in the refrigerator for at least 30 minutes to meld the flavors together. Serve cold for a refreshing experience that encapsulates the spirit of spring.
Variations & Substitutions
Gluten-Free Strawberry Shortcake Cups: If you’re seeking a gluten-free version, simply substitute all-purpose flour with a gluten-free flour blend. You might even consider almond flour for a nutty flavor—just be aware that this will change the texture slightly. Many gluten-free blends contain stabilizers that will substitute for traditional flour’s properties, allowing you to achieve a satisfying cake without the gluten.
Dairy-Free Strawberry Shortcake Cups: To create a dairy-free option, use coconut whipped cream in place of the heavy cream. You can also swap regular milk or cream with non-dairy milk such as almond, soy, or oat milk. Coconut milk adds a rich flavor, but ensure your whipped topping is free from dairy. Keep in mind that fresh strawberries are naturally dairy-free, making this dessert an ideal option for various diets.
Vegan Strawberry Shortcake Cups: For a vegan take, utilize flaxseed meal or chia seeds mixed with water to replace the eggs in the cake batter. Additionally, opt for a plant-based whipped cream alternative or make your own by whipping aquafaba (the liquid from canned chickpeas) with sugar until it reaches soft peaks. This variation allows everyone to enjoy a taste of spring—regardless of dietary restrictions.
Chocolate Strawberry Shortcake Cups: For chocolate lovers, you can enhance the flavor by adding cocoa powder to your batter. Use about 1/3 cup cocoa powder for a rich chocolate cake that pairs wonderfully with the juicy strawberries. Top with either chocolate whipped cream or traditional cream for a sumptuous dessert.
Common Mistakes to Avoid
One common mistake is **overmixing the batter**. Overmixing can lead to a dense texture instead of a light, fluffy cake. Always fold ingredients gently until just combined. Additionally, failing to properly **measure your ingredients** can affect the outcome. When baking, using a kitchen scale may yield more accurate measurements, particularly for flour.
Another pitfall involves not allowing the cake to cool adequately before assembling. If the cake is warm, the whipping cream can melt, resulting in a soggy mixture. Ensure you give yourself enough time for cooling. Lastly, avoid skipping the **maceration process** for strawberries, as it intensifies their sweetness and enhances the overall taste profile of your dessert.
Storage, Freezing & Reheating Tips
Strawberry Shortcake Cups can be stored in the refrigerator for up to 2 days. Keep them covered with plastic wrap or in an airtight container to prevent the whipped cream from absorbing unwanted odors. However, they’re best enjoyed fresh, as the cake may lose its fluffy texture over time.
If you want to prepare these cups ahead of time, consider storing the components separately. Keep the cake, strawberries, and whipped cream in separate containers in the refrigerator and assemble right before serving. This method allows you to maintain the integrity of each ingredient.
As for freezing, it’s best not to freeze the assembled cups since the whipped cream and strawberries do not thaw well. However, you can freeze the sponge cake layers, wrapped tightly in plastic, for up to a month. When ready to use, simply thaw them in the refrigerator overnight.
Frequently Asked Questions
Can I use frozen strawberries for this recipe? Yes, you can use frozen strawberries. However, be mindful that they may release more moisture, which can affect the texture of your dessert. It’s best to thaw them and drain any excess liquid before using.
Is it necessary to use vanilla extract? While vanilla extract adds depth to the flavor, you can omit it if desired. You could also experiment with other extracts like almond or citrus for a unique twist, but vanilla is a classic choice that balances well with the strawberries.
Can I substitute sugar with a sugar alternative? Absolutely! You can use sugar substitutes such as stevia, monk fruit sweetener, or erythritol. Just be sure to follow the substitution guidelines as these may vary based on the type you choose.
How do I know when my sponge cake is done baking? The simplest method is to perform the toothpick test: insert a toothpick into the center of the cake, and if it comes out clean or with a few moist crumbs, the cake is done. Additionally, the edges should pull slightly away from the sides of the pan.
Can I make this dessert the night before serving? You can, but it’s recommended to store the components separately—the sponge cake, strawberries, and whipped cream—to maintain freshness. Assemble them just before serving for maximum flavor and texture.
Conclusion:
Strawberry Shortcake Cups are a delightful springtime dessert that brings together the essence of fresh strawberries, fluffy cake, and airy whipped cream. Their simplicity makes them a go-to option for any gathering or special celebration. Don’t hesitate to customize the recipe according to your dietary needs or personal preferences. The best part is that you can enjoy this delicious dessert in just under an hour. Gather your ingredients and give this charming recipe a try; you won’t regret it! Share the love with friends and family, and invite them to experience this wonderful taste of spring.