Prep time: 30 minutes
Cook time: 30 minutes
Total time: 1 hour
Servings: 12
The joy of baking is one that can bring people together, especially during festive seasons like spring. Imagine the vibrancy of pastel colors, the sweet aroma of buttercream, and the joy of presenting a beautifully designed cake that not only tastes delightful but also captivates the eye. This Spring Cake Designs: Pastel Spring Buttercream Swirls is not merely a dessert; it’s a canvas for creativity and a testament to the beauty of seasonal flavors. Through this recipe, you’ll navigate the world of buttercream, understand how to create those breathtaking swirls, and discover tips that enhance not only your baking skills but also your ability to impress family and friends during spring gatherings.
In this article, you will learn how to create the perfect cake from scratch, including essential techniques for making rich buttercream that holds its shape beautifully. You will discover variations to suit dietary needs, ways to avoid common baking mistakes, and expert storage tips to ensure your creation stays fresh. Whether you’re a busy parent searching for a fun baking project with your kids, a beginner aiming to impress at a potluck, or simply someone who loves cake, this recipe will be your guide.
What Is Spring Cake Designs: Pastel Spring Buttercream Swirls?
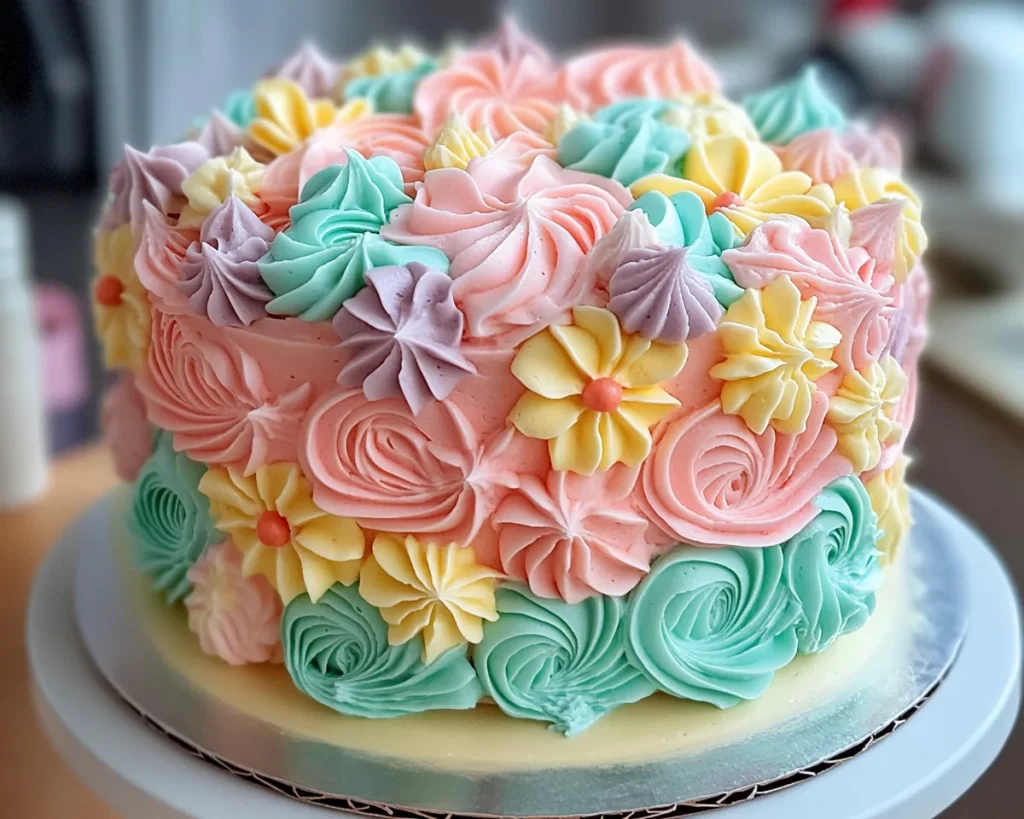
Spring Cake Designs: Pastel Spring Buttercream Swirls is an enchanting dessert that celebrates the arrival of spring. At its core, this cake combines layers of fluffy vanilla sponge with a luscious buttercream frosting that is expertly tinted in soft pastel hues. The layers create a delightful texture, while the lightness of the sponge balances beautifully with the creamy richness of the buttercream. Originating from classic celebratory cakes, this version takes it a step further by using vibrant colors inspired by blooming flowers.
The texture of the cake is light and airy, making it perfect for any spring occasion. Each bite melts in your mouth, with the buttercream adding a rich, sweet flavor that complements the cake’s fluffy structure perfectly. The pastel colors not only make for an eye-catching presentation but also speak to the freshness of spring ingredients such as fruits and florals. This cake is filled with endless possibilities—each slice reveals a swirl of colors that tantalize both the eyes and the palate, making it a perfect centerpiece for any spring celebration.
Why You’ll Love This
You’ll fall in love with this recipe for several reasons. Firstly, the taste is simply divine. The combination of a light vanilla sponge cake paired with rich buttercream creates a perfect harmony of flavors that appeals to all palates. Additionally, this recipe is incredibly easy to follow—a perfect project for beginners and an exciting challenge for seasoned bakers looking to refine their skills. The vibrant colors add a flurry of excitement, making this cake ideal for occasions like birthdays, baby showers, or springtime gatherings.
Moreover, making a cake from scratch can be far more cost-effective than purchasing one from a bakery. By utilizing simple ingredients—many of which you might already have in your kitchen—you can create an impressive dessert without breaking the bank. Lastly, this cake is highly versatile. You can customize it with various fillings, flavors, and decorations to align with your personal preferences or dietary needs. Don’t worry if you’re new to baking; common pitfalls can be avoided with the right guidance, and you’ll be able to impress your guests with minimal hassle.
Ingredients You’ll Need
- All-purpose flour: 2 cups – This is your base ingredient that provides structure to your cake.
- Baking powder: 2 teaspoons – This leavening agent will help your cake rise.
- Salt: ½ teaspoon – A vital ingredient that enhances the flavor of the cake.
- Unsalted butter: 1 cup (softened) – This imparts a rich flavor and moist texture.
- Granulated sugar: 1 ½ cups – Sweetens your cake; you can use coconut sugar for a less refined option.
- Eggs: 4 large – These add moisture and aid in binding the mixture together.
- Vanilla extract: 2 teaspoons – A classic flavor enhancer for baked goods.
- Milk: 1 cup – Adds moisture and richness to the batter. Use almond or oat milk for a dairy-free version.
- Confectioners’ sugar: 4 cups – Essential for creating the fluffy buttercream frosting.
- Heavy cream: 2 tablespoons – This helps achieve a smooth buttercream consistency; alternative non-dairy creams can be used.
- Food coloring: Pastel shades of your choice – These are used to tint the buttercream in swirl patterns.
Each ingredient in this recipe plays a crucial role. The all-purpose flour is the backbone that provides support, while the combination of sugar and butter creates a moist tenderness that keeps the cake from drying out. The eggs function not only as a binding agent but also enhance the overall flavor and richness of the cake. When you introduce the buttercream frosting, you’ll notice how the fluffiness contrasts with the structure of the cake, resulting in an irresistible dessert.
How to Make
- Prepare your baking pans: Start by preheating your oven to 350°F (175°C). Grease two 9-inch round cake pans with butter or cooking spray, ensuring they are well coated to prevent sticking. You can also line the bottoms with parchment paper for even easier removal.
- Mix your dry ingredients: In a separate bowl, whisk together the all-purpose flour, baking powder, and salt. This step is crucial as it ensures that the leavening agent is evenly distributed throughout the flour, leading to an even rise in your cake.
- Cream the butter and sugar: In a large mixing bowl, beat the softened unsalted butter and granulated sugar together until light and fluffy, about 5 minutes. This airiness will help your cake achieve its delightful texture. Make sure to scrape down the sides of the bowl occasionally to ensure everything is well combined.
- Add the eggs: Beat in the eggs one at a time, ensuring each is thoroughly incorporated before adding the next. This helps incorporate additional air into the mixture, contributing to a lighter cake. Add the vanilla extract and mix until combined.
- Combine wet and dry ingredients: Gradually add your dry ingredients to the butter mixture, alternating with the milk. Start with the dry ingredients, mix until just combined, then add half the milk, blending lightly before the next addition. The goal is to create a smooth batter while avoiding over-mixing, which can lead to a dense cake.
- Pour and bake: Divide the batter evenly between the prepared pans and smooth the tops with a spatula. Bake in the preheated oven for about 25-30 minutes, or until a toothpick inserted into the center comes out clean. Keep an eye on the cakes towards the end of the baking time, as oven temperatures may vary.
- Cool the cakes: Once baked, remove the cakes from the oven and let them cool in the pans for 10 minutes. Then carefully transfer them to a wire rack to cool completely. Ensure they are completely cool before frosting to prevent melting.
- Make the buttercream frosting: In a clean mixing bowl, beat the softened unsalted butter until creamy. Gradually add the confectioners’ sugar, alternating with heavy cream, mixing until the frosting reaches your desired consistency. Add a pinch of salt and mix. For pastel colors, divide the frosting into separate bowls and use food coloring to achieve soft, spring-like shades.
- Assemble the cake: Once your cakes are completely cool, place one layer on a serving platter. Spread a generous layer of buttercream on top, smoothing it out evenly. Place the second layer on top and coat the entire cake with a thin layer of buttercream (this is called the crumb coat) to seal in any crumbs.
- Decorate: After the crumb coat has set (about 15 minutes in the fridge), use the remaining buttercream to create decorative swirls. You can use a piping bag fitted with a star tip for a professional finish. Create swirls and peaks for added dimension. Feel free to add sprinkles or edible flowers for a festive touch.
The key to a successful cake isn’t just in the ingredients, but in your technique. Take your time while mixing, and remember to stop and check for proper consistency and texture, particularly with the buttercream. Don’t hesitate to sample along the way—it’s part of the joy of baking!
Variations & Substitutions
Chocolate Variation: If you’re a chocolate lover, consider substituting ½ cup of all-purpose flour with unsweetened cocoa powder. This addition will infuse the cake with rich cocoa flavor and a darker, inviting color. For the frosting, you can either add melted chocolate or cocoa powder to match the cake. This variation is perfect for chocolate enthusiasts seeking a decadent twist.
Gluten-Free Option: For those needing a gluten-free cake, be sure to replace all-purpose flour with a gluten-free flour blend. Make sure it includes xanthan gum, which aids in texture. Additionally, if you notice that it’s too dry, a little extra milk or a couple more eggs may achieve the right balance. This way, everyone can enjoy the colorful festivities without worry.
Dairy-Free Adaptation: To make this cake dairy-free, opt for dairy-free butter and non-dairy milk like almond or oat milk. Make sure to check the labels on the confectioners’ sugar, as some brands may contain dairy additives. The buttercream can still be achieved using plant-based substitutes but will require some practice to ensure it reaches the desired consistency.
Fruit Infusion: For a fruity twist, consider adding a layer of fruit preserves or a fresh fruit filling between the cake layers. This not only adds moisture but also a refreshing burst of flavor. Berries or citrus fruits work beautifully during spring, giving a vibrant flavor that pairs excellently with the sweet buttercream.
Color Variations: Instead of just pastel colors, get creative! Use vibrant shades if you’re feeling adventurous—think deeper purples, bright yellows, or even striking greens. Playing with colors can make the cake visually stunning while allowing you to match your celebrations perfectly, whether it’s a spring party or a colorful themed event.
Common Mistakes to Avoid
One of the most common mistakes while baking a cake is over-mixing the batter. When you incorporate too much air, it can lead to a dense cake that won’t rise properly. Always mix until just combined, especially when adding dry ingredients.
Another important warning is to ensure that your butter is at room temperature; cold butter will create lumps in the batter, while melted butter can lead to a greasy cake. If you’re worried about time, consider cutting your butter into smaller pieces before allowing it to soften.
Be cautious not to skip the cooling step after baking. Failing to let your cakes cool completely can cause the buttercream to melt and slide off the cake instead of clinging nicely to it. Patience is key here; a beautifully frosted cake deserves proper structure to hold its shape.
Finally, avoid skipping the crumb coat stage. This first layer of frosting seals in crumbs and prevents them from ruining the finish of your final layer. A crumb coat is particularly important if you are decorating intricately, as it helps create a smoother final appearance.
Storage, Freezing & Reheating Tips
After creating your stunning Spring Cake, you might wonder how to store it. To keep your cake fresh, always store it in an airtight container at room temperature for up to 3 days. The fluffiness of your cake will remain while keeping the buttercream deliciously soft. However, if your kitchen is particularly warm, consider refrigerating it to avoid melting.
If you wish to save your cake for later, you can freeze it. Slice the cake into pieces or keep the whole cake intact. Wrap it in plastic wrap, followed by aluminum foil, to prevent freezer burn. Your cake will stay fresh for up to three months. To defrost, place it in the refrigerator overnight.
When it comes to reheating, the recommendation is to skip heating the whole cake and instead enjoy it at room temperature. However, if you do want to warm a slice slightly, consider using the microwave for no more than 15-20 seconds. This way, you keep the delicious texture intact.
Always practice food safety. If the cake has sat out longer than 2 hours in a warm room, it’s best to discard uneaten portions. This ensures that your delightful creation remains enjoyable without any risk of spoilage.
Frequently Asked Questions
Can I make this cake ahead of time?
Yes, you can prepare the cake layers in advance. Bake them, then cool completely and store them wrapped in plastic wrap at room temperature for up to two days. Alternatively, you can freeze the layers for longer storage. Frost the cake on the day you plan to serve it for best results.
How do I achieve a smoother buttercream?
To achieve a smoother buttercream, ensure your butter is at room temperature and fully creamed before adding confectioners’ sugar. If your buttercream seems stiff, gradually add a teaspoon of milk or cream to loosen it up. Always mix until fluffy to achieve that ideal texture.
Can I use whole wheat flour instead of all-purpose flour?
You can use whole wheat flour, but be aware that it will yield a denser texture. Consider using a blend of whole wheat and all-purpose flour for a lighter outcome while still benefiting from the nutrients of whole grains.
What should I do if my cakes dome in the middle?
If your cake domes, you can remedy this by carefully leveling the tops with a serrated knife once the cakes are completely cooled. To prevent doming in the future, be sure to check your oven temperature and avoid overmixing the batter.
Can I use a different flavor of frosting?
Absolutely! While this recipe provides a classic buttercream, feel free to experiment with flavors. Try adding extracts, like almond or lemon, or incorporating pureed fruits for a unique flavor profile that pairs well with your spring theme.
Conclusion:
This Spring Cake Designs: Pastel Spring Buttercream Swirls is not just a recipe; it’s an opportunity to unleash your creativity while baking. With its delightful flavors and stunning visual appeal, this cake is sure to impress anyone lucky enough to get a slice. Remember, don’t hesitate to customize the flavors, decorations, and shapes to make this cake your own. Whether making it for a special occasion or simply treating yourself, you’ll find that your efforts will be richly rewarded. So, roll up your sleeves, gather your ingredients, and create a masterpiece that captures the essence of spring! Be sure to share your beautiful creation with others or simply savor each delightful bite with your loved ones. Enjoy your baking journey!


