Prep time: 30 minutes
Cook time: 45 minutes
Total time: 1 hour 15 minutes
Servings: 12
Spring is in the air, and with it comes the opportunity to create beautiful, vibrant desserts that celebrate the season. One delightful creation you can whip up is the Spring Cake Designs: Pastel Floral Cake Topper Design. Imagine a stunning cake adorned with an array of delicate, pastel-colored flowers that mimic the beauty of spring blooms. This cake is more than just a feast for the eyes; it’s a delicious treat that brings joy to any gathering, whether it’s a birthday, baby shower, or simply a spring get-together.
This recipe is special because it marries the scientific art of baking with the creative freedom of designing. You’ll learn not just how to bake a flavorful cake but also how to craft edible decorations that will wow your guests. The experience of creating this cake combines both challenging and satisfying elements, perfect for those who love to experiment in the kitchen. Get ready to impress with a cake that not only tastes heavenly but also provides a palette of colors and textures to explore.
As you dive into this delightful culinary adventure, expect to learn about the flavors of the cake, the methods for achieving the perfect pastel color, and tips for assembling a visually stunning floral decoration. By the end, you will be well-equipped to create your own Spring Cake adorned with a beautiful pastel floral design.
What Is Spring Cake Designs: Pastel Floral Cake Topper Design?
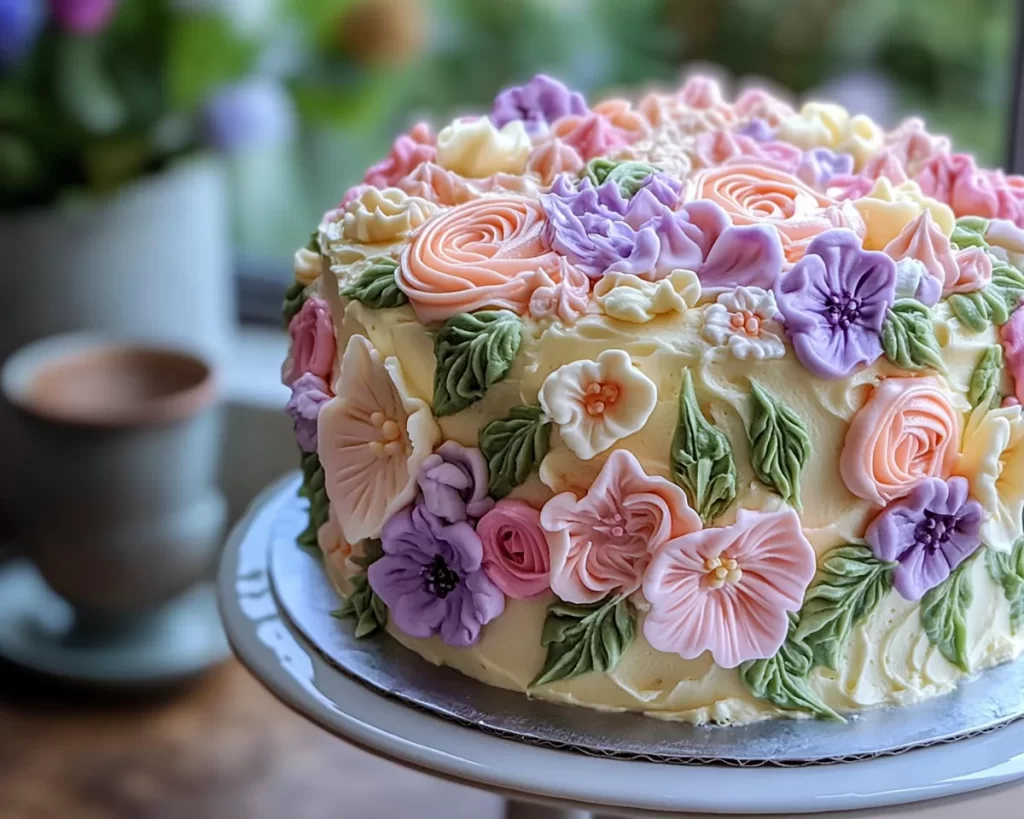
The Spring Cake Designs: Pastel Floral Cake Topper Design is a charming cake that encapsulates the essence of spring with its soft color palette and floral adornments. The cake often features layers of rich, fluffy sponge cake, usually complemented by a light buttercream or cream cheese frosting that serves as a canvas for the decor. The use of pastel shades—such as soft pinks, mint greens, and pale yellows—adds to its charm, making it a suitable centerpiece for any spring celebration.
Originating from the artistic side of cake decorating, the floral topper typically includes variations like handcrafted sugar flowers, real edible blooms, or even paper decorations for those who wish to avoid sugar. Each element, whether it be the cake layers or the floral accents, contributes to a delightful interplay of flavors and textures. The cake is moist and airy, offering a perfect bite with every slice. Its versatile flavor profile can be enhanced by the types of cake you choose—vanilla, lemon, or even almond—making it customizable to your taste.
Creating this cake goes beyond mere baking; it’s an art form. Whether you are a novice or a seasoned baker, the process allows you to experiment with color, design, and flavors. The end result is not just a dessert; it’s a creative masterpiece that reflects your effort and artistic flair.
Why You’ll Love This
You will absolutely adore this Spring Cake Designs: Pastel Floral Cake Topper Design for several compelling reasons. First and foremost, the cake is a burst of flavor and freshness. Just imagine slicing through layers of sponge cake, filled with a perfectly balanced creamy frosting. The light sweetness is an excellent complement to the floral decoration that not only looks stunning but also adds a subtle hint of flavor to each bite.
This cake is incredibly versatile, allowing you to experiment with various flavors and fillings. Whether you are a fan of classic vanilla or crave the zestiness of lemon curd, the options are endless. Moreover, the ease of this recipe makes it accessible for busy parents who want to create something stunning without spending endless hours in the kitchen. Each step breaks down the process, providing beginner bakers with confidence.
A common misconception about ornate cakes like this is that they are time-consuming and complicated. While they do require attention to detail, the clear instructions and a little practice make them achievable, even for those who may consider themselves novices. Think of this cake as a fun project; the rewards you receive in both taste and presentation are well worth it.
Lastly, the cost-effectiveness of this recipe should not be overlooked. Using staple ingredients often found in your pantry, along with a few fresh additions, allows for a budget-friendly baking experience without compromising on quality. You can create a showstopper that impresses your friends and family while staying on budget.
Ingredients You’ll Need
To successfully create your Spring Cake Designs: Pastel Floral Cake Topper Design, you’ll need the following ingredients:
- 2 cups all-purpose flour: This forms the base of our cake. You can use gluten-free flour as a substitute for a gluten-free version.
- 1 ½ cups granulated sugar: Adds sweetness and moisture to the cake. Brown sugar can be used for a deeper flavor.
- ½ cup unsalted butter, softened: Provides richness and a tender crumb. You can substitute with coconut oil for a dairy-free option.
- 3 large eggs: Acts as a binding agent while contributing to the texture and moisture. Flax eggs work as a vegan substitute.
- 1 cup milk: Whole milk enhances flavor; almond milk can be used for a non-dairy option, though it may slightly alter the taste.
- 2 teaspoons baking powder: This is crucial for helping the cake rise. Ensure it’s fresh for best results.
- 1 teaspoon vanilla extract: Adds depth to the flavor profile. You can substitute with almond extract for a different flavor note.
- 1/4 teaspoon salt: Balances sweetness and enhances the flavors of the cake.
- For the frosting: You’ll need 1 cup of unsalted butter, 4 cups of powdered sugar, 2 tablespoons of milk, and a few drops of food coloring for pastel shades.
- Flowers for decoration: Options include edible flowers or handcrafted sugar flowers.
Each ingredient in this recipe serves an important role, ensuring that the cake is not only delicious but visually appealing. Understanding these roles allows for successful substitutions based on dietary needs or preferences.
How to Make
Follow these step-by-step instructions to create your Spring Cake Designs: Pastel Floral Cake Topper Design:
- Preheat your oven: Begin by preheating your oven to 350°F (175°C). This step is fundamental as it ensures an even bake. While the oven warms, you can prepare your cake batter without worrying about time management for baking.
- Prepare your cake pans: Grease and flour two 9-inch round cake pans. This will prevent the cakes from sticking to the pans. An optional tip is to line the bottom with parchment paper for extra assurance. Set them aside for later use.
- Combine dry ingredients: In a mixing bowl, whisk together the all-purpose flour, baking powder, and salt. This step is crucial as it ensures that your leavening agents are evenly distributed throughout the flour. A well-mixed dry ingredient base is key to a fluffy cake consistency.
- Mix wet ingredients: In a separate large mixing bowl, cream together the softened butter and sugar until the mixture becomes light and fluffy—around 3-4 minutes using an electric mixer. Once whipped, add the eggs one at a time, followed by the vanilla extract. As you mix, you’ll notice a slight increase in volume as air is incorporated into the mixture.
- Combine wet and dry mixtures: Gradually add the dry mixture to the wet ingredients, alternating with the milk. Start and end with the dry ingredients (dry, wet, dry). This creates a smoother batter and helps with the cake’s structure.
- Check consistency: The batter should be smooth and slightly thick but pourable. If it seems too dense, you can add an additional tablespoon of milk. Make sure to scrape down the sides for even mixing.
- Pour the batter into pans: Divide the batter evenly between the prepared cake pans. Use a spatula to spread it out evenly, which helps it bake uniformly.
- Bake the cake: Place in the preheated oven and bake for 25-30 minutes, or until a toothpick inserted into the center comes out clean. You should see the edges pulling away from the sides slightly, indicating it’s time to remove them.
- Cool the cakes: Once baked, remove from the oven and allow the cakes to cool in the pans for about 10 minutes. After that, transfer them to a wire rack to cool completely. Cooling is an essential step to prevent melting the frosting later.
- Prepare the frosting: In a mixing bowl, beat the unsalted butter until it’s smooth. Gradually add the powdered sugar, mixing on low speed until combined. Then add milk and food coloring as needed to achieve your desired consistency and pastel shade.
- Assemble the cake: Place one layer of cake on a serving plate. Spread a generous layer of frosting on top. Place the second layer on top and frost the entire cake. Make sure to smooth the frosting for a professional look.
- Decorate: Finish by arranging your floral decorations atop the cake as desired. You can create a wreath of flowers around the top edge or a cascading effect down one side. This is where you can let your imagination run wild!
Your Spring Cake is now complete! The texture should be moist, the taste should be pleasantly sweet, and the pastel floral decorations should evoke the freshness of spring.
Variations & Substitutions
Gluten-Free Variation: For those seeking a gluten-free option, simply substitute the all-purpose flour with a gluten-free flour blend. This swap may slightly change the texture, but using a good quality blend will yield impressive results. Pairing your gluten-free cake with a light whipped cream frosting will elevate the flavor while keeping it airy.
Lemon Zest Addition: To infuse your cake with a refreshing citrus twist, add 1 tablespoon of freshly grated lemon zest to your batter. This variation not only enhances the flavor but also adds a light perfume to your cake, reminiscent of a sunny spring day. The combination of lemon with the floral top will create a delightful experience for your taste buds.
Chocolate Buttercream Frosting: If you’re a chocolate lover, why not try chocolate buttercream? Replace the vanilla extract in your frosting with melted chocolate or cocoa powder. This frosted variation takes the cake to a whole new level and pairs perfectly with a vanilla or chocolate-flavored cake. Make sure to adjust the sugar level accordingly to balance the richness of the chocolate.
Egg-Free Variation: For those avoiding eggs, you can substitute the three eggs with a combination of 1/4 cup unsweetened applesauce and 1/4 teaspoon baking soda. This helps provide the necessary leavening and keeps the cake moist while maintaining its fluffiness. This is particularly useful for those following a vegan or egg-free diet.
Fruit Filling Variation: For added flavor complexity, consider using a fruit filling such as strawberry or raspberry jam between the cake layers. This tartness will contrast beautifully with the sweet frosting and offer a delightful surprise in every slice. Choose fresh fruit where you can, and layer it with whipped cream for an added twist.
Common Mistakes to Avoid
When embarking on your cake-baking journey, it’s crucial to avoid some common pitfalls that can detract from your efforts. One such mistake is over-mixing the batter, which can lead to a denser cake than intended. Remember, once you combine your dry ingredients with the wet ones, mix only until you see no more flour spots. Overworking the batter can cause gluten to develop, resulting in a less tender crumb.
Another frequent error is skipping the cooling step after baking. Frosting a warm cake can melt your frosting, leading to a gooey mess rather than a beautifully frosted dessert. Always ensure your cakes are completely cool before you begin assembling. Lastly, be cautious with your baking powder. If this essential leavening agent is old or improperly measured, your cake may not rise as expected. A quick tip: Check the expiration date on your baking powder and test if it’s still active by pouring a little into vinegar; it should fizz if it’s fresh.
Storage, Freezing & Reheating Tips
When it comes to storing your Spring Cake Designs: Pastel Floral Cake Topper Design, ensure that it is properly covered with plastic wrap or stored in an airtight container. This keeps the cake moist while preserving the decorative elements. If you plan to enjoy the cake over several days, it’s best to cut only one slice at a time to minimize exposure to air.
For longer storage, consider freezing both the unfrosted cake layers and the decorated cake. Wrap the unfrosted layers tightly in cling film and then place them in a freezer-safe bag. They can last for up to three months frozen. When ready to consume, allow the layers to thaw in the refrigerator overnight before frosting and decorating.
If you decide to reheat a slice, the microwave method is simple and effective. Place a slice of cake on a microwave-safe plate, cover with a damp paper towel to maintain moisture, and heat for about 15-20 seconds. This will revive the cake’s texture without drying it out.
Frequently Asked Questions
Can I use other colors for the frosting and decorations?
Absolutely! The beauty of this recipe lies in its versatility. You can use any food coloring of your choice to achieve the desired hues for your frosting. Pastels are lovely for spring, but vibrant colors can make for a fun summer cake or a bold party dessert. Use gel food coloring for better pigmentation and less liquid.
Can I make this cake ahead of time?
Yes, this Spring Cake can be made a day ahead. Simply bake the layers, allow them to cool, and store them wrapped in plastic wrap at room temperature. You can frost and decorate the cake the following day. It’s actually best to let the flavors meld overnight!
What kind of flowers can I use for the decoration?
You can use various edible flowers like pansies, nasturtiums, or violets, which not only look beautiful but also add subtle flavors. If you opt for sugar flowers, you can get creative with colors and styles. The type of decoration can change the look and feel of your cake significantly!
Is it necessary to use a stand mixer for this recipe?
While a stand mixer does make the process easier, it’s not necessary. A hand mixer or even a whisk and elbow grease can achieve similar results. Just ensure to thoroughly cream the butter and sugar together to incorporate enough air for a fluffy texture.
How do I keep the cake from drying out?
Here are a few tips: use fresh ingredients, avoid over-baking, and make sure to wrap the cake tightly for storage. Adding simple syrup between the layers can also enhance moisture while introducing additional flavor if desired.
Conclusion:
In summary, the Spring Cake Designs: Pastel Floral Cake Topper Design is not just another cake; it is a creation that brings a sense of joy, beauty, and deliciousness to any occasion. Combining fresh ingredients and delightful decoration can truly elevate your baking game. Encouraging you to take on this project, customize it to your style, or bring variations into play will enhance your experience. Whether you share it with loved ones or keep it all for yourself, the reward is in the adventure of creation. So, roll up your sleeves, gather your ingredients, and get ready for a baking experience that is as much fun to create as it is to delight in. Share your creation and inspire others to embrace their baking journeys!


