Prep time: 30 minutes
Cook time: 45 minutes
Total time: 1 hour 15 minutes
Servings: 12
Imagine a beautiful Spring day where vibrant flowers are blooming, the air is filled with a delightful fragrance, and friends and family gather to celebrate life. What better way to embrace this season than with a gorgeous Spring Cake adorned with colorful flowers? This recipe for an Elegant Spring Cake with Flowers will not only satisfy your sweet cravings but also serve as a stunning centerpiece for any celebration. Whether you’re preparing for a birthday, Easter gathering, or a simple family get-together, this cake brings joy and a sprinkle of beauty to the table. In this article, you’ll learn how to create a delectable and visually stunning cake that showcases the best of Spring through delightful flavors and fresh designs.
This recipe is special because it combines easy-to-follow techniques with stunning results, allowing even beginner bakers to impress their guests. The use of delicate floral designs makes this cake not only a treat for the taste buds but also a feast for the eyes. Get ready to make an unforgettable dessert that is as enjoyable to create as it is to eat!
What Is Spring Cake Designs: Elegant Spring Cake with Flowers?
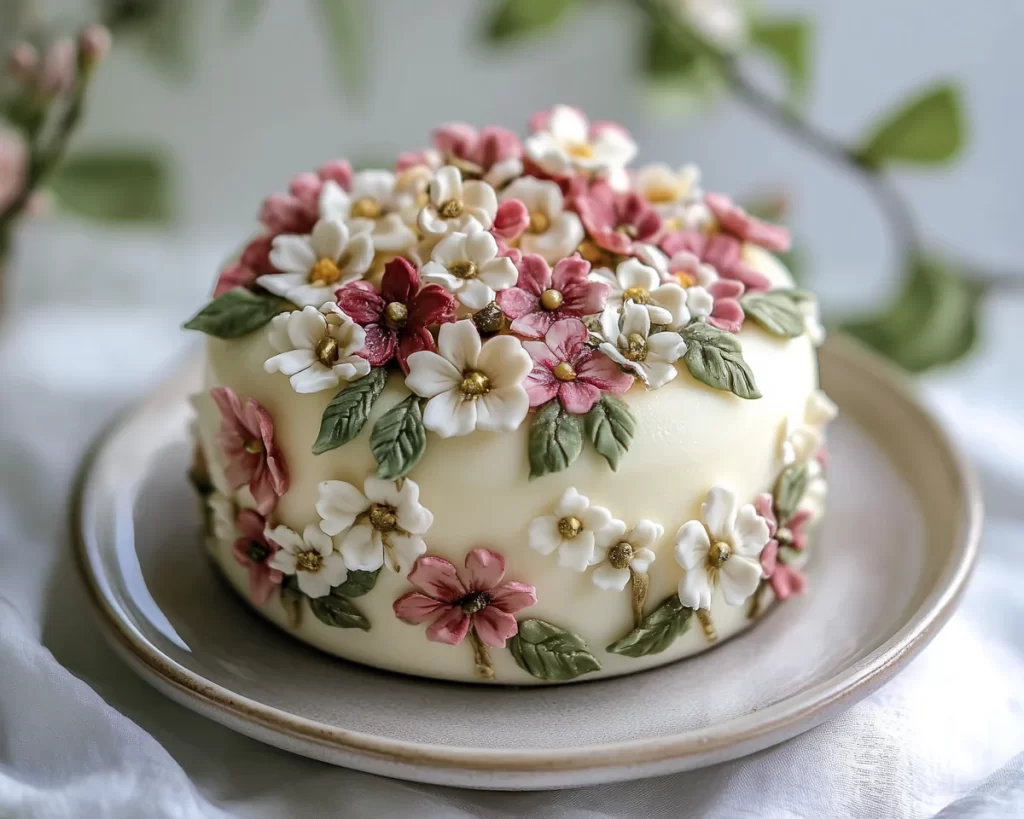
The Elegant Spring Cake with Flowers is a delightful dessert that encapsulates the spirit of Spring. Originating from traditional cake designs, this cake features a **light and airy vanilla cake** layered with **fluffy buttercream frosting**, adorned with edible flowers and fresh fruits. The combination of flavors and textures makes it appealing to both the eyes and the palate. The cake base is moist and tender, while the rich frosting adds a creamy element that complements the floral decorations beautifully.
What sets this cake apart is not just its taste, but its **elegant presentation**. The edible flowers, which can include options like **pansies, violets, and nasturtiums**, create a stunning visual impact, making the cake an ideal choice for Spring celebrations. These flowers not only enhance the aesthetics but also contribute delicate flavors to the cake, merging beautifully with the vanilla and buttercream. When sliced, the layers are visible, showcasing the artistry that goes into the creation of this dessert.
Overall, the Elegant Spring Cake with Flowers is a perfect representation of Spring’s beauty—light, refreshing, and vibrant. It invites you to gather around the table, celebrate special moments, and indulge in a slice of happiness that comes packed with warmth and joy.
Why You’ll Love This
You’ll love this recipe for numerous reasons, ranging from its delightful taste to its stunning visual appeal. One of the most notable benefits is how this cake brings together vibrant **flavors** and a rich texture that is undeniably satisfying. The combination of moist vanilla cake layers and creamy buttercream frosting results in a dessert that is both luscious and light, making it perfect for any occasion.
Additionally, the ease of preparation makes it accessible, even for busy parents or beginners in the kitchen. With clear steps and easy-to-find ingredients, you can experience the joy of baking without the stress. This recipe also allows for versatility in decorating; you can use whatever edible flowers are available in your area or choose fruits that are in season. This means you can customize your cake to suit dietary preferences or restrictions, making it a wonderful choice for gatherings.
Common misconceptions might include the belief that such a beautiful cake must take hours to create or require advanced baking skills. In reality, with a little practice and patience, anyone can master this cake. You’ll soon find that the most complex-looking desserts can often be crafted with basic ingredients and techniques, allowing you to impress friends and family while enjoying the cooking process.
Ingredients You’ll Need
1. **For the Vanilla Cake**:
– 2 ½ cups all-purpose flour
This flour forms the base of the cake, providing structure and a delicate crumb. You can substitute with a gluten-free flour blend if required.
– 2 ½ tsp baking powder
Ensures the cake rises properly, creating a fluffy texture. Double-check the expiration date for best results.
– ½ tsp salt
Enhances the flavor of the cake, balancing the sweetness.
– 1 cup unsalted butter, softened
Adds richness and moisture to the cake. Use room-temperature butter for the best incorporation into the batter.
– 2 cups granulated sugar
Sweetens the cake and contributes to its light texture when creamed with butter.
– 5 large eggs
Provide structure and moisture. Ensure they are also at room temperature for better mixing.
– 1 tbsp vanilla extract
Offers a fragrant, sweet flavor that complements the cake beautifully.
– 1 cup whole milk
For a moist cake batter. You can also use almond or soy milk for dairy-free options.
2. **For the Buttercream Frosting**:
– 1 cup unsalted butter, softened
Offers the creamy texture essential for buttercream.
– 4 cups powdered sugar
Sweetens the frosting and thickens it to the right consistency.
– 2 tbsp heavy cream
This adds softness to the frosting, helping to achieve a smooth texture.
– 1 tsp vanilla extract
For enhancing the flavor, much like in the cake.
3. **For Decoration**:
– Edible flowers (such as pansies, violets, or nasturtiums)
Bring a fresh touch and aesthetic appeal. Make sure they are pesticide-free and safe for consumption.
– Fresh berries (like strawberries, raspberries, or blueberries)
Add a tart flavor and vibrant colors to the design.
Each ingredient plays a crucial role in creating this cake’s unique flavor profile and texture, so don’t overlook their significance!
How to Make
1. **Preheat the Oven**: Begin by preheating your oven to 350°F (175°C). Prepare your cake pans by greasing and flouring them. This step is essential to prevent the cake from sticking and ensure a seamless release after baking.
2. **Mix Dry Ingredients**: In a bowl, combine the all-purpose flour, baking powder, and salt. Whisk them together until well blended. This helps to evenly distribute the leavening agent throughout the flour, creating a uniform texture in the final cake.
3. **Cream Butter and Sugar**: In a large mixing bowl, cream the softened butter and granulated sugar together until the mixture is light and fluffy. This process should take about 3-5 minutes on medium speed. The air that gets incorporated here is what gives your cake that light texture.
4. **Add Eggs and Vanilla**: Gradually add the eggs, one at a time, making sure to mix well after each addition. Then stir in the vanilla extract. It’s crucial for the eggs to be at room temperature, as this helps create a smoother batter.
5. **Incorporate Dry Ingredients and Milk**: Alternate adding the dry ingredients and milk, starting with the flour mixture and ending with the milk. Mix on low speed until just combined. Over-mixing at this stage can lead to a dense cake, so be gentle.
6. **Bake the Cakes**: Divide the batter evenly between the prepared pans and smooth the tops. Bake in the preheated oven for about 25-30 minutes. You can check for doneness by inserting a toothpick into the center of the cake; it should come out clean when fully baked.
7. **Cool Down**: Once baked, remove the cakes from the oven and allow them to cool in the pans for about 10 minutes. Then, carefully transfer them to a wire rack to cool completely. This cooling process is vital for preventing a too-soft frosting.
8. **Prepare the Buttercream**: While the cakes are cooling, prepare your buttercream. Beat the softened butter in a mixing bowl until creamy. Gradually add the powdered sugar, followed by heavy cream and vanilla extract, mixing until smooth and fluffy.
9. **Assemble the Cake**: Once the cakes are completely cool, level the tops if needed to create even layers. Place the first layer on a serving plate, spread a generous layer of buttercream on top, and then place the second layer on top.
10. **Ice the Cake**: Apply a thin layer of buttercream all over the cake for a **crumb coat**. Chill the cake in the fridge for about 30 minutes to set this layer. After chilling, apply a thicker layer of frosting, making it as smooth or textured as you desire.
11. **Decorate with Flowers**: After frosting the cake, it’s time for the fun part! Adorn the top with your chosen edible flowers and fresh berries. You can arrange them artfully for a rustic look or cluster them for a bold statement.
12. **Serve and Enjoy**: Slice up your elegant Spring Cake and watch as the impressive layers of deliciousness are revealed. Serve it to family and friends, and enjoy the praise that follows!
Variations & Substitutions
Lemon Spring Cake: If you’re a fan of citrus flavors, consider adding lemon zest and substituting part of the milk with fresh lemon juice. This will give the cake a zesty brightness that complements the floral decorations beautifully. The tartness of the lemon pairs nicely with the sweetness of the frosting and adds a refreshing element perfect for Spring gatherings.
Gluten-Free Option: For those with gluten sensitivities, you can easily switch out the all-purpose flour for a gluten-free blend. Make sure your baking powder is also gluten-free. The rest of the ingredients (like eggs and butter) remain unchanged. This way, you can enjoy the same incredible taste while ensuring that everyone can partake in this delicious treat.
Chocolate Spring Cake: Love chocolate? Replace a cup of the all-purpose flour with cocoa powder for a rich chocolate cake experience. To enhance this variation, consider adding chocolate chips to the batter for an extra indulgent texture. Pairing this chocolate cake with a vanilla buttercream creates a classic and irresistible combination.
Dairy-Free Alternative: If you’re looking for a dairy-free version, swap out the butter for a plant-based substitute like coconut oil or vegan butter. Use almond or oat milk in place of whole milk. This variation still delivers the moist texture of the cake, but it caters to those with dairy intolerances.
Seasonal Fruit Spring Cake: To celebrate the seasonal bounty, consider incorporating mashed berries, such as strawberries or blueberries, directly into the batter. This adds not just flavor but also lovely specks of color throughout the cake, enhancing both its dress and taste.
Each variation offers a unique twist on this already splendid dessert, allowing you to customize it to suit your taste and dietary needs.
Common Mistakes to Avoid
One of the common mistakes in baking this cake is **not measuring the flour correctly**. Using too much flour can lead to a dense cake. Make sure to spoon the flour into your measuring cup and level it off with a knife instead of scooping straight from the bag.
Another critical aspect is **over-mixing** the batter after adding the flour. This can develop the gluten too much and create a tough cake. Mix until just combined, and don’t worry about small lumps; they will incorporate during baking.
When it comes to the frosting, a common issue is using butter that is either too cold or too warm. The butter should be softened but not melting. If it’s too cold, it won’t cream well, and if it’s too warm, the frosting may end up too runny.
Lastly, ensure your oven is preheated correctly. Placing your cake in an oven that hasn’t reached the right temperature can lead to uneven baking, resulting in burnt edges and a raw center. **Invest in an oven thermometer** if you’re unsure about your oven’s accuracy.
Storage, Freezing & Reheating Tips
Proper storage of your Elegant Spring Cake is essential for maintaining its freshness. If you plan to enjoy the cake over several days, store it covered at room temperature for up to 2 days. After that, it’s best to transfer it to the refrigerator, ensuring that it’s well-covered to prevent it from drying out.
If you’re looking to freeze the cake, it’s best to freeze the unfrosted layers individually. Wrap each layer tightly in plastic wrap before placing them in an airtight container. You can freeze unfrosted cake layers for up to 3 months. When ready to enjoy, thaw them in the refrigerator overnight and frost once completely cool.
For reheating, keep in mind that cakes are best served at room temperature, so take the cake out of the fridge an hour before serving. If you’ve frozen it, allow it to thaw completely before enjoying. This way, you’ll relish every bite of that delightfully moist cake.
When considering food safety, always ensure that the cake is stored in a clean and dry environment, especially if including fresh flowers and fruits. If any signs of spoilage are present, it’s best to err on the side of caution and discard the cake.
Frequently Asked Questions
How can I ensure my cake layers are level?
Using a serrated knife or a cake leveler, gently trim the tops of your cooled cake layers until they are perfectly flat. This will ensure a stable base when stacking the layers, leading to a beautifully structured cake.
Can I use a different type of frosting?
Absolutely! While the buttercream is a classic choice, cream cheese frosting or whipped cream can also work wonderfully with this cake, providing a different flavor profile and texture. Feel free to experiment with different frostings to find what suits your preference!
How long does the cake last in the refrigerator?
The cake can last for about a week in the refrigerator if stored properly. Make sure it is well-covered to keep it fresh. However, it’s best enjoyed within the first few days for optimal flavor.
Can I make this cake in advance?
Yes! You can bake the cake layers a day or two in advance and store them in the refrigerator. Just frost them just before serving to maintain the best texture and appearance.
What are some suggestions for serving the cake?
This cake pairs well with a variety of beverages like tea, coffee, or lemonade. You can also serve it alongside a scoop of vanilla ice cream or a dollop of freshly whipped cream for an extra indulgent treat.
Conclusion:
The Elegant Spring Cake with Flowers is not just a dessert; it’s a celebration of the season itself. Its delightful flavors, stunning presentation, and versatility make it a must-try recipe for anyone looking to impress. As you embark on creating this cake, remember to have fun and embrace the process. Customize it to fit your preferences or the occasion, and don’t hesitate to share it with friends and family.
This recipe is sure to become a cherished addition to your baking repertoire. Dive into this delicious adventure, and let your creativity flourish. Happy baking!


