Prep time: 30 minutes
Cook time: 25 minutes
Total time: 55 minutes
Servings: 12
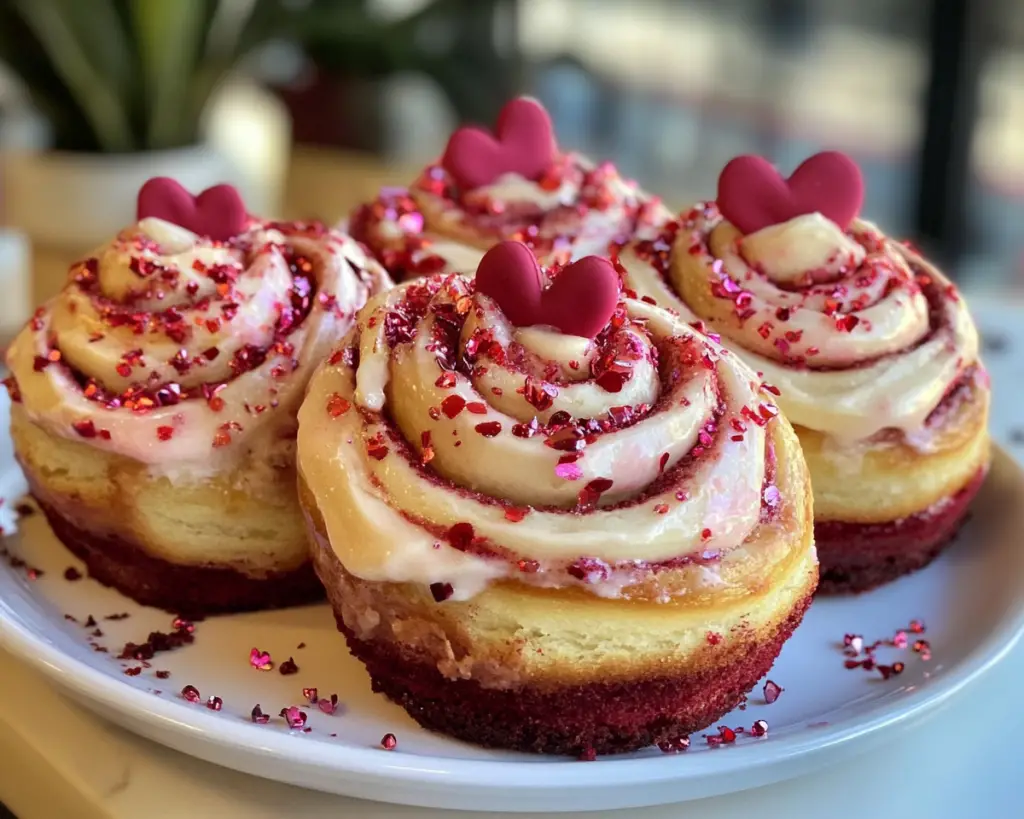
Imagine waking up on a chilly Valentine’s Day morning, the aroma of freshly baked cinnamon rolls wafting through your kitchen. You open the oven and reveal gorgeous, fluffy rolls adorned with a rich cream cheese topping, a vibrant red hue peeking through. That is the magic of Red Velvet Cinnamon Rolls, a delightful treat that embodies the spirit of love and warmth. This recipe is not just a breakfast item; it’s a celebration of flavors, textures, and memories.
The pairing of classic cinnamon rolls with the decadence of red velvet cake is nothing short of genius. Whether you’re indulging by yourself, sharing with family, or impressing a loved one, this recipe is unique and easy to follow. In this article, you’ll learn how to make these delightful treats from scratch, along with tips, variations, and answers to common questions. We’ll explore the tantalizing flavors and textures that make these rolls so special, ensuring that your Valentine’s brunch will be memorable.
What Is Red Velvet Cinnamon Rolls Recipe Easy Valentine’s Day Brunch Treat?
Red Velvet Cinnamon Rolls are a luscious twist on the traditional cinnamon roll recipe. Originating from the beloved red velvet cake, this dish merges the moist, velvety texture of red velvet with the beloved spiral form of cinnamon rolls. The rolls themselves are infused with cocoa powder and vibrant red food coloring, giving them a stunning appearance that is perfect for Valentine’s Day. Each roll is a pillowy delight filled with a buttery cinnamon-sugar mixture, creating a mouthwatering swirl in every bite.
The flavor profile is rich yet subtly sweet, allowing the taste of the cinnamon to shine through while the cream cheese glaze adds a creamy tang. This unique blend of sweetness and light acidity transports you with each decadent mouthful. The beauty of Red Velvet Cinnamon Rolls lies not just in their taste but also in their visual appeal; the vibrant red swirls make them the centerpiece of any brunch table. Whether you enjoy them hot out of the oven or at room temperature, these rolls are a delightful indulgence.
If you thought making cinnamon rolls was a difficult task meant only for seasoned bakers, think again! This recipe is designed to be simple and approachable. By following the steps outlined below, you’ll have delicious cinnamon rolls to impress your loved ones without spending the entire day in the kitchen.
Why You’ll Love This
There are numerous reasons to fall in love with this Red Velvet Cinnamon Rolls recipe. First and foremost, they taste absolutely indulgent. The combination of soft, fluffy dough with a rich cinnamon filling and creamy glaze creates an explosion of flavors in your mouth. Furthermore, the recipe is incredibly easy to follow, making it accessible for busy parents and total beginners alike. You don’t need to have extensive baking skills to pull this off—you’ll be a star in your kitchen!
Another advantage is the versatility of these rolls. They can easily be customized to suit various dietary preferences, whether you want to make them gluten-free, dairy-free, or even vegan. Plus, they’re an affordable treat compared to brunching out, ensuring that you can whip up a delightful spread without breaking the bank.
Common misconceptions about baking, such as the belief that it’s too time-consuming or complicated, don’t hold up here. While these rolls take some time to rise, the hands-on work is minimal. You simply mix the dough, let it rise, roll it out, fill it, and bake. It’s a delightful process that will fill your kitchen with warmth and stimulate your senses.
Ingredients You’ll Need
- All-purpose flour: The backbone of the dough. This gives the rolls their structure. You can substitute it with gluten-free flour if necessary.
- Granulated sugar: Used to sweeten the dough and filling. You can also opt for coconut sugar for a more natural sweetness.
- Cocoa powder: It’s what gives red velvet its unique flavor. A good quality unsweetened cocoa powder works best.
- Active dry yeast: Essential for leavening the rolls, making them fluffy. Ensure your yeast is fresh for the best rise.
- Salt: For enhancing flavors; it’s a vital ingredient that shouldn’t be omitted.
- Milk: Provides moisture and helps activate the yeast. Whole milk is the best option, but almond or oat milk can work too.
- Butter: Adds richness and contributes to the soft texture. Use unsalted butter for better control over the salt level.
- Egg: Works as a binding agent; it helps with the structure and richness of the dough. You can use a flax egg for a vegan alternative.
- Red food coloring: For that signature color. Make sure to use a high-quality gel or liquid food dye for the best results.
- Cinnamon: This is the star of the filling. It adds warmth; without it, you lose the essence of cinnamon rolls.
- Brown sugar: To provide moisture and a deeper flavor to the filling; it complements the cinnamon beautifully.
- Vanilla extract: Enhances the overall flavor profile; pure vanilla extract is recommended for best results.
- Cream cheese: This is used for the glaze. It adds a tangy sweetness that balances the rolls perfectly.
- Powdered sugar: To achieve a smooth and sweet glaze, powdered sugar is a must. It’s much easier to use than granulated sugar when making a glaze.
How to Make
- In a large mixing bowl, combine 1/2 cup of warm milk with 2 1/4 teaspoons of active dry yeast and a pinch of sugar. Allow this mixture to sit for about 5-10 minutes, until it becomes frothy. This step is essential as it proves your yeast, ensuring it is alive and ready to help your dough rise.
- While the yeast is proving, melt 1/4 cup of unsalted butter and let it cool slightly. In another bowl, whisk together 3 cups of all-purpose flour, 1/2 cup of granulated sugar, 1/4 cup of cocoa powder, and 1 teaspoon of salt. This combination creates a wonderful base for your dough.
- Once the yeast is ready, add the melted butter, 1 large egg, and 1 tablespoon of red food coloring to the yeast mixture. Stir well to combine, making sure everything is well incorporated for a uniform dough.
- Gradually add the dry ingredients to the wet ingredients, mixing with a wooden spoon or your hands until combined; the dough will seem a bit sticky at first but keep kneading it. Knead the dough on a floured surface for about 5-7 minutes, until it becomes smooth and elastic. This is critical for gluten development!
- Place the kneaded dough in a greased bowl, cover it with a damp cloth, and let it rise in a warm area for about 1 hour or until doubled in size. The warmth helps activate the yeast significantly, giving you fluffy rolls.
- After the dough has risen, punch it down to release the air bubbles. Roll it out on a floured surface into a rectangle about 18×12 inches. Spread it with 3 tablespoons of softened butter, then sprinkle 1 cup of brown sugar and 2 tablespoons of cinnamon evenly over the surface.
- Carefully roll the long edge of the dough tightly into a log. Make sure to roll it evenly to ensure consistent-sized rolls. Once rolled, cut the log into 12 equal pieces using a sharp knife or dental floss, which gives a cleaner cut.
- Place the cinnamon rolls in a greased 9×13 inch baking pan, covering them with a cloth. Allow them to rise for another 30-45 minutes. This second rise ensures they will be light and fluffy when baked.
- Preheat your oven to 350°F (175°C). Bake the rolls for about 20-25 minutes, or until they are slightly brown on top. Keep an eye on them during the last few minutes to avoid over-baking.
- As the rolls are baking, prepare the cream cheese glaze by whisking together 4 ounces of softened cream cheese, 1 cup of powdered sugar, 1 teaspoon of vanilla extract, and 2 tablespoons of milk until smooth. Drizzle this glaze generously over the warm rolls once they cool down a bit, creating a luscious finish to your treat.
Variations & Substitutions
Gluten-Free Red Velvet Cinnamon Rolls: If you or someone you love is sensitive to gluten, you can create a gluten-free version of this recipe by using a high-quality gluten-free all-purpose flour blend. Many brands create flour combinations that mimic the elasticity of regular flour. Follow the same instructions but make sure to add in a bit of xanthan gum to help the gluten-free flour bind together. The result will still yield delicious, fluffy rolls even without gluten!
Dairy-Free Red Velvet Cinnamon Rolls: For a vegan option, substitute the butter with coconut oil or a plant-based buttery spread. For the milk, almond or oat milk work beautifully, and you can easily replace the cream cheese glлze with a vegan cream cheese alternative or make a simple glaze using just powdered sugar and plant milk. Rest assured, the taste will still be divine and perfect for any dairy-sensitive guests!
Mini Red Velvet Cinnamon Rolls: If you’d like to make bite-sized versions of this delightful treat, roll the dough thinner and cut it into smaller strips before rolling. Once baked up, they make perfect finger foods for gatherings or parties! Adjust the baking time to about 15-20 minutes to ensure they don’t overbake.
Nutty Red Velvet Cinnamon Rolls: Add a crunchy twist by incorporating 1/2 cup of chopped nuts like pecans or walnuts into the filling along with the sugar and cinnamon. Nuts add a delightful crunch and an extra layer of flavor to every bite.
Cheesecake-Filled Red Velvet Cinnamon Rolls: For an indulgent twist, make a cheesecake layer to spread before rolling up the red velvet dough. Combine 8 ounces of cream cheese, 1/4 cup of sugar, and 1 teaspoon of vanilla extract, then spread this mixture onto the dough before you add the cinnamon filling. This will add a rich, creamy goodness that will elevate your cinnamon rolls to new heights!
Common Mistakes to Avoid
One of the most common mistakes when making cinnamon rolls is using inaccurate measurements. Baking is a science, so it’s essential to measure your ingredients correctly. Too much flour can lead to dense rolls, while too little can result in them falling apart. Always use a kitchen scale for precision or spoon and level your flour carefully to avoid packing it into the measuring cup.
Another critical point is the yeast. Make sure your yeast is fresh and active. If your rolls don’t rise, it may be due to inactive yeast. Always test your yeast by activating it in warm milk before adding it to the dough. If it doesn’t bubble up, it’s best to start again with fresh yeast.
Lastly, don’t skip the resting and rising times. Allowing the dough to rise properly is crucial for getting that fluffy, airy texture that everyone loves in a cinnamon roll. Skipping the first rise will lead to dense, tough rolls. Remember to be patient; the time spent waiting will be rewarded with delicious results.
Storage, Freezing & Reheating Tips
To ensure the best quality, store any leftovers in an airtight container at room temperature for up to 2 days. If you need to keep them longer, consider freezing. Wrap the individual rolls tightly in plastic wrap and then place them in a freezer-safe bag. They can be frozen for up to 3 months. To reheat, simply thaw overnight in the refrigerator, then warm them gently in the oven or microwave for a few seconds.
For those who make them in advance, you can assemble the rolls and leave them unbaked in the refrigerator overnight. Let them rise in a warm spot when you’re ready to bake them in the morning. This is a great way to simplify cooking on those busy mornings while still enjoying fresh, warm cinnamon rolls.
Frequently Asked Questions
Can I make these cinnamon rolls ahead of time? Yes! You can prepare the dough and fillings a day in advance. After rolling the dough and cutting the rolls, place them in a greased baking dish, cover with plastic wrap, and refrigerate overnight. In the morning, let them sit at room temperature to rise before baking.
Can I use a different type of flour? Absolutely! While all-purpose flour gives the best results, you can try using a gluten-free flour blend or whole wheat flour. Make sure to adjust any necessary quantities and be mindful of the texture; you may need to add more liquid if you’re using whole wheat flour.
What should I serve with Red Velvet Cinnamon Rolls? These treats pair beautifully with a range of beverages like coffee, tea, or a festive mimosa. You can also add a side of fresh fruit to balance out the sweetness of the rolls or serve them alongside a light yogurt to create a delightful brunch spread.
How do I know when my cinnamon rolls are done? Your cinnamon rolls are ready when they are gently golden on top and have risen well. You can also use a toothpick to ensure the dough is cooked through; it should come out clean when inserted into the middle of a roll.
Can I use less sugar in this recipe? While sugar is important for ensuring the sweetness of the rolls and activating the yeast, you can adjust the quantity a little. However, consider that reducing sugar too much may impact the overall texture and flavor. A natural substitute or smaller amounts of coconut sugar might work as alternatives, but expect some differences in taste and result.
Conclusion:
The Red Velvet Cinnamon Rolls Recipe is an enchanting way to celebrate love, be it for your family, friends, or even yourself. These fluffy and delicious rolls blend the charm of red velvet cake with the comfort of cinnamon rolls, providing a unique treat that is sure to bring smiles all around. With detailed steps and variations, you can easily customize this dish to suit your preferences and dietary needs.
Don’t hesitate to try this recipe for your next brunch gathering or special occasion. Remember, baking is all about joy and creativity, so feel free to share your own twists! Whether you keep it classic or explore new flavors, your Red Velvet Cinnamon Rolls will be a hit every time. Happy baking!