Prep time: 15 minutes
Cook time: 25 minutes
Total time: 40 minutes
Servings: 12
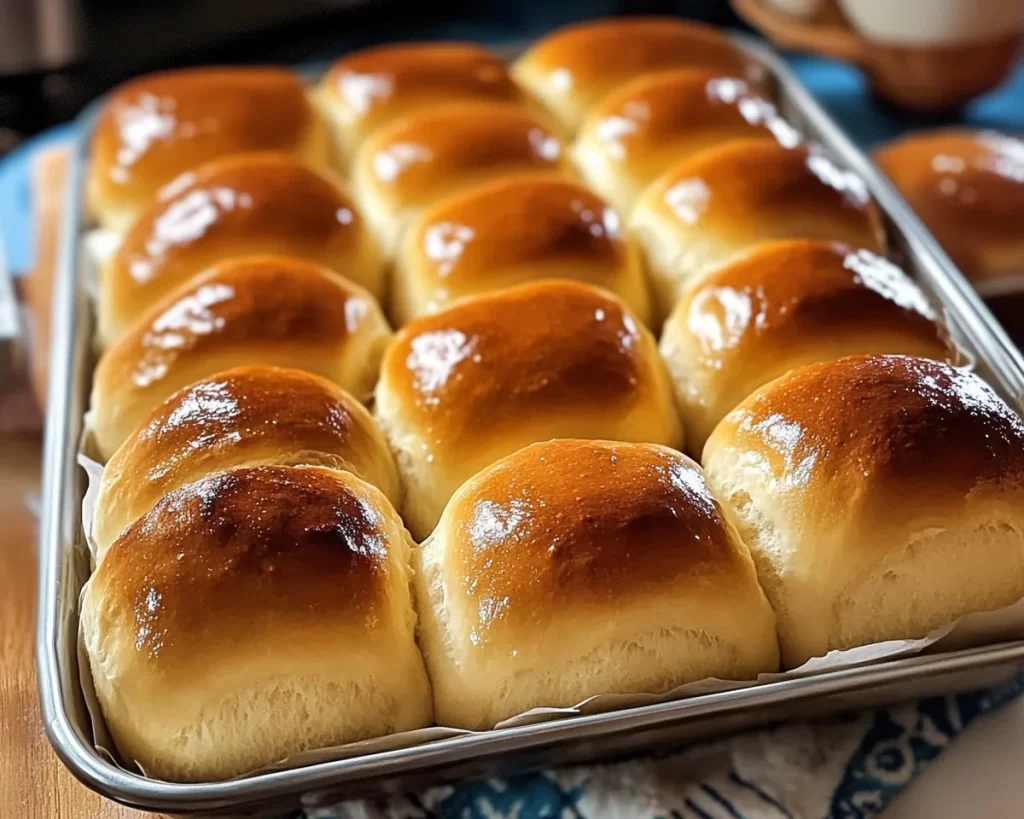
Quick & Easy Jumbo Dinner Rolls are a delightful addition to any meal, serving as a perfect side that pairs beautifully with many dishes. Whether you’re hosting a family gathering, enjoying a cozy dinner at home, or in need of something to elevate your usual dinner experience, these dinner rolls bring warmth and homemade goodness to the table. The moment you pull them out of the oven, the aroma of freshly baked bread will envelop your kitchen and make every mouth water with anticipation.
Making these rolls is not only a pleasure but also a quick and simple process that anyone can master. In this recipe, you’ll discover the ease of preparation, the joy of watching them rise, and the satisfaction of pulling golden-brown rolls from the oven. You will also learn some handy tips to ensure they turn out perfectly every time.
What Is Quick & Easy Jumbo Dinner Rolls?
Quick & Easy Jumbo Dinner Rolls are soft, fluffy, and wonderfully chewy bread rolls made from basic ingredients you probably already have in your pantry. The beauty of these rolls lies not only in their taste but also in their straightforward preparation. Originating from classic bread-making traditions, these rolls combine a balance of yeast and flour to create that irresistible texture that melts in your mouth.
These rolls can be enjoyed fresh with a pat of butter, used to soak up delicious gravies, or even made into delightful sandwiches. The interplay of textures—from the crispy outer crust to the soft, warm interior—makes every bite a new experience. You’ll find that they’re perfect for any occasion, be it a holiday feast or casual weeknight dinner.
Why You’ll Love This
One of the primary reasons you will love these Quick & Easy Jumbo Dinner Rolls is their incredible taste and freshness. There’s something truly gratifying about homemade bread, and these rolls deliver all the flavor without the lengthy preparation often associated with bread-making. The combination of simplicity and deliciousness makes them a go-to recipe for busy parents and anyone looking to whip up a satisfying side dish in a short amount of time.
Additionally, these rolls are highly versatile. They can be customized to suit various dietary preferences, making them a fantastic option for family gatherings where everyone has different tastes. The economical use of basic ingredients also means you can make them on a budget, all while including a touch of homemade flair in your meals.
Another advantage is their *warmth*—not just in temperature but emotionally, as homemade bread brings people together. While baking these rolls, you’ll create an inviting atmosphere in your home, invoking memories of family dinners and celebrations around the table.
Ingredients You’ll Need
- All-purpose flour: This is the base ingredient that provides structure to the rolls. You can substitute whole wheat flour for a healthier alternative, but each variation will change the flavor and texture slightly.
- Active dry yeast: This ingredient is crucial for making the rolls rise light and fluffy. Always ensure that your yeast is fresh for the best results.
- Warm water: The warmth activates the yeast. If it’s too hot, it can kill the yeast, and if it’s too cold, it may not activate properly. Aim for water that feels comfortably warm to the touch.
- Sugar: A small amount of sugar helps feed the yeast, promoting its growth, and adding a touch of sweetness to the rolls.
- Salt: This essential ingredient not only enhances the flavor but also strengthens gluten structure, contributing to the chewy texture.
- Butter: Adding melted butter lends richness and flavor to the rolls, making them even more enjoyable. You can use olive oil as a healthier substitute if desired.
- Milk: This ingredient enriches the dough, yielding a softer texture in the final rolls. Plant-based milk can be used for a vegan alternative.
Each ingredient plays a significant role in creating the perfect dinner rolls. By understanding their functions, you can make informed decisions about substitutions and variations to tailor the rolls to your dietary needs or flavor preferences.
How to Make
- Start by activating the yeast. In a small bowl, combine warm water (about 110°F) and sugar. Stir gently to combine, and then sprinkle the active dry yeast over the surface. Allow it to sit for about 5 minutes until it becomes frothy. This indicates that the yeast is alive and ready to go.
- In a large mixing bowl, combine all-purpose flour and salt. Mix these dry ingredients well to ensure the salt is evenly distributed throughout the flour. This step is crucial, as adding salt directly to the yeast mixture can inhibit the yeast’s ability to rise.
- Once your yeast mixture is frothy, add it to the flour mixture along with melted butter and milk. Stir until the dough begins to come together. If the dough feels too sticky, add a little extra flour until it’s manageable. This will ensure a good texture in your rolls.
- Turn the dough out onto a floured surface and knead it gently for about 5-10 minutes. Kneading helps develop gluten, which gives the rolls their structure. You’ll know it’s ready when the dough is smooth and elastic. It should spring back when you poke it.
- Place the kneaded dough into a greased bowl, cover it with a clean kitchen towel, and let it rise in a warm place for about 1 hour or until it has doubled in size. This step is essential as it allows the yeast to do its job, creating those fluffy rolls.
- After the dough has risen, punch it down gently to release the air. Turn it out onto a floured surface and divide it into 12 equal pieces. Shape each piece into a smooth ball by rolling it between your palms.
- Place the dough balls on a greased baking sheet, spacing them apart so they have room to rise. Cover the shaped rolls with the kitchen towel again and let them rise for another 30 minutes. This double rise will help you achieve the height and fluffiness characteristic of these rolls.
- While the rolls are rising, preheat your oven to 375°F (190°C). Once the rolls have risen, they should be puffy and close together on the baking sheet.
- Bake the rolls in the preheated oven for 20-25 minutes or until they’re golden brown on top. The aroma will be heavenly, and you’ll see them developing a beautiful color. To check for doneness, tap the bottom of a roll; it should sound hollow.
- Remove the rolls from the oven and allow them to cool on a wire rack for a few minutes. This helps them retain moisture and remains soft. Serve them warm with a dollop of butter on top and enjoy!
Follow these steps carefully and you’ll be rewarded with rolls that are not only visually appealing but also bursting with flavor and texture. These rolls are versatile enough to complement any meal.
Variations & Substitutions
Whole Wheat Jumbo Dinner Rolls: If you prefer a healthier option, using whole wheat flour instead of all-purpose flour is an excellent choice. The whole grain flour will give the rolls a denser texture and a nuttier flavor profile. Remember to increase the liquid slightly since whole wheat flour tends to absorb more moisture. These rolls are perfect for those looking for a more wholesome option.
Cheesy Rolls: For a savory twist, you can add shredded cheese to the dough. Cheddar, mozzarella, or even feta can be delightful additions. Mix in about a cup of cheese during the initial mixing stage. This variation will provide a cheesy, gooey middle and a gloriously flavorful crust. These rolls are ideal for serving alongside pasta, soups, or stews.
Herb-Infused Dinner Rolls: Infusing the dough with herbs such as rosemary, thyme, or garlic can elevate your rolls. Simply add about a tablespoon of dried herbs during the mixing process, or use fresh herbs finely chopped. This will give your rolls a lovely aromatic quality and pair beautifully with grilled meats and roasted vegetables.
Sweet Rolls: Transform your dinner rolls into sweet treats by adding a tablespoon of cinnamon and brown sugar to the dough. For additional zing, you can include raisins or chopped nuts. After baking, glaze the top with a simple icing made from powdered sugar and milk. These sweet rolls make for a delightful breakfast or dessert option!
Common Mistakes to Avoid
Creating the perfect dinner rolls can be tricky, but avoiding common pitfalls can make the process much smoother. One mistake to watch for is using water that is too hot when activating yeast. If the water is too hot, it can kill the yeast, preventing the dough from rising. Always test the temperature beforehand—it should feel warm but not scalding.
Another common issue is not allowing the dough to rise enough. If you don’t give it sufficient time to double in size, your rolls may end up dense instead of light and fluffy. On the flip side, over-proofing can also be detrimental; if the dough rises too much, it may collapse during baking.
Additionally, be mindful of your oven temperature. An oven that is too hot can cause the rolls to brown too quickly on the outside while remaining raw in the center. Always preheat your oven, and consider using an oven thermometer to ensure accurate temperatures.
Storage, Freezing & Reheating Tips
Proper storage is vital to keeping your rolls fresh and delicious. If you have any leftovers, allow the rolls to cool completely before storing them in an airtight container. They can stay at room temperature for about 2-3 days. However, for longer storage, consider freezing them.
To freeze, wrap each roll in plastic wrap and place them in a freezer bag or airtight container. They can be frozen for up to 3 months. When you are ready to enjoy them, simply remove the desired number of rolls and let them thaw at room temperature. You can reheat them in the oven at 350°F (175°C) for about 10 minutes to revive their lovely texture.
For best quality, avoid microwaving leftover rolls, as they can become chewy and dry. Instead, the oven method will keep them light and fluffy.
Frequently Asked Questions
Can I skip the second rise?
While skipping the second rise might seem tempting for a quicker process, I highly recommend allowing the dough to rise once more. The second rise helps to develop the rolls’ texture and flavor, ensuring that they’re light, fluffy, and enjoyable. Rushing this step could result in denser rolls.
What should I do if my dough doesn’t rise?
If your dough doesn’t rise, the likely culprit is inactive yeast. Ensure your yeast is fresh and active. For future attempts, keep the dough in a warm area, avoiding drafts. If the temperature of your kitchen is too cold, consider placing it in a slightly heated (turned off) oven to create a warm, draft-free environment.
Can I make dough ahead of time?
Yes! You can make the dough ahead of time and refrigerate it after the first rise. Punch it down, wrap it tightly, and store it in the fridge for up to 24 hours. When ready to bake, let it come to room temperature and follow the instructions for shaping and the second rise.
Can I flavor the butter used in the rolls?
Indeed! You can infuse the butter with herbs or garlic before melting it for richer flavor. This added step can enhance the overall taste of your rolls, giving them a unique character that pairs beautifully with savory dishes.
What’s the best way to serve these rolls?
These rolls are delightful when served warm and can be accompanied by a variety of spreads. Classic butter works wonders, but consider flavored butters such as herb-infused or honey butter. These rolls also shine alongside soups, stews, or as the bread for sandwiches, showcasing their versatility in any meal.
Conclusion:
Quick & Easy Jumbo Dinner Rolls are a game-changer for anyone looking to elevate their mealtime with minimal effort. With a little bit of time and simple ingredients, you can produce warm, fluffy rolls that everyone will love. Whether you enjoy them on their own, as a side, or in a unique way, this recipe provides the foundation for many delicious meals. Don’t hesitate to try out the variations or modifications to make them your own. I encourage you to gather your loved ones around the table and savor the delightful experience of homemade bread—happy baking!