Prep time: 15 minutes
Cook time: 15 minutes
Total time: 30 minutes
Servings: 4
The allure of a perfectly baked chocolate lava cake is nothing short of enchanting. Imagine the moment you break into that delicate exterior, and a river of rich, molten chocolate flows. It’s an experience that evokes memories, whether it’s a cherished Mother’s Day tradition or just a sweet indulgence after a long day. This recipe for Mother’s Day Chocolate Lava Cakes is designed to make you the star of your own kitchen, delighting not just moms but anyone with a sweet tooth.
What makes this recipe truly special is its simplicity. With just a handful of ingredients, you can create a dessert that looks and tastes like it was made by a professional pastry chef. In this guide, you’ll learn all the essential steps to craft these delectable cakes, along with pro tips and variations that cater to different preferences.
What Is Mother’s Day Chocolate Lava Cakes?
Chocolate lava cakes, often referred to as molten chocolate cakes, are a decadent dessert that features a warm, gooey center. Originating in the United States in the late 1980s, these cakes quickly became popular for their unexpected burst of melted chocolate when cut into. The outer layer is typically made with a rich chocolate batter that is baked until cooked through on the outside but still molten inside, giving that signature “lava” effect.
The key cooking technique in this recipe is precision. The cakes require just the right balance of baking time and temperature to achieve that perfect molten center. The texture combines a fudgy outer shell with a luscious, flowing interior that envelops your taste buds in a blanket of semi-sweet chocolate comfort. This dessert is not only eye-catching but also offers a multi-sensory experience—visual appeal, mouthwatering aroma, and unforgettable flavor.
Why You’ll Love This
This Mother’s Day Chocolate Lava Cake recipe isn’t just about the taste; it’s also about how easy and quick it is to prepare. In under 30 minutes, you can impress your loved ones with restaurant-quality dessert. Chocolate lovers will appreciate the rich flavor, while those watching their budgets will love that this recipe uses common pantry staples.
A common misconception is that molten cakes are difficult to make, but with this simplified recipe, you’ll discover that it’s entirely achievable—even for beginners! The sensation of soft chocolate oozing from the cake is a delightful surprise that guarantees a smile on every face around your table.
Ingredients You’ll Need
- Dark chocolate: At least 70% cacao is ideal for a rich flavor. You can substitute with semi-sweet chocolate in a pinch, but be aware it might alter the depth of flavor.
- Unsalted butter: Provides moisture and richness. Always opt for unsalted to better control the overall salt level in your dish.
- Granulated sugar: Sweetens the cake. If you’re looking for a healthier option, you can try coconut sugar.
- Large eggs: Bind the ingredients together and help provide structure. Make sure they are at room temperature for the best results.
- All-purpose flour: Offers the necessary structure for the cake. A gluten-free blend can also substitute here.
- Vanilla extract: Enhances the chocolate flavor. Freshly extracted vanilla always outshines imitation, should you have it on hand.
- Pinch of salt: Balances the sweetness and enhances the overall flavor profile.
How to Make
- Prepare the ramekins: Begin by preheating your oven to 425°F (220°C). While the oven is heating, generously grease four ramekins with butter and dust them with a bit of cocoa powder. This will ensure the cakes won’t stick and will come out with clean edges, providing a beautiful presentation.
- Melt the chocolate and butter: In a microwave-safe bowl, combine the dark chocolate and unsalted butter. Heat in 30-second intervals, stirring between each, until the mixture is completely melted and smooth. Be cautious not to overheat, as chocolate can seize up quickly. The ideal consistency is glossy and fluid.
- Combine the egg and sugar: In a separate bowl, whisk together the large eggs and granulated sugar until they are thick and pale, about 2-3 minutes. You want to achieve a light and airy mixture that adds volume and structure to your cakes.
- Mix the chocolate base: Slowly pour the melted chocolate mixture into the egg and sugar mixture. Stir gently to combine, folding it in delicately to keep as much air in as possible. This step is essential for ensuring a light cake.
- Add dry ingredients: Sift the all-purpose flour and a pinch of salt over the chocolate mixture, then fold gently until just combined. Again, be careful not to overmix; you want a smooth batter without any lumps, but a little care will retain the cake’s lightness.
- Incorporate vanilla: Add the vanilla extract into the batter, folding it in gently but thoroughly. This gives that extra layer of flavor that beautifully complements the richness of the chocolate.
- Pour and bake: Divide the batter evenly among the prepared ramekins. Place them on a baking sheet for easy handling. Bake for about 12-14 minutes, or until the edges are firm but the centers remain soft and jiggle slightly when touched. Be vigilant, as overbaking will rob you of that luscious molten center.
- Cool slightly: Once baked, remove the cakes from the oven and allow them to cool for about 1 minute. This waiting period will make releasing them easier without collapsing.
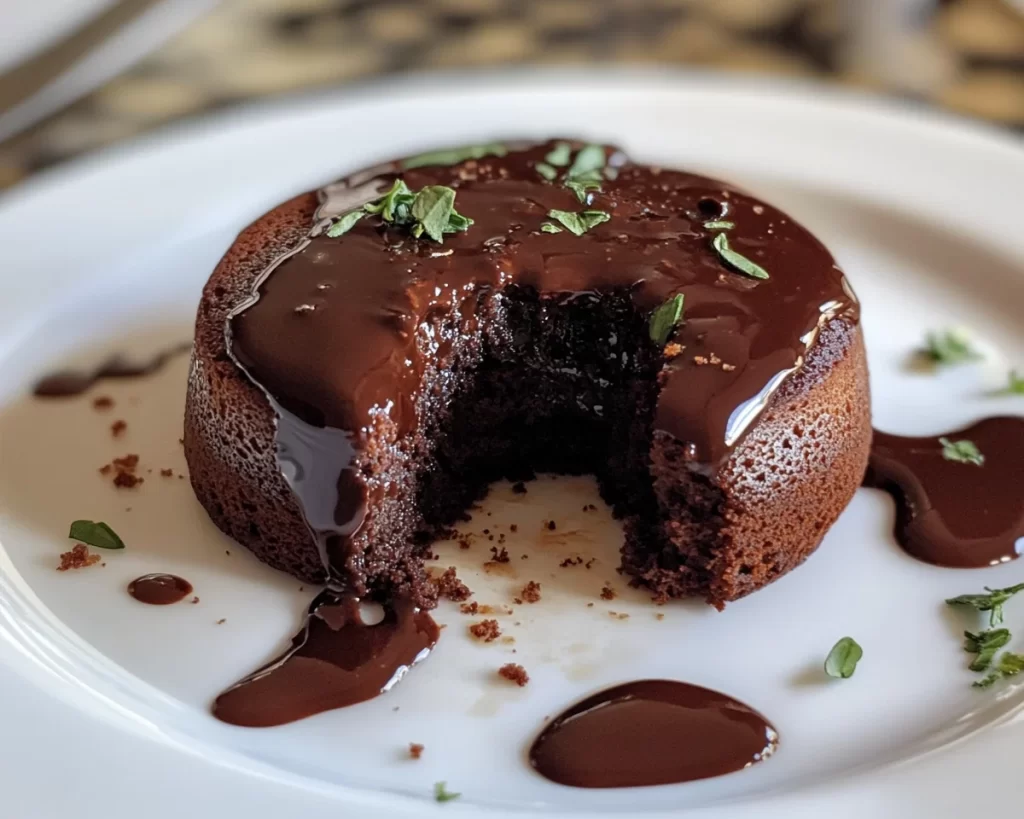
- Serve: Carefully invert each ramekin onto a plate. Gently tap or shake the ramekin to release the cake. Dust with powdered sugar or garnish with fresh berries for an elegant presentation. Cut into the cake to reveal your beautiful, flowing chocolate center.
Variations & Substitutions
Vegan Chocolate Lava Cakes: For a vegan version of this recipe, substitute the eggs with flaxseed meal or unsweetened applesauce. Use a dairy-free chocolate and coconut oil instead of butter. The molten center can still be achieved by ensuring the cakes are not overbaked.
Chocolate Lava Cake with Raspberry Filling: Incorporate a fresh raspberry puree into the center before baking. This will add a delightful tartness that pairs beautifully with chocolate, creating a contrasting flavor experience that elevates the dessert to new heights.
Gluten-Free Version: To make this recipe gluten-free, replace the all-purpose flour with almond flour or a dedicated gluten-free flour blend. Just remember that the texture may slightly differ, but it will still deliver that satisfying molten interior.
Spicy Chocolate Lava Cakes: For those who enjoy a kick, add a pinch of cayenne pepper or chili powder into the batter. The warmth of the spice enhances the chocolate and adds an unexpected depth to the flavor profile.
Nutty Chocolate Lava Cakes: Consider incorporating finely chopped nuts, such as walnuts or hazelnuts, into the batter. This will give an added texture and nutty flavor, making each bite even more delightful and satisfying.
Common Mistakes to Avoid
One common mistake is overbaking the chocolate lava cakes. If you allow them to bake too long, the molten center will solidify, and you’ll lose that signature eruption of chocolate. Always watch the baking time closely, and remember that the cakes will continue to cook slightly once out of the oven.
Another mistake is not preparing your ramekins sufficiently. Skipping the greasing and dusting step can lead to frustration when attempting to unmold your cakes, resulting in broken desserts. Make sure you coat them well to achieve clean, beautiful cakes.
Lastly, using cold ingredients can hinder the mixture’s ability to emulsify properly. For best results, all ingredients like eggs and butter should be at room temperature. This ensures a smooth batter and a perfect texture for your cakes.
Storage, Freezing & Reheating Tips
If you have leftovers, chocolate lava cakes can be stored in the fridge for up to 2-3 days. Make sure to cover them with plastic wrap or transfer them to an airtight container to keep them fresh.
For longer storage, you can freeze the batter in the ramekins before baking. Wrap each ramekin tightly in aluminum foil and place them in a freezer-safe container. They can be stored for up to 2 months. When you’re ready to bake them, remove the ramekins from the freezer and bake from frozen, adding an additional minute or two to the cook time.
To reheat leftover lava cakes, place them in a microwave for 20-30 seconds on medium power. This will gently warm the centers without cooking them through. Keep an eye on them to avoid overcooking.
Frequently Asked Questions
Can I make chocolate lava cakes ahead of time?
Yes, you can prepare the batter ahead of time and store it in the fridge for a day or two. You can also freeze the filled ramekins and bake them straight from the freezer. This makes them a convenient choice for entertaining.
What kind of chocolate should I use?
Using high-quality dark chocolate with at least 70% cacao will provide the richest flavor. Semi-sweet chocolate is a suitable alternative, but avoid using chocolate chips, as they contain stabilizers that won’t melt as smoothly.
How do I know when my lava cakes are done?
The edges should be set, while the centers are still jiggly. If you’re unsure, you can gently press the tops; if they feel firm yet soft, they are likely done. Always err on the side of underbaking for that signature molten center.
Can I add any other fillings to the cakes?
Absolutely! Feel free to experiment with other fillings such as peanut butter, caramel, or even a dollop of cream cheese in the center to create diverse flavor profiles that tantalize your taste buds.
What do I serve with chocolate lava cakes?
Serving chocolate lava cakes with a scoop of vanilla ice cream, whipped cream, or a dusting of powdered sugar enhances the experience. Fresh fruit like berries complements the richness of the chocolate beautifully.
Conclusion:
This Mother’s Day Chocolate Lava Cakes recipe is a show-stopper that combines simplicity and elegance in every bite. From the rich, molten center to the soft, plush exterior, it truly embodies comfort food at its finest. I encourage you to try this recipe and perhaps customize it to fit your family’s preferences. Share your own twist on this classic dessert, and get ready to feel like a culinary superstar in your own kitchen.


