Prep time: 20 minutes
Cook time: 2 hours
Total time: 2 hours 20 minutes
Servings: 8
Imagine a dessert that not only captivates your taste buds but also creates stunning memories for special occasions. That’s where the **Mother’s Day Berry Pavlova** comes into play. This delightful dessert is a show-stopper, often gracing tables during celebrations. With its crisp exterior, marshmallow-like interior, and an abundance of fresh berries, the **Mother’s Day Berry Pavlova** tops the list of sophisticated yet uncomplicated desserts. Loved by many, it exudes elegance while inviting you along for a sweet journey of textures and flavors.
What makes this recipe so special is the purity of its ingredients and the ease of preparation. It’s a fantastic choice for those of you who may not be seasoned bakers but are eager to impress. This dessert is adaptable, lending itself well to various fruits and toppings so you can personalize it to suit your preferences. In this article, you will learn how to make the perfect pavlova from scratch, tips to avoid common pitfalls, and exciting variations alongside the classic recipe.
What Is Mother’s Day Berry Pavlova?
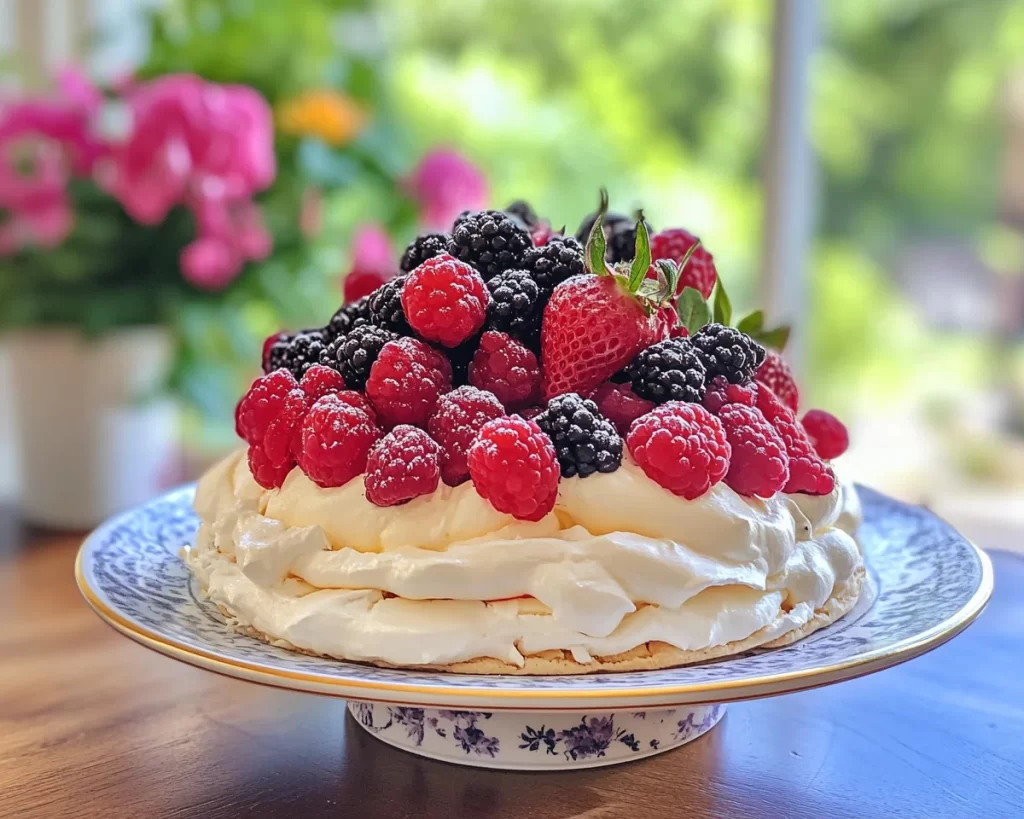
The **Mother’s Day Berry Pavlova**, often simply called Pavlova, is an intricate dessert that originated in Australia and New Zealand, crafted in honor of the Russian ballerina Anna Pavlova. Characterized by its light and airy meringue base, it boasts a delightful contrast – a crunchy crust and soft, fluffy interior. Each bite promises a satisfying crunch, followed by a melt-in-your-mouth experience that pairs beautifully with fresh seasonal berries.
While the classic Pavlova is topped with fruit, the charm of this dessert extends beyond its simple composition. The crisp meringue is enhanced with smooth whipped cream, creating a luxurious layer that complements the tartness of berries such as strawberries, blueberries, raspberries, or even kiwis. The decadent sweetness, combined with the slight tang from the fruits, makes it a memorable delight, perfect for celebrations like Mother’s Day.
This dessert is not only about flavor but also about presentation. When garnished with vibrant berries and a drizzle of chocolate or honey, the Pavlova becomes an eye-catching centerpiece. You’ll learn that with a bit of patience and practice, making a beautiful Pavlova can become your new kitchen forte.
Why You’ll Love This
There are several compelling reasons to adore the **Mother’s Day Berry Pavlova**. First and foremost, its taste is an explosion of flavors that can captivate anyone’s palate. The combination of crisp meringue, luscious cream, and fresh fruits strikes a delightful balance. It’s sweet but not overly so, making it suitable for those who might be hesitant about richer desserts.
Ease of preparation is another significant benefit. Unlike many desserts that require arduous techniques, the Pavlova involves basic steps and fundamental ingredients. If you are new to baking, the clear instructions will guide you toward success. Plus, it doesn’t demand complicated equipment – just a mixing bowl, a whisk, and an oven.
Cost-effectiveness is another plus; the ingredients for this dessert are often available at home or can be acquired at an affordable price from your local grocery store. Health-wise, it can be adjusted with a mix of seasonal fruits which are packed with vitamins and nutrients, offsetting the sweetness of the meringue and cream. The **Mother’s Day Berry Pavlova** also accommodates various dietary needs, as it can be made gluten-free and can even be adjusted for lower-sugar diets without losing its charm.
Don’t assume a dessert of this stature is only for the baking elite. Many novices have amazed friends and family with their homemade Pavlova. It’s essential, however, to be aware of common misconceptions; for instance, people often believe that meringue is difficult to make, but it just requires careful temperature control and proper whisking techniques.
Ingredients You’ll Need
– **4 large egg whites**: Egg whites are crucial as they create the meringue base. If you are looking for substitutes, you can use aquafaba (the liquid from canned chickpeas) to make it vegan.
– **1 cup granulated sugar**: The sugar sweetens the meringue while contributing to its structure. Avoid using powdered sugar here, as it won’t provide the same texture.
– **1 teaspoon white vinegar**: This acts as a stabilizer in the meringue, helping to maintain its airy texture.
– **1 teaspoon cornstarch**: Added to the meringue, cornstarch helps give the Pavlova its characteristic soft center.
– **1 cup heavy whipping cream**: This forms the decadent topping that adds richness to the dessert.
– **2 cups mixed berries**: Strawberries, blueberries, and raspberries work beautifully, providing a colorful and flavorful topping.
– **Optional garnishes**: You may want to add chocolate shavings or a drizzle of honey for added flavor.
Each ingredient plays its role in delivering that beautiful Pavlova experience. You can easily switch them up based on your preferences or what’s in season, ensuring that you have full control over the final product.
How to Make
1. **Preheat your oven**: Begin by preheating your oven to 250°F (120°C). This low temperature is crucial for the meringue to bake gently, allowing it to rise slowly while drying out.
2. **Prepare your baking surface**: Line a baking sheet with parchment paper. You can draw a 9-inch circle on the parchment to use as a guide for shaping your meringue. Flip the parchment over so that the ink is facing down.
3. **Whip the egg whites**: In a clean, dry mixing bowl, use an electric mixer to whip the egg whites until they reach soft peaks. This may take about 4–5 minutes. At this stage, the egg whites should appear foamy, and when you lift the whisk, the peaks should gently fold back on themselves.
4. **Add the sugar gradually**: With the mixer running, gradually add the granulated sugar, about 1 tablespoon at a time. Continue to whip the mixture until it becomes glossy and stiff peaks form. This process is essential for achieving the Pavlova’s unique texture.
5. **Incorporate cornstarch and vinegar**: Gently fold in the cornstarch and vinegar using a spatula. Be careful not to deflate the meringue. You want to maintain the fluffiness while making sure that the ingredients are well incorporated.
6. **Shape the meringue**: Spoon the meringue onto the prepared parchment, using the circle you drew as a guide. Shape the sides upward to create an indent in the center for holding cream and fruits later.
7. **Bake the meringue**: Place the baking sheet in your preheated oven. Bake for about 1.5 hours, then turn off the oven and let the meringue cool inside for at least one hour. This gradual cooling will help prevent cracks.
8. **Prepare the cream**: While the meringue is cooling, whip the heavy cream in a mixing bowl until soft peaks form. This creamy layer will provide nice balance to the crisp meringue.
9. **Assemble your Pavlova**: Once the meringue has completely cooled, gently lift it off the parchment and place it on your serving dish. Use a spatula to spread the whipped cream over the meringue base. Top it generously with the mixed berries, arranging them beautifully to create an inviting presentation.
10. **Serve and enjoy**: For the best experience, serve your Pavlova immediately after assembling to maintain its crunchy texture as the cream can soften it over time.
Variations & Substitutions
Fruit Variations: While mixed berries are a classic topping, you can switch things up by using other fruits. Mango, kiwi, or even tropical fruits can give a different flair. If you opt for more acidic fruits, such as passionfruit, your Pavlova will have a zesty twist, balancing out the sweetness effectively.
Chocolate Pavlova: For those with a sweet tooth, incorporating cocoa powder into the meringue can create a chocolate version of this dessert. Replace a few tablespoons of sugar with cocoa; the chocolate flavor pairs wonderfully with strawberries or raspberries.
Vegan Pavlova: Many of you may be intrigued by making this dessert without eggs. Using aquafaba instead of egg whites, you can still achieve the same airy texture. Whip the aquafaba until stiff peaks appear and follow the same steps in creating the meringue.
Citrus Zest Infusion: Adding lemon or orange zest to the whipped cream can elevate your Pavlova’s flavor profile. The citrus-infused cream will give a refreshing twist, making it delightful to enjoy on warm days.
Nutty Add-In**s*: If you love nuts, sprinkle some crushed pistachios or almonds over the whipped cream along with the berries. The added crunch pairs beautifully with the soft meringue and cream, adding another layer of texture.
Common Mistakes to Avoid
One of the most common mistakes when making meringue is not ensuring the mixing bowl and whisk are absolutely clean and dry. Any residual grease or moisture can prevent the egg whites from whipping up properly.
Another mistake is rushing the addition of sugar; it’s crucial to add it gradually. If added too quickly, you might end up with a gritty texture. Pay attention to the sound of the mixer and the appearance of the meringue; it should become thick and glossy.
Don’t open the oven during the baking phase. Sudden temperature changes can cause the meringue to collapse. Once baked, allow it to cool slowly in the oven to set the structure properly.
Finally, remember the importance of serving the Pavlova immediately after assembly to prevent sogginess. The cream, while delicious, can soak into the meringue if it sits for too long.
Storage, Freezing & Reheating Tips
If you have leftover **Mother’s Day Berry Pavlova**, you may wonder how to store it properly. It is best to store any unused meringue in an airtight container at room temperature. However, avoid refrigerating it, as the moisture can ruin its crisp texture.
Unfortunately, the Pavlova doesn’t freeze well, as it may lose its structure. If you plan on making it ahead of time, it is advisable to prepare the meringue in advance, store it properly, and then assemble it with cream and berries on the day you intend to serve it.
When storing whipped cream, keep it refrigerated in a separate container. Combine it with the meringue just before serving for optimal freshness and flavor. If you have leftover berries, you can store them in the fridge, but always wash them right before consumption to maintain their freshness.
Frequently Asked Questions
Can I use an electric mixer or a hand whisk?
You can use either! An electric mixer will make the process significantly quicker, especially when beating egg whites to a stiff peak. Hand whisking, however, can be a great workout and allows you to connect with the process more intimately. Just ensure you have the patience, as it may take a while.
How can I achieve a perfect meringue every time?
To achieve a perfect meringue, begin with room temperature egg whites and make sure all equipment is clean and dry. Gradually add sugar, and whip until you achieve a glossy texture with stiff peaks. Patience is key here, and a little practice will yield great results.
What should I do if my Pavlova cracks?
Cracking is a common occurrence; it’s primarily due to temperature fluctuations while baking or cooling. If cracks occur, fear not! You can cover them with toppings like whipped cream and fruit. This adds to the rustic charm of the dessert.
How long does the Pavlova last? Can I make it a day ahead?
The baked meringue can last up to two days at room temperature if stored properly. You can make it a day ahead and keep it. However, always add cream and toppings on the day you serve it for the best result.
Can I reduce the sugar in meringue?
It’s not recommended to drastically reduce sugar in meringue, as sugar plays a vital role in creating structure and stability. However, experimenting with a smaller adjustment can still yield decent results, but you might lose some texture.
Conclusion:
The **Mother’s Day Berry Pavlova** is truly a remarkable dessert that combines simplicity and elegance, making it perfect for any occasion. From its crisp exterior to the creamy center and vibrant fruit topping, this recipe will surely become a staple in your dessert rotation. Don’t hesitate to make it your own—try out the variations or substitute ingredients that excite you. Encourage your friends and family to join in on the fun of making this delightful treat. With just a little practice, you’ll have a winning recipe that not only impresses but also warms hearts. Share your delicious creations and precious moments around the table. Enjoy the journey of baking, and happy celebrating!


