Prep time: 30 minutes
Cook time: 25 minutes
Total time: 55 minutes
Servings: 10
What could be more delightful than a slice of Mother’s Day Berries and Cream Cake? As one of the most cherished desserts, this cake not only celebrates the flavors of **fresh berries** but also evokes sweet memories of gathering with loved ones. This is the kind of dessert that inspires nostalgia; think of how such a treat can light up a family gathering and bring smiles all around the table. The combination of the **fluffy cake**, velvety cream, and vibrant, juicy berries creates a multilayered experience that is both satisfying and celebratory. In this recipe, you’ll discover the secrets to achieving this heavenly dessert. Whether you’re a seasoned baker or new to the kitchen, you’ll find that the process is straightforward and rewarding.
By the end of this article, you’ll not only master the creation of this luscious cake but also learn useful tips, variations, and answers to frequently asked questions. Let’s dive into the world of the Mother’s Day Berries and Cream Cake, where each slice tells a joyful story.
What Is Mother’s Day Berries and Cream Cake?
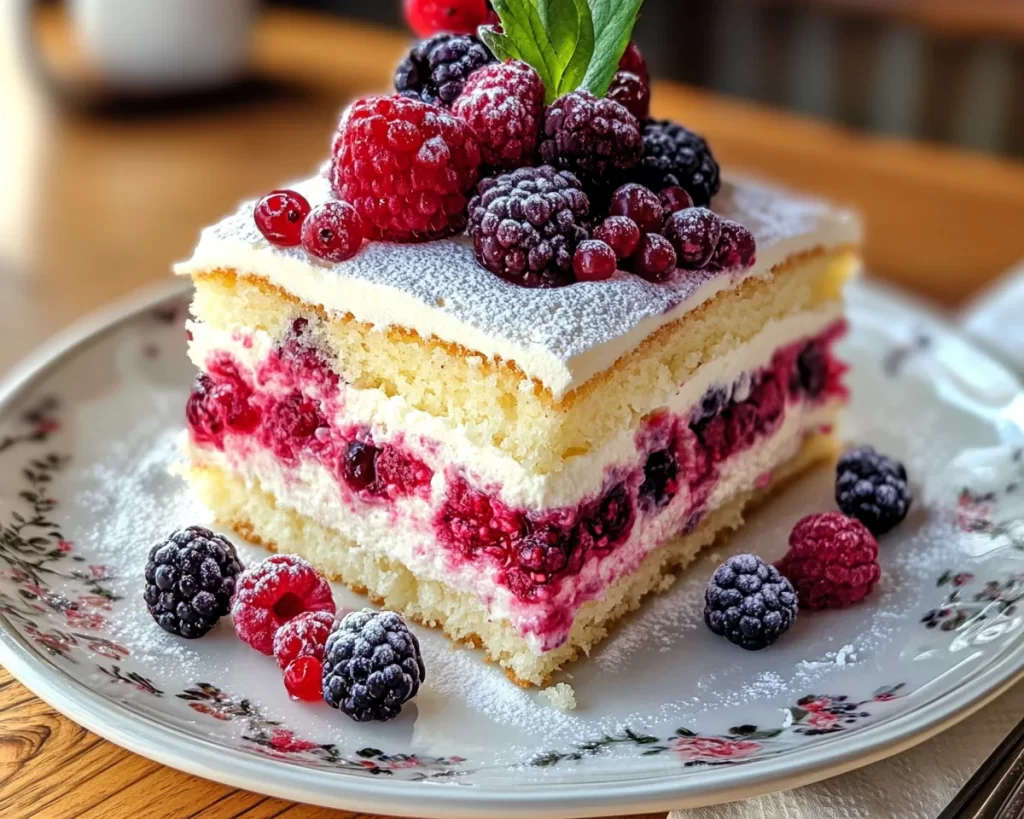
The Mother’s Day Berries and Cream Cake is a **light and airy dessert** that beautifully combines rich flavors with refreshing notes of fruit. Traditionally, this cake features layers of **vanilla sponge cake or pound cake**, light cream, and a variety of berries, such as strawberries, blueberries, and raspberries. This cake hails from a long-standing tradition of celebrating mothers and special occasions, highlighting the bond between families and the joy of sharing delicious food.
When made well, the cake has a delicate texture that almost melts in your mouth, paired with a luscious **cream filling** and the vibrant burst of **berries**. The harmony of sweet and tart is beautifully balanced, making each slice irresistible. The addition of **whipped cream** adds not only a creamy texture but also a subtle sweetness that complements the natural flavors of the fruits. This cake doesn’t just taste great; it looks stunning too, making it ideal for a special occasion like Mother’s Day. Imagine walking into a room filled with the aroma of this cake, with elegantly arranged layers covered in sweet cream and colorful fruits—it’s more than just dessert; it’s a centerpiece that encapsulates love and gratitude.
Why You’ll Love This
There are countless reasons to fall in love with the Mother’s Day Berries and Cream Cake. Firstly, the flavor profile is simply **irresistible**; the combination of **light cake**, smooth cream, and fresh berries creates a dessert that is refreshing and indulgent at the same time. The cake is light yet satisfying, ensuring you and your family can enjoy it without feeling weighed down.
Ease is another attractive feature. This cake, while visually impressive, doesn’t require complex techniques that could overwhelm a beginner. It’s a perfect project for busy parents or anyone looking to impress at a family gathering without spending countless hours in the kitchen. Additionally, you can make many aspects of the cake in advance—like the cake layers and cream—making it a fantastic choice for meal prep.
Cost can also be a concern; however, the ingredients for this cake are relatively simple and can often be found in your pantry or at a reasonable price. The health aspect is also noteworthy: incorporating fresh berries can bring natural sweetness and essential nutrients, making it a more wholesome choice compared to some other desserts. The cake can also be customized to fit various diets, whether gluten-free or dairy-free, ensuring that everyone can partake in the celebration.
In short, it’s a dessert that delivers on multiple fronts—flavor, ease, cost-effectiveness, and versatility, making it an ideal choice for Mother’s Day or any special occasion.
Ingredients You’ll Need
To make the Mother’s Day Berries and Cream Cake, gather the following ingredients:
- All-purpose flour: The base of your cake, it provides structure. You can substitute with whole wheat flour for a denser option.
- Granulated sugar: This sweetener is crucial for balancing flavors. Consider using coconut sugar or honey for variations.
- Baking powder: Essential for leavening; this will help your cake rise. Ensure it’s fresh for the best results.
- Salt: Enhances flavors; it will balance the sweetness.
- Unsalted butter: Adds richness to the cake. If necessary, margarine can be used as a substitute.
- Eggs: These act as binders and provide moisture; for a vegan version, consider flaxseed eggs.
- Vanilla extract: For that essential vanilla flavor; using pure extract is advised for the best taste.
- Heavy cream: This is the base for your whipped cream filling. Coconut cream works well as a dairy-free alternative.
- Fresh berries: Strawberries, blueberries, and raspberries will add natural sweetness and color. Feel free to substitute with seasonal fruits.
- Powdered sugar: For sweetening the whipped cream. Cornstarch can be used as a thickener in substitutions.
These ingredients work harmoniously to create a cake that is not only delicious but also visually appealing. Don’t hesitate to explore substitutions that meet dietary needs or preferences. The goal is for you to create a cake that everyone can enjoy!
How to Make
Creating the Mother’s Day Berries and Cream Cake is an exciting adventure, and following these step-by-step instructions will guide you through the process seamlessly. Here’s how to whip up this delightful dessert:
- Preheat the oven: Start by preheating your oven to 350°F (175°C). This ensures your cake bakes evenly from the get-go. Also, prepare two 9-inch round cake pans by **greasing** and **flouring** them, preventing the cake from sticking. You can also line the bottoms with parchment paper for added security.
- Mix dry ingredients: In a medium bowl, whisk together your all-purpose flour, baking powder, and salt. This step is important as it helps distribute the baking powder evenly throughout the flour, leading to an even rise in your cake. Set this mixture aside for later use.
- Cream butter and sugar: In a large mixing bowl, beat the unsalted butter and granulated sugar together until the mixture is light and fluffy. This typically takes about 3 to 5 minutes using an electric mixer. This step incorporates air into the mixture and will create a tender cake.
- Add eggs and vanilla: Beat in the eggs one at a time, making sure each is fully incorporated before adding the next. Then, add your vanilla extract. Be patient here; fully mixing these ingredients will ensure your cake has a rich flavor and moist texture.
- Combine wet and dry ingredients: Gradually add the dry mixture to the wet mixture, alternating it with any milk or additional liquid you prefer. Begin and end with the dry ingredients, mixing gently just until combined. Avoid overmixing, as this can develop gluten in the flour, resulting in a dense cake.
- Pour into pans: Divide the batter evenly between the two prepared pans. Smooth the tops with a spatula. This ensures even baking, so the layers cook at the same rate. You can gently tap the pans on the counter to release any trapped air bubbles.
- Bake: Place the pans in the preheated oven and bake for 25-30 minutes, or until a toothpick inserted into the center comes out clean. Keep an eye on them towards the end of baking, as every oven is different. If the tops begin to brown too much, gently tent them with foil.
- Cool: Once the cakes are done, remove them from the oven and let cool in the pans for about 10 minutes. Then, turn them out onto a wire rack to cool completely. It’s essential that they are fully cooled before frosting, as warm cakes can melt your whipped cream.
- Prepare whipped cream: In a large mixing bowl, combine your heavy cream and powdered sugar. Whip using an electric mixer until soft peaks form. This usually takes about 3-5 minutes. Be careful not to over-whip; it can turn into butter if left too long. The cream should be light and fluffy, perfect for layering between your cake.
- Layer the cake: Place one layer of the cake on a serving plate. Spread a generous layer of whipped cream on top and arrange your fresh berries over it. Then, place the second layer on top and frost the top and sides with more whipped cream, garnishing with additional berries. Take your time with this step; a lovely presentation will make it even more delightful!
- Chill and serve: For best results, refrigerate the cake for at least 30 minutes before slicing. This helps the flavors meld together and makes it easier to cut. You can slice and serve it chilled, letting your guests enjoy a delicious piece of this delightful dessert.
With these detailed steps, you’ll be able to create a beautifully layered cake bursting with flavor and freshness. It’s a delightful treat everyone will enjoy!
Variations & Substitutions
Gluten-Free Variation: If you’re baking for someone with gluten sensitivities, substitute the all-purpose flour with a high-quality gluten-free flour blend. Over the years, many brands have developed blends that mimic the behavior of traditional flour, making it easy to create a light and fluffy cake. Just be sure to check that your baking powder is gluten-free as well.
Dairy-Free Variation: For a dairy-free version, you can replace heavy cream with coconut cream. Just chill a can of coconut milk overnight, then scoop out the solidified cream and whip it with powdered sugar to create a delightful topping. Your cake will maintain its delicious flavor while catering to those avoiding dairy.
Chocolate Berry Cake: If you want a richer variation, consider incorporating cocoa powder into the batter for a **chocolate twist**. Replace about a quarter of the flour with unsweetened cocoa powder to give your cake a chocolate flavor that pairs beautifully with the fresh berries. Adjust the sugar level slightly to balance the added bitterness of the cocoa.
Alternative Fruits: While this recipe highlights **strawberries**, **blueberries**, and **raspberries**, feel free to explore with other fruits. Sliced kiwi, peaches, or even cherries can add a unique and delicious twist to your cake. Just be mindful of different fruits’ hydration levels to avoid making the cake soggy.
Layered Dessert Cups: For a fun twist, instead of making a traditional layered cake, create individual dessert cups. Layer the cake, whipped cream, and berries in **mason jars** or cups for a visually appealing presentation. They are perfect for picnics or gatherings, as they are easily portable and allow guests to enjoy their treat without needing utensils.
By exploring these variations, you can make the Mother’s Day Berries and Cream Cake appeal to different tastes and dietary needs, ensuring that everyone at your gathering can find something to enjoy!
Common Mistakes to Avoid
When making the Mother’s Day Berries and Cream Cake, a few common pitfalls can lead to challenges. One major issue is **overmixing the batter**. It’s essential to mix just until the wet and dry ingredients are combined. Overmixing can develop gluten, causing the cake to become dense and chewy instead of light and fluffy.
Another common mistake is not properly preparing the cake pans. If you skip this step, your cakes might stick, making them challenging to remove. Always take the time to grease and flour your pans or line them with parchment for easy release.
When making whipped cream, be cautious not to over-whip it. While you want stiff peaks, whipping it too long can turn the cream into butter! Watch this step closely and stop once it reaches the right texture—light and fluffy with good volume.
Temperature also plays a crucial role in the successful outcome of your cake. Ensure your ingredients, especially your butter and eggs, are at room temperature. This promotes better emulsification, leading to a tender cake.
Finally, if you’re using fresh berries, don’t wash them until just before you are ready to use them. Washing berries in advance can make them soggy, which can adversely affect the texture of your cake.
Being aware of these common mistakes can help you achieve a stunning Mother’s Day Berries and Cream Cake that will impress everyone at your gathering!
Storage, Freezing & Reheating Tips
Proper storage is crucial to maintaining the quality of your Mother’s Day Berries and Cream Cake. If you have leftover cake, store it in the refrigerator in an airtight container to keep it fresh for up to 3-4 days. This helps retain the cream and fruit’s texture while preventing any off-flavors from developing. However, if you notice that the whipped cream is starting to break down or the fruit is releasing too much moisture, it may be time to enjoy the last of it!
If you’re planning to make the cake ahead of time, consider **freezing** the cake layers. Wrap each layer tightly in plastic wrap and then in aluminum foil to protect against freezer burn. Properly stored, they can last for up to 3 months in the freezer. When you’re ready to enjoy the cake, simply remove it from the freezer, thaw it in the refrigerator overnight, and prepare the whipped cream and berries the next day.
For reheating, generally, this cake is best enjoyed cold or at room temperature. If you’ve frozen it, allow it to thaw completely for the best taste and texture. If you must reheat a slice, consider using a microwave for a few seconds, but avoid overdoing it to maintain the integrity of the **cream** and berries.
Following these tips can ensure that your cake remains delicious and safe to eat while allowing you the flexibility to prepare it ahead of time.
Frequently Asked Questions
Can I make this cake the day before serving?
Absolutely! In fact, making the cake a day ahead is a great idea. It allows the flavors to meld together beautifully. Just ensure that you wrap the cake layers well in plastic wrap after they have cooled. Assemble the cake with cream and berries the day you plan to serve it for the freshest taste.
What kind of berries work best?
While strawberries, blueberries, and raspberries are the stars of this cake, feel free to be adventurous. Seasonal fruits like peaches, cherries, or even blackberries can add exciting flavors and textures. The key is to use fresh, ripe fruit for the best taste.
Can I substitute any ingredients for this recipe?
Certainly! As previously discussed, there are many substitutions available for dietary preferences. If someone in your home is gluten-free, be sure to use gluten-free flour. For dairy-free options, coconut cream is a fantastic alternative. You can also experiment with different fruits and sweeteners, allowing you to customize the cake to your preferences.
How can I ensure my cake comes out light and fluffy?
To achieve a light and fluffy cake, avoid overmixing your batter and ensure all your ingredients, especially butter and eggs, are at room temperature. Additionally, use fresh ingredients, particularly baking powder, to ensure the cake rises well.
What can I do if my whipped cream doesn’t thicken?
If your whipped cream isn’t thickening, it could mean your cream isn’t cold enough. Ensure that the bowl and beaters are chilled, and use cold heavy cream for the best results. Sometimes, adding a stabilizer like gelatin or cornstarch can help maintain its shape as well.
Conclusion:
The Mother’s Day Berries and Cream Cake is not just an exquisite dessert; it is a canvas for love, creativity, and nostalgic memories. Whether you’re baking for a special occasion or simply treating yourself and your family, this cake offers an experience that goes beyond flavors—it encapsulates the essence of celebration and togetherness. You have learned not only how to make the cake but also how to personalize it through variations, substitutions, and storage tips. I encourage you to give this recipe a try, customize it to fit your taste, and share your creations with loved ones. This cake is bound to become a cherished favorite in your home, just as it has in many others. Enjoy this delightful baking journey, and happy Mother’s Day to all!


