Prep time: 20 minutes
Cook time: 35 minutes
Total time: 55 minutes
Servings: 12
There’s nothing that quite satisfies a sweet tooth like a slice of moist chocolate cake. Imagine biting into a luscious, rich chocolate layer that practically melts in your mouth, and then there’s that heavenly glossy ganache on top, adding an extra touch of sophistication. This recipe for Moist Chocolate Cake with Glossy Ganache is not just any dessert; it’s a slice of happiness, a way to elevate any ordinary day into something special. Whether you’re celebrating a birthday, a promotion, or simply treating yourself after a long week, this cake will meet your cravings head-on.
What’s more? This recipe is designed to be straightforward and enjoyable. You don’t need to be a professional baker to whip up this exquisite chocolate delight. You’ll find tips to ensure that your cake turns out perfectly every time, along with variations to suit different dietary needs. So, grab your apron and let’s get started on this delightful journey of baking!
What Is Moist Chocolate Cake with Glossy Ganache?
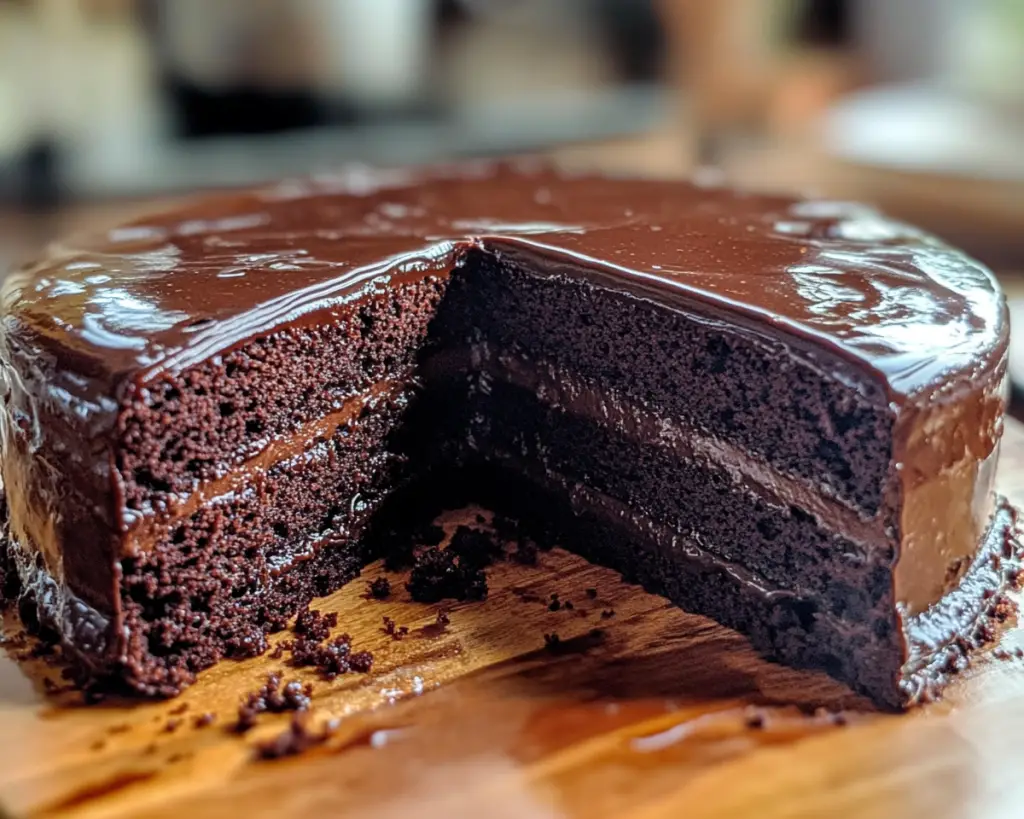
Moist Chocolate Cake with Glossy Ganache is a beloved dessert known for its decadent flavor and rich texture. Originating from classic baking traditions, this cake features a dense crumb that is both soft and fudgy, making every bite a pure delight. The key to achieving this moist texture lies in the careful selection of ingredients, such as using both melted chocolate and cocoa powder.
The glossy ganache, made from just chocolate and cream, is poured over the cake to create a smooth, shiny finish that not only enhances the visual appeal but delivers a luxurious taste. When it comes to flavor, the deep richness of the chocolate pairs perfectly with its moist crumb, making it irresistible. Each slice offers a delightful balance of sweetness from the cake and a slightly bittersweet note from the ganache, creating a truly harmonious dessert experience.
This recipe adapts well to various occasions, from a cozy family dinner to a fancy gathering, making it a versatile choice for any home baker. The ganache can even be used as a filling between layers, allowing for creativity in presentation and taste. If you’re looking for a cake that impresses without requiring professional skills, this is the one for you.
Why You’ll Love This
There are many reasons to fall in love with this recipe for Moist Chocolate Cake with Glossy Ganache. Firstly, the taste is simply unbeatable. The combination of chocolate and a rich ganache creates a symphony of flavors that appeals to both kids and adults. Secondly, it’s incredibly easy to make. The clear step-by-step instructions make it accessible for beginners, while seasoned bakers will enjoy the straightforward nature of the recipe.
Cost is another aspect that adds to its charm; it’s affordable to make yet tastes as luxurious as cakes that are often priced much higher. This means you can treat your family or friends without breaking the bank. Additionally, it’s versatile; whether you want to make it gluten-free or dairy-free, the recipe allows for easy substitutions.
One common misconception surrounding baking cakes is that it must be a tricky and time-consuming task. However, this cake debunks that myth entirely. With this recipe in your toolkit, you’ll be ready to impress anyone. Just imagine the compliments you’ll receive when you serve this cake for dessert!
Ingredients You’ll Need
- All-purpose flour: 2 cups. This is the foundation of your cake, providing texture. If you need a gluten-free option, consider using a gluten-free all-purpose blend.
- Cocoa powder: 3/4 cup. Unsweetened cocoa powder gives a depth of chocolate flavor. Make sure to sift it to avoid lumps.
- Granulated sugar: 2 cups. This sweetens the cake, counterbalancing the bitterness of the cocoa.
- Baking powder: 1 1/2 teaspoons. The leavening agent that gives the cake its lift.
- Baking soda: 1 1/2 teaspoons. Works with the baking powder to help the cake rise.
- Salt: 1 teaspoon. Enhances the flavor of the chocolate.
- Unsalted butter: 1 cup (2 sticks), softened. Adds moisture and richness to the cake. Use dairy-free butter for a vegan option.
- Eggs: 2 large. They bind the ingredients together and add moisture.
- Vanilla extract: 2 teaspoons. A must-have for flavor enhancement.
- Milk: 1 cup (whole or buttermilk). This liquid hydrates the flour and softens the cake.
- Bittersweet chocolate: 8 ounces, chopped. This is for the ganache. Feel free to use semi-sweet if you prefer a sweeter topping.
- Heavy cream: 1 cup. Provides the luscious texture for the ganache.
Each ingredient plays a vital role in crafting this gorgeous cake. Whether you’re looking to make substitutions or just need to understand why each component is essential, this list covers it all.
How to Make
- Preheat your oven to 350°F (175°C). This is a crucial first step to ensuring that your cake bakes evenly. Prepare two 9-inch round cake pans by greasing them with butter and dusting them with cocoa powder instead of flour. This will ensure an easy release after baking.
- In a large mixing bowl, combine the all-purpose flour, cocoa powder, granulated sugar, baking powder, baking soda, and salt. Whisk the dry ingredients together thoroughly, ensuring there are no lumps, which can lead to uneven texture in your cake.
- In another bowl, cream together the unsalted butter and granulated sugar until light and fluffy. This process usually takes about 3-5 minutes with an electric mixer. Fluffing up the butter and sugar incorporates air into the mixture, giving the cake richness and a light texture.
- Add in the eggs one at a time, mixing well after each addition. Then stir in the vanilla extract. The addition of eggs will lend moisture and structure to the cake.
- Gradually mix in the dry ingredients, alternating with the milk, beginning and ending with the dry mix. The batter should be smooth and slightly thick, consistent in texture without lumps. Make sure not to over-mix, as this can lead to a dense cake.
- Pour the batter evenly into the prepared cake pans. Smooth out the tops with a spatula to ensure they bake evenly. Place them in the center of the oven and bake for about 30-35 minutes. You’ll know they are done when a toothpick inserted into the center comes out clean.
- Once baked, remove the cakes from the oven and let them cool in the pans for about 10 minutes. Then, carefully turn them out onto wire racks to cool completely. Cooling completely is essential before frosting, as any warm cake can cause the ganache to melt, leading to a gooey mess.
- While the cakes are cooling, prepare the ganache. Place the chopped bittersweet chocolate and heavy cream in a heatproof bowl. Heat the cream gently until it’s just simmering. Pour it over the chocolate, let it sit for a few minutes to melt, then stir until smooth and glossy. This can take a little patience, but the goal is a silky ganache.
- Once the cakes are cool and your ganache is ready, place one cake layer on a serving plate. Pour a generous amount of ganache over the first layer, making sure it drizzles over the edges for an enticing look. Place the second layer on top and repeat the ganache process.
- Finally, let the ganache set for about 30 minutes. This will ensure that it’s no longer runny and is luscious enough to keep its shape when you slice into the cake. You can decorate with chocolate shavings or fresh fruit if desired.
Once you’ve mastered the basic techniques, you can even feel free to experiment with flavors or add-ins, like nuts or espresso powder, to amplify the chocolate taste.
Variations & Substitutions
Gluten-Free Variation: If you are gluten intolerant, you can easily make this cake gluten-free by substituting the all-purpose flour with a 1-to-1 gluten-free flour blend. Make sure to check the specific blend’s requirements, as some might call for additional ingredients like xanthan gum for binding. Your cake will still turn out rich and chocolatey, allowing everyone to indulge in this sweet treat.
Dairy-Free Variation: For those following a vegan or dairy-free diet, you can replace the unsalted butter with coconut oil or a dairy-free butter substitute. Use almond milk or coconut milk in place of regular milk. Additionally, skip the eggs by using ground flaxseed mixed with water (1 tablespoon of flaxseed meal + 2.5 tablespoons of water equals one egg) for a light, fluffy cake. You’ll still achieve that moist texture without compromising taste.
Mini Chocolate Cake: Want to create individual servings? Instead of making a large cake, pour the batter into a muffin tin lined with cupcake liners. This way, you’ll have mini chocolate cakes ready to serve. Bake them for about 18-20 minutes or until a toothpick comes out clean. These mini versions are perfect for parties or as a lunchbox treat!
Flavor Variants: Experimenting with different types of chocolate can yield fantastic results. Swap the bittersweet chocolate with dark chocolate for a rich, intense flavor or white chocolate for a sweeter finish. You can also add a teaspoon of espresso powder to the batter for a mocha effect. Just ensure you mix it well to distribute the flavors evenly.
Each of these variations not only ensures that the cake meets different dietary needs but also invites creativity into your baking. Feel free to mix and match or come up with your own unique spin on this delightful recipe.
Common Mistakes to Avoid
One of the most common mistakes in baking this cake is **over-mixing** the batter. Once you add in the flour, mix just until combined. Overworking the cake batter can lead to a dense, bread-like texture instead of a moist cake. For best results, you want to incorporate the flour until you can no longer see it in the batter.
Another pitfall is not measuring your ingredients properly. Baking is a science where precise measurements matter. Always measure your flour by spooning it into your measuring cup and leveling it off with a knife rather than dipping the cup directly into the flour bag. This ensures you’re not getting too much flour, which can lead to a dry cake.
Also, be cautious of the baking time. Oven temperatures can vary, so it’s imperative to check your cake a few minutes before the suggested time. A toothpick should come out with a few moist crumbs but not wet batter. Finally, don’t rush the cooling step; letting your cake cool in the pans for the right amount of time is vital to avoid breakage when transferring them to a plate.
Storage, Freezing & Reheating Tips
Once your cake is baked and frosted, proper storage is key to maintaining its moistness and flavor. To store the cake at room temperature, cover it with a cake dome or wrap it loosely in plastic wrap. It will last for up to 3 days.
If you’re not planning to eat it all within a few days, consider freezing it. To freeze, wrap each layer of cake tightly in plastic wrap followed by aluminum foil. Label with the date, and it can be stored in the freezer for up to 3 months. When you’re ready to eat it, thaw it in the refrigerator overnight.
For reheating individual slices, you can place them in the microwave for about 10-15 seconds. This will warm them just enough to bring back that freshly-baked taste! For any ganache, if it starts to solidify in the refrigerator, simply reheat it gently in a saucepan, stirring until smooth.
Always remember the safe food storage guidelines: if the cake has been left out for more than 2 hours at room temperature, it’s best to discard it to prevent foodborne illness.
Frequently Asked Questions
Can I make this cake a day in advance?
Absolutely! This cake actually tastes better the day after it’s made because the flavors have a chance to meld together. Just make sure to store it properly at room temperature or in the refrigerator if you have a ganache topping.
What can I use if I don’t have heavy cream for the ganache?
If you don’t have heavy cream, you can substitute it with whole milk or a non-dairy milk alternative. However, keep in mind that this may affect the thickness and glossy finish of your ganache. You might want to add some butter or coconut oil to help achieve a richer texture.
Can I add something extra into the cake batter?
Yes! Feel free to add chocolate chips, nuts, or dried fruit into the batter before baking. Just make sure to fold them in gently so you don’t over mix the batter. Add-ins can provide a delightful textural contrast alongside the moist cake.
What should I do if the cake is too dry?
If your cake turns out dry, it might be because it was overbaked or too much flour was used. To help revive it, consider serving it with a scoop of ice cream or drizzling a bit of simple syrup on top before serving. This will add moisture and flavor.
Can I substitute the granulated sugar with something else?
Certainly! You can use brown sugar for a deeper flavor and added moisture, or alternatives like coconut sugar or agave syrup for a less refined option. Just keep in mind that the texture may vary slightly, so you may need to adjust the other liquids accordingly.
Conclusion:
In summary, this Moist Chocolate Cake with Glossy Ganache is more than just a dessert; it’s a celebration of flavors and textures that elevates any occasion. Whether you’re baking for a special event or just want to treat yourself, this cake delivers on all fronts—delicious, easy to make, and customizable. I encourage you to give this recipe a try, even add your creative flair, and watch as it becomes a new family favorite. Don’t forget to share it with friends and family—they’ll be amazed at what you’ve created and may even ask for the recipe themselves! So roll up your sleeves, grab those ingredients, and start baking today!


