Prep time: 15 minutes
Cook time: 12 minutes
Total time: 27 minutes
Servings: 24 cookies
When you think of comforting treats, nothing quite compares to the warmth that homemade cookies bring. Imagine biting into a soft, chewy cookie that melts in your mouth, leaving behind a delightful burst of *vanilla* flavor and a sweet, creamy essence of milk. That’s precisely what these *Milk Cookies: Soft Vanilla Milk Cookies* offer. Not only do they evoke a sense of nostalgia, reminiscent of cozy afternoons spent baking with loved ones, but these cookies also come together in no time at all. Whether you’re busy with work, managing a household, or simply looking for an easy and rewarding recipe to share, this milk cookie recipe is your ticket to a deliciously simple dessert.
With just a few ingredients, you will learn how to create these tender, delectable cookies that are perfect for any occasion. From the moment you mix the dough to the delicious aroma that fills your kitchen as they bake, you’ll discover how straightforward yet fulfilling it is to whip up a batch of these cookies. Besides the scrumptious flavor and texture, you’ll also find that the ingredients are likely already in your pantry. Let’s dive into this delectable adventure together!
What Is Milk Cookies: Soft Vanilla Milk Cookies?
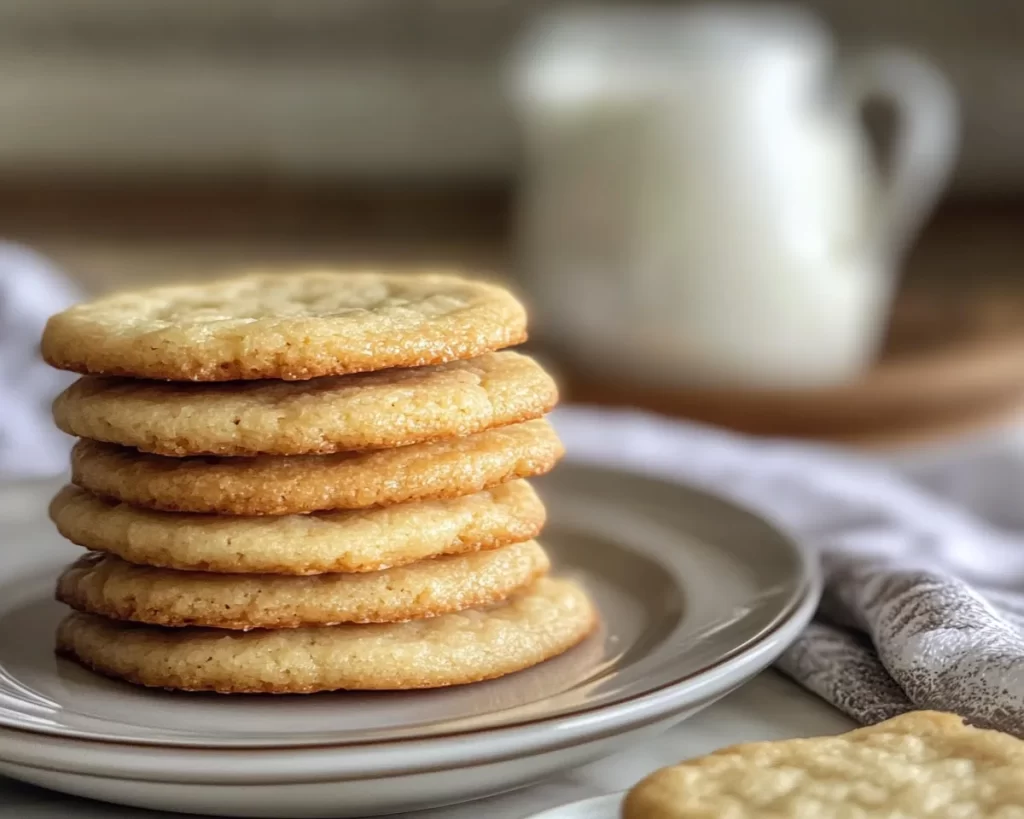
Milk cookies, especially the *soft vanilla milk cookies*, are a delightful treat that originated from a simple household tradition of adding milk to cookie recipes. This technique not only enhances the *softness* of the cookies but also imbues them with a rich, creamy taste that sets them apart from traditional cookie recipes. The combination of buttery goodness, a hint of vanilla, and the subtle sweetness of milk culminates in a nostalgic flavor profile that appeals to both kids and adults alike.
These cookies are characterized by their *soft and chewy texture*, which makes them utterly addictive. They aren’t overly sweet, allowing the comforting flavors of *vanilla* and *milk* to shine through. With a golden-brown exterior and a soft, slightly gooey interior, these cookies are designed to be a treat for all senses. Many people fondly remember enjoying these cookies paired with a glass of cold milk, making them an unforgettable part of childhood. Their simplicity makes them perfect for any occasion, whether you’re hosting a family gathering, preparing a school lunch treat, or simply indulging in a sweet snack for yourself.
Why You’ll Love This
There are countless reasons to fall in love with these *milk cookies*. Firstly, their *taste* is extraordinary. The delicate hints of *vanilla* perfectly complement the creamy milk, resulting in a cookie that’s bursting with flavor yet not overpowering. This balance makes the milk cookies an appealing choice for dessert lovers of all ages.
Additionally, the ease of preparing these cookies cannot be overstated. Using minimal equipment and straightforward techniques, even beginner bakers will find success with this recipe. You don’t need to be a professional to whip up a delightful batch of cookies, making it an ideal choice for *busy parents* and *beginners in the kitchen*.
Moreover, this recipe is budget-friendly. All the ingredients—flour, sugar, butter, milk, and vanilla—are household staples, ensuring you won’t need to venture out and splurge on extravagant items. You can have mouthwatering cookies without breaking the bank!
Lastly, these cookies are incredibly versatile. You can easily modify them to include your favorite *chocolate chips*, *nuts*, or even dried fruits to suit your taste. With so many possible variations, you’ll never get tired of them!
Ingredients You’ll Need
- All-purpose flour: This is the base of the cookies, providing structure and texture. Replace with *whole wheat flour* for a healthier option.
- Granulated sugar: Adds sweetness to the cookies. Consider using *brown sugar* for a richer flavor.
- Unsalted butter: Contributes to the rich flavor and helps to create a soft texture. If you prefer a *dairy-free* version, use a plant-based butter.
- Milk: The star ingredient! It adds moisture and creaminess. You may substitute with *almond milk*, *soy milk*, or any other milk of your choice.
- Vanilla extract: Enhances the flavors, making the cookies aromatic and delicious. For a deeper flavor, try using *vanilla bean paste*.
- Baking soda: This is essential for helping the cookies rise and achieving that lovely soft texture.
- Salt: Even a pinch enhances the sweet flavor. You can use *sea salt* for a more refined taste.
- Eggs: They bind the ingredients together and contribute to the texture. For a *vegan* option, you can use *flax eggs* or *applesauce*.
How to Make
- Preheat your oven: Begin by preheating your oven to 350°F (175°C). Proper preheating ensures that your cookies bake evenly. While the oven is heating, you can prepare your dough, making it a seamless process.
- Mix the wet ingredients: In a large mixing bowl, cream together the softened unsalted butter and granulated sugar until it’s light and fluffy. This usually takes about 3-5 minutes. Next, add in the egg and vanilla extract, mixing until well combined. The texture should become smooth and slightly airy, showcasing the effects of whipped butter.
- Combine the dry ingredients: In a separate bowl, whisk together the all-purpose flour, baking soda, and salt. This step is crucial as it ensures that the baking soda is evenly distributed throughout the flour, preventing any bitter spots in the final cookies. Once mixed, gradually add this dry mixture to the wet ingredients, mixing until just combined. Don’t overmix; the dough should be thick and slightly sticky.
- Add milk: Slowly pour in the milk, mixing thoroughly until the dough is well-blended but remains soft. This extra moisture from the milk is the secret to making these cookies so *soft* and chewy. You might notice that the dough becomes a bit more pliable, allowing for easy scooping.
- Scoop the dough: Use a cookie scoop or a spoon to drop generous amounts of dough onto a baking sheet lined with parchment paper. Leave enough space between each cookie, as they will spread slightly while baking. For uniformity, try to keep the sizes consistent; this helps with even cooking.
- Baking: Place the baking sheet in the preheated oven and bake for 10-12 minutes. Keep an eye on them towards the end; you want them to be lightly golden around the edges but still soft in the center. This underbaking is essential to achieve that perfect chewy texture!
- Cooling: Once baked, remove the cookies from the oven and let them cool on the baking sheet for about 5 minutes before transferring them to a wire rack. This allows them to set and makes them easier to handle. The aroma at this stage is simply divine, filling your kitchen with sweet *vanilla* notes.
Variations & Substitutions
Chocolate Chip Milk Cookies: One of the simplest ways to elevate your milk cookies is by adding *chocolate chips*. Fold in about a cup of semi-sweet or milk chocolate chips right after adding the milk. This variation provides a delightful contrast between the creaminess of the milk cookies and the richness of the chocolate. It’s ideal for those who want a classic cookie experience with a *decadent twist*.
Nutty Vanilla Milk Cookies: For those who crave a bit of crunch, consider adding chopped nuts like *walnuts or pecans*. Incorporate about half a cup into the dough when mixing your dry ingredients. Not only does this variation provide a satisfying *texture*, but it also adds a nutty flavor that pairs beautifully with the sweet milk base. This option is great for *vegetarians* and anyone looking to expand their cookie repertoire!
Gluten-Free Milk Cookies: If you need a gluten-free option, simply swap out the all-purpose flour for a certified gluten-free flour blend. Be mindful to check that all other ingredients, such as baking soda and vanilla extract, are also gluten-free to avoid any cross-contamination. The result will be equally delicious, soft cookies that everyone can enjoy!
Spiced Vanilla Milk Cookies: Infuse your cookies with warmth by adding spices like *cinnamon or nutmeg*. Start with a teaspoon of cinnamon in your dry ingredients; this addition will give your cookies a cozy aroma and flavor reminiscent of fall. It’s perfect if you’re looking for something a bit different but still comforting during those chilly evenings.
Common Mistakes to Avoid
When making these milk cookies, there are a few common mistakes that can affect your results. One crucial point is accurately measuring your flour. Using too much flour can result in dense, dry cookies instead of the desired *soft texture*. To avoid this, spoon the flour into your measuring cup and level it off rather than scooping directly from the container.
Another common error is overmixing the dough. While you want all the ingredients to be combined, mixing too vigorously can develop the *gluten in the flour*, leading to tough cookies. Mix until just combined, and you’ll be rewarded with that perfect chewy texture.
A critical warning is to ensure you’re not opening your oven door frequently during baking. This releases heat and can lead to uneven baking. Instead, wait until the minimum baking time has passed to check on your cookies. Trust your instincts, and don’t let the initial sight of underbaked cookies scare you—they will continue to firm up as they cool on the baking sheet!
Storage, Freezing & Reheating Tips
Proper storage of your milk cookies ensures that they remain fresh and delicious for as long as possible. Once your cookies have cooled completely, store them in an airtight container. This keeps them moist and protects them from becoming stale. They can last at room temperature for about a week or in the refrigerator for a longer period, although the latter may reduce their *softness*.
For longer storage, consider freezing your cookies. You can freeze the dough before baking by scooping it onto a baking sheet and freezing until solid. Once frozen, transfer the dough balls into a resealable freezer bag. They can be baked directly from the freezer, adding an extra minute or two to the baking time. This method allows you to enjoy warm, freshly baked cookies even on short notice!
If you’ve decided to freeze baked cookies, ensure they have completely cooled before wrapping them individually in plastic wrap and placing them in a freezer-safe container. Reheat them for a few seconds in the microwave or for a few minutes in a preheated oven to bring back their *deliciously soft texture*.
Frequently Asked Questions
Can I use whole wheat flour instead of all-purpose flour?
Yes, you can substitute whole wheat flour for all-purpose flour; however, keep in mind that the texture may change slightly. Whole wheat flour tends to absorb more liquid, so you may need to adjust the amount of liquid in your recipe to achieve the desired dough consistency.
What can I use instead of eggs in this recipe?
If you’re looking to make these cookies *egg-free*, consider using flax eggs or applesauce as alternatives. To make a flax egg, mix 1 tablespoon of ground flaxseed with 3 tablespoons of water and let it sit for 5 minutes before adding it to your dough. Applesauce can also work well, with a ¼ cup equating to one egg.
How do I make these cookies on the healthier side?
To make these cookies healthier, consider using *whole wheat flour* and reducing the amount of sugar. You can also substitute part of the butter with unsweetened applesauce, which would reduce the fat content. By swapping out some of the sugar for natural sweeteners like *honey or maple syrup*, you can also enhance the nutrient quality.
Can I add flavor variations besides vanilla?
Absolutely! Feel free to experiment with other extracts like almond or lemon. Just remember to adjust the quantity to match the intensity of the flavor you desire. You can also consider adding a dash of *cocoa powder* for a chocolaty twist or a sprinkle of citrus zest for a refreshing version.
What should I do if my cookies spread too much while baking?
If your cookies spread excessively, it could be due to unchilled dough, too much butter, or not enough flour. To resolve this, consider chilling your cookie dough for at least 30 minutes before baking. This helps them hold their shape better and results in a thicker, chewier cookie.
Conclusion:
In conclusion, these *Milk Cookies: Soft Vanilla Milk Cookies* aren’t just a recipe; they’re a delightful embodiment of *comfort and nostalgia*. With their soft texture and creamy flavor, they are sure to become a favorite in your household. The versatility of this recipe allows you to explore numerous variations while still enjoying the classic taste that started it all. So give these cookies a try and feel free to personalize them to your heart’s content. And don’t forget to share your creations—whether it’s a simple gathering or a special occasion, everyone will appreciate a warm, homemade treat. Happy baking!


