Prep time: 15 minutes
Cook time: 12 minutes
Total time: 27 minutes
Servings: 24 cookies
Imagine walking into your kitchen, and the sweet, soothing aroma of freshly baked cookies fills the air. Just like that, your worries seem to melt away. If you’ve ever craved a cookie that’s soft, buttery, and just the right amount of sweet, look no further than these Milk Cookies: Soft Milk Sugar Cookies. They remind many of childhood baking days, where each bite took you back to simpler times. These cookies aren’t just treats; they are a nostalgic experience, perfect for sharing with family or enjoying during a cozy night in.
In this article, you’ll learn how to create not just any cookie, but ones that are fluffy and delicious, thanks to the unique properties of milk in the recipe. Moreover, you’ll discover different variations, helpful tips, and answers to common questions. These cookies are so simple to make that even the busiest parents and kitchen novices can whip them up without breaking a sweat.
What Is Milk Cookies: Soft Milk Sugar Cookies?
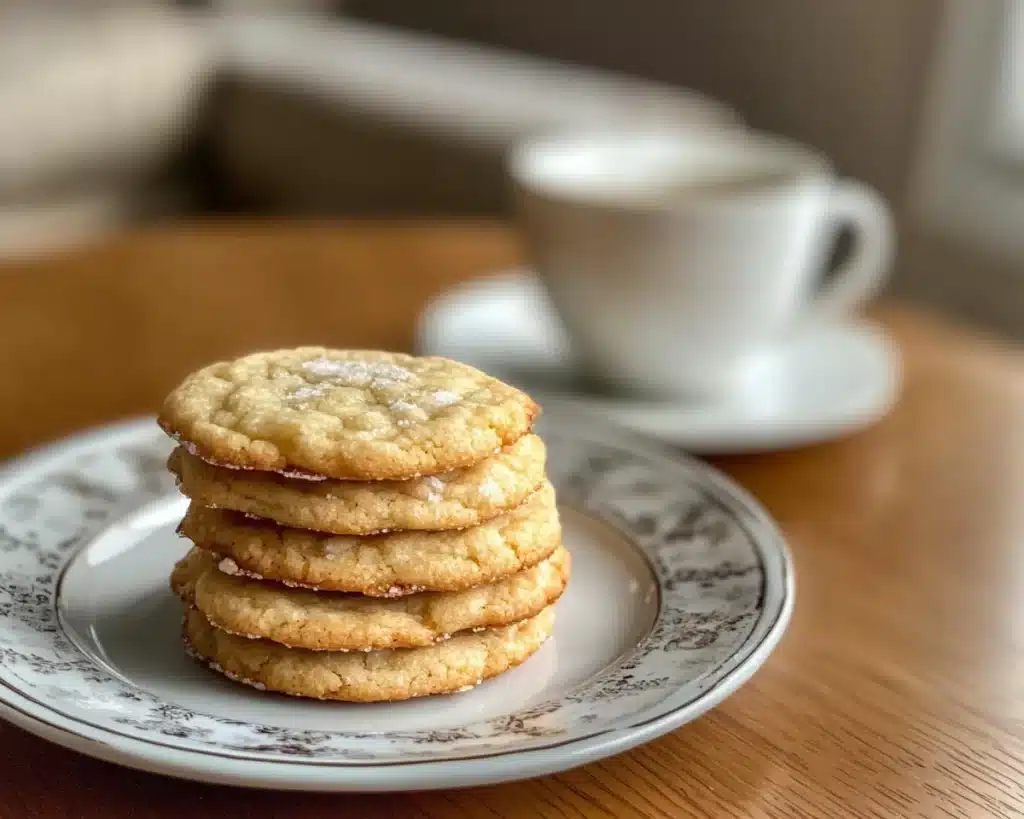
Milk Cookies: Soft Milk Sugar Cookies are a delightful twist on the classic sugar cookie. Originating from home kitchens, this recipe showcases the essential ingredient of milk, which contributes to their irresistible softness and flavor. As you bite into one, you’ll experience a pillowy texture that seems to dissolve in your mouth, complemented by a sweet, buttery flavor that leaves you wanting more.
The magic of these cookies lies in their balance. They manage to be sweet enough to satisfy your dessert cravings, yet light enough to be enjoyed as an everyday snack. The combination of milk and simple ingredients brings a sense of comfort, making them ideal for family gatherings, celebrations, or just a quiet night at home. Whether dunked in milk or enjoyed fresh out of the oven, these cookies redefine what it means to indulge.
Why You’ll Love This
There are countless reasons to fall in love with these cookies! First and foremost, their taste is absolutely fantastic. The sweetness from the sugar, combined with the richness of the butter and milk, creates a flavor profile that’s hard to resist. You get that melt-in-your-mouth experience, which is an essential characteristic of a perfect cookie.
Another advantage is the ease of preparation. With just a handful of ingredients, you’ll find this recipe approachable, even for beginners. There are no complicated cooking methods involved, just straightforward mixing and baking. Busy parents can appreciate how quick they come together, making them an ideal choice for after-school snacks or last-minute dessert ideas.
Additionally, they are budget-friendly. Using common pantry staples means you’re not investing in expensive ingredients. And let’s talk about health: while they are indulgent, the presence of milk not only adds flavor but also provides some essential nutrients. Many people shy away from baking due to misconceptions of it being overly complicated or time-consuming. This recipe proves that great-tasting cookies can come easily and quickly, allowing you to focus on enjoying the result rather than stressing over the process.
Ingredients You’ll Need
To make your delightful Milk Cookies, you’ll need the following ingredients:
- 2 ¾ cups all-purpose flour: This serves as the base for your cookies, giving them structure. If you prefer, you can substitute with whole wheat flour for added nutrients, but the texture may slightly differ.
- 1 teaspoon baking soda: This is your leavening agent, ensuring that cookies rise and remain fluffy.
- ½ teaspoon salt: Salt balances the sweetness and enhances the overall flavor.
- 1 cup unsalted butter, softened: The butter is key to achieving that rich flavor and tender texture. Always use unsalted so that you can better control the saltiness of the final product.
- 1 cup granulated sugar: Adds sweetness and promotes that lovely golden-brown color when baked.
- ½ cup brown sugar: This contributes moisture and a deeper sweetness due to the molasses content.
- 2 large eggs: Binding agents that provide richness and structure.
- 1 teaspoon vanilla extract: For that classic cookie flavor.
- ½ cup milk: The magical ingredient that makes these cookies soft and moist.
Each ingredient has a purpose in this recipe, ensuring that you achieve that perfect blend of flavor and texture. If any ingredients are not available, don’t worry! There are alternatives you can use without compromising the end product.
How to Make
Follow these easy steps to create your own batch of soft milk cookies:
- Preheat your oven to 350°F (175°C) and line a baking sheet with parchment paper. This will prevent sticking and make clean-up a breeze. Parchment paper not only helps ensure your cookies bake evenly but also gives you the freedom to slide them right off once they’re done.
- In a medium bowl, whisk together the all-purpose flour, baking soda, and salt. This dry mixture helps to distribute the leavening agent evenly, ensuring that your cookies rise uniformly. Set this aside as you work on your wet ingredients.
- In a large mixing bowl, cream the softened unsalted butter with both the granulated sugar and brown sugar. Use an electric mixer set to medium speed for about 2-3 minutes until the mixture is light and fluffy. Proper creaming of your butter and sugars is essential to incorporate air into your cookies, which is critical for achieving a soft and tender texture.
- Add the eggs one at a time to the butter mixture, mixing well after each addition. Follow this by adding the vanilla extract. This step is important as it helps bind the mixture together and enhances the flavor!
- Gradually mix in the dry ingredients into the wet mixture. I recommend doing this in three parts to avoid flour flying everywhere. Mix until just combined; overmixing can lead to tough cookies, so be gentle!
- Finally, slowly pour in the milk while continuing to mix. This will enhance the cookie’s softness and moisture. You’ll notice the dough becomes more pliable and easy to scoop.
- Using a cookie scoop or spoon, drop tablespoon-sized portions of dough onto your prepared baking sheet, spacing them about two inches apart to allow for spreading as they bake. If you would like, you can sprinkle a little extra sugar on top for added sweetness and a crunchy finish.
- Bake in your preheated oven for 10-12 minutes or until the edges are lightly golden. Remember, the center will look slightly underbaked, but that’s okay! They will continue to set as they cool down on the baking sheet.
- Once baked, let your cookies cool on the sheet for about 5 minutes before transferring them to a wire rack to cool completely. Cooling on the baking sheet helps maintain the tender texture, while transferring to a rack ensures they do not become soggy.
You are now ready to indulge in your homemade soft milk sugar cookies! Enjoy them warm or pack them into lunchboxes for a sweet companion throughout the day.
Variations & Substitutions
Chocolate Chip Variation: One of the most beloved variations involves adding semi-sweet chocolate chips into the dough. Simply fold in one cup of chocolate chips right after mixing the dry and wet ingredients together. The combination of sweet dough with gooey chocolate creates an irresistible treat that both kids and adults adore. This variation is perfect for those who love decadent flavors and adds a delightful surprise with each bite.
Oatmeal Milk Cookies: For a heartier option, try incorporating oats into your recipe. Replace one cup of flour with rolled oats to create a cookie that offers a chewy texture and nutty flavor. This is an excellent choice for individuals looking for a more filling snack or for those who enjoy a rustic bite. Oatmeal cookies also pair wonderfully with raisins or nuts if you’re looking to add even more texture and richness.
Nut-Free Variation: For those with nut allergies or preferences, you can easily exclude any nuts from your cookies. In case you are using almond flour in some other variation, simply switch it back to all-purpose flour. This keeps your milk cookies safe while still maintaining their delightful softness and sweetness.
Gluten-Free Option: If you want these cookies to suit a gluten-free diet, you can use a 1:1 gluten-free flour blend in place of the all-purpose flour. Make sure to check that the baking powder you use is also gluten-free. The result will be slightly different but still delicious, allowing everyone to enjoy these delightful milk cookies.
Citrus Zest Variation: For those who enjoy a hint of zestiness, you can incorporate lemon or orange zest into the cookie dough. Simply add one tablespoon of zest after creaming the butter and sugars. This option gives the cookies a refreshing twist, perfect for summer gatherings or festive occasions, where a bright burst of flavor can brighten anyone’s day.
Common Mistakes to Avoid
Baking cookies may seem straightforward, but there are a few common pitfalls that can take your cookies from delightful to disastrous. One prevalent issue is not measuring your ingredients correctly. Using too much flour can lead to dry cookies, while too much sugar can make them overly sweet. Always use measuring cups and spoons for accuracy, especially when baking.
Another mistake is baking at the wrong temperature. If your oven runs too hot, your cookies may burn on the edges while remaining raw in the center. It’s wise to invest in an oven thermometer to verify that your oven is at the correct temperature before baking.
Overmixing the dough is yet another common error. Once you add the flour, mix just until combined. Overmixing activates gluten, which can result in tough, dense cookies instead of the soft, tender ones you desire. Lastly, don’t skip the cooling step! If you move them too soon to a cooling rack, they might fall apart, ruining your wonderfully crafted cookies.
Storage, Freezing & Reheating Tips
To ensure your Milk Cookies stay fresh, store them in an airtight container at room temperature. They can last up to a week, although they’re often gone much sooner! If you want to keep them longer, freezing is a fantastic option. Place them in a single layer on a baking sheet, freeze them until solid, and then transfer them to a freezer-safe bag. They can be stored this way for up to three months.
When you’re ready to enjoy, you don’t need to thaw them beforehand! Simply pop them in the oven at 350°F (175°C) for about 5 minutes, and they’ll be just as soft and fresh as when they first came out of the oven.
Be mindful of how you freeze and reheat to maintain their delightful texture. Avoid microwaving them for reheating, as this tends to dry them out and can make them rubbery. Instead, use the oven method for the best results.
Frequently Asked Questions
Can I use milk alternatives for this recipe?
Yes, you can absolutely use milk alternatives such as almond milk, oat milk, or soy milk. Each will provide a slightly different flavor, but they will still contribute to the cookie’s texture and moisture!
How can I make my cookies even softer?
To achieve an even softer cookie, consider using a higher butter-to-flour ratio. Additionally, don’t let your cookies bake too long; you want to remove them from the oven when they are still slightly underbaked in the center.
Can I add mix-ins like nuts or dried fruit?
Certainly! Feel free to fold in a cup of your favorite mix-ins, such as chocolate chips, nuts, or dried cranberries. Just remember that adding too many mix-ins can alter the texture, so moderation is key.
What’s the best way to store cookies to prevent them from drying out?
Ensure your cookies are stored in an airtight container. Adding a slice of bread to the container can also help absorb excess moisture while keeping the cookies soft.
Are these cookies suitable for freezing?
Absolutely! You can freeze these cookies either before or after baking. Just make sure they are well-wrapped to avoid freezer burn. Frozen cookies can be baked directly from the freezer with slight adjustments in baking time.
Conclusion:
In summary, these Milk Cookies: Soft Milk Sugar Cookies aren’t just another cookie recipe; they’re an opportunity to create delicious memories. Their delightful taste, ease of preparation, and versatility make them a favorite for every occasion. Whether you try the classic recipe or experiment with various variations, you’re bound to find a combination that speaks to your palate. Don’t hesitate to try them for yourself, share them with loved ones, or even customize them to make them your own. Happy baking!