Little Debbie Star Crunch is an iconic treat that has made countless childhood snacks memorable. The delicious combination of chocolate, crisp rice, and caramel creates a unique texture and flavor that’s perfect for satisfying your sweet tooth. Whether you grew up enjoying these dessert bars or have just discovered them, you’re in for a treat. In this article, we will delve into the history of Star Crunch, explore why they are beloved by many, and guide you through making them at home with your own twist.
**What Is Little Debbie Star Crunch?**
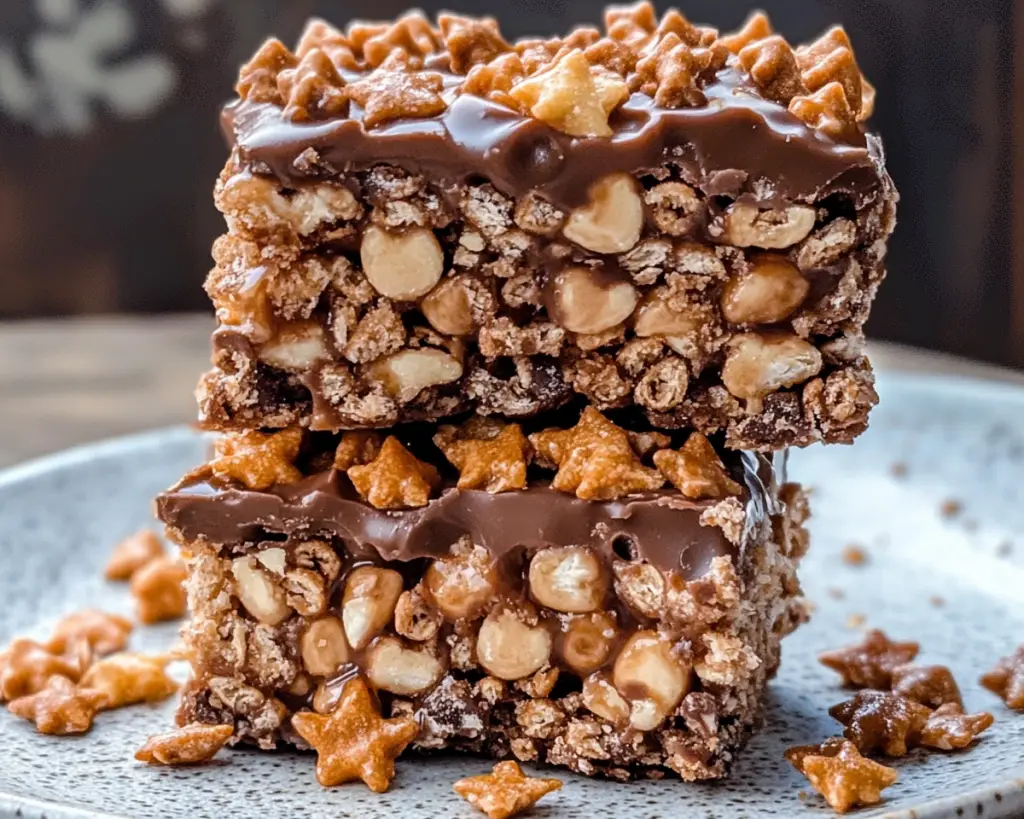
Little Debbie Star Crunch is a no-bake dessert made by combining crispy rice, caramel, and chocolate. These sweet treats feature a chewy, gooey texture covered in a sweet chocolate coating, reminiscent of a chocolate chip cookie combined with a delicious rice crispy treat. Created by McKee Foods in the 1960s, the Star Crunch has become a staple in the line of Little Debbie snacks, capturing the hearts of both children and adults alike with its fun and festive appearance.
Star Crunch bars come in individual packaging, making them easy to grab as a quick snack. The crunchy exterior combined with the chewy caramel interior gives them a unique mouthfeel that is both satisfying and comforting. Plus, the delightful chocolate coating adds a rich, sweet flavor that complements the crunchy rice and sticky caramel perfectly.
Historically, Little Debbie has been synonymous with affordability and convenience, and Star Crunch is no exception. These bars are not just a nostalgic memory for many but also a simple treat that brings joy and satisfaction any time of the day.
**Why You’ll Love This Little Debbie Star Crunch**
There are numerous reasons to fall in love with Little Debbie Star Crunch. First and foremost, they encapsulate the essence of a guilty pleasure treat that can be enjoyed any time. From busy parents needing a quick snack for their kids to adults craving a sweet fix during an afternoon slump, these bars fit the bill perfectly.
1. **Taste:** The harmonious blend of chocolate, caramel, and crispy rice makes every bite a delightful experience. The rich chocolate coating provides a luxurious dessert feel, while the caramel and rice crisps add texture.
2. **Ease of Preparation:** Making these treats at home is incredibly easy and requires no baking. This accessibility is especially appealing to novice home cooks or busy parents who may feel intimidated by more complicated dessert recipes.
3. **Cost-effective:** Making your own Little Debbie Star Crunch is often more economical than purchasing pre-packaged snacks. Additionally, you can easily adjust the recipe to include ingredients you might already have on hand, which helps finance a delicious treat without breaking the bank.
4. **Versatility:** One of the best aspects of making your own Star Crunch is the opportunity to customize them to your preferences. You can switch up the chocolate type, add nut butter, or even turn it into a gluten-free treat with simple substitutions.
5. **Healthier Options:** While it may not be a completely health-oriented treat, making your own allows you to control the ingredients, helping you to accommodate various dietary needs or preferences.
**Ingredients You’ll Need**
To recreate the classic flavor of Little Debbie Star Crunch at home, you’ll need several simple ingredients. Here’s what you’ll need to store in your pantry before getting started on this scrumptious treat:
– **Crispy Rice Cereal:** This serves as the base ingredient, providing that essential crunch. You can use regular crispy rice cereal or a gluten-free variant if needed.
– **Marshmallows:** These will help create that chewy texture. Mini marshmallows or regular marshmallows will work equally well.
– **Caramel:** Either store-bought caramel sauce or candy caramels will do. They provide the sweetness and stickiness that binds the bars together.
– **Chocolate Chips:** Semi-sweet chocolate chips are most common, but feel free to choose dark or milk chocolate depending on your preference.
– **Butter:** This helps in melting the marshmallows and combines the flavors. You can replace regular butter with vegan alternatives for a dairy-free version.
**How to Make Little Debbie Star Crunch**
Now that you have gathered your ingredients, let’s get started. Follow these straightforward steps to create your very own Little Debbie Star Crunch at home.
1. **Prepare Your Workspace:** Begin by gathering all your ingredients and tools. You will need a medium saucepan, a mixing bowl, a spatula, and a baking dish lined with parchment paper to prevent sticking.
2. **Melt Butter and Marshmallows:** In a medium saucepan over low to medium heat, add 4 tablespoons of butter. Once the butter is melted, add 4 cups of mini marshmallows or cut regular-sized marshmallows in half. Stir them frequently until fully melted and smooth.
3. **Incorporate Caramel:** Once the marshmallows are fully melted, stir in 1 cup of store-bought caramel or unwrapped caramel candies (about 20 caramels). Continue to stir until the mixture blends well and forms a sticky consistency. Ensure that every marshmallow and caramel piece is melted and well combined.
4. **Add Crispy Rice Cereal:** Remove the saucepan from heat and carefully add 6 cups of crispy rice cereal to the melted marshmallow and caramel mixture. Gently fold in the cereal until everything is evenly coated. Be cautious not to crush the cereal; you want to maintain its texture.
5. **Press Mixture into Baking Dish:** Transfer the mixture into a lined baking dish, using a spatula or your hands (lightly greased) to evenly press the mixture down. Make sure it’s compact and even across the dish to ensure proper slicing later.
6. **Melt Chocolate Chips:** In a separate microwave-safe bowl, combine 1 cup of semi-sweet chocolate chips and melt them in the microwave in 30-second intervals until smooth and fully melted. Stir well after each interval to prevent scorching.
7. **Coat the Bars:** Once your rice crispy mixture has set for about 30 minutes, pour the melted chocolate over the top. Spread the chocolate evenly across the surface and allow it to set for another 30-60 minutes before cutting into squares or rectangles.
8. **Slice and Serve:** Once the chocolate has solidified, carefully lift the bars from the baking dish using the parchment paper. Cut into squares or rectangles, and enjoy your homemade Little Debbie Star Crunch!
**5 Variations & Substitutions**
1. **Nutty Variation:**
– To enhance the flavor and texture, add 1 cup of chopped nuts (such as pecans, walnuts, or almonds) to the mixture when folding in the crispy rice cereal. This will give your Star Crunch a nutty twist and added protein, making it a satisfying snack.
2. **Peanut Butter Twist:**
– If you love peanut butter, try incorporating ½ cup of creamy or crunchy peanut butter directly into the melted marshmallow and caramel mixture. This substitution will give your bars a rich and creamy texture that pairs perfectly with the chocolate.
3. **Coconut Delight:**
– For a coconut flavor, consider adding 1 cup of sweetened shredded coconut to the mixture when folding in the crispy rice cereal. This unique and tropical twist will take your Star Crunch to new heights of deliciousness.
4. **Vegan Version:**
– To make your Star Crunch vegan-friendly, substitute regular butter with coconut oil or vegan butter and use dairy-free chocolate chips. You can also replace the marshmallows with a vegan marshmallow variety if available.
5. **Gluten-Free Option:**
– If you need a gluten-free option, ensure to use certified gluten-free crispy rice cereal and check the ingredients on the caramel and chocolate to confirm they are gluten-free.
**Common Mistakes to Avoid**
One of the essential points to keep in mind when making Little Debbie Star Crunch is not to overheat the marshmallows. Overheating will lead to a burnt flavor and could compromise the texture. Make sure you’re stirring constantly over low to medium heat to prevent scorching.
Another typical mistake is not allowing the bars enough time to cool before slicing. Rushing this step could result in a gooey mess instead of neatly sliced treats. Lastly, don’t skip the lining of the baking dish with parchment paper. This will save you from messy cleanup and ensure the treats are straightforward to remove.
**Storage, Freezing & Reheating Tips**
For best results, store your homemade Little Debbie Star Crunch bars in an airtight container at room temperature. They can typically last about one week, though they are often devoured much faster than that!
If you plan to enjoy these treats later, you can freeze them for longer storage. To freeze, place the bars in an airtight container or wrap them individually in plastic wrap and then place them in a zip-top freezer bag. They can be frozen for up to three months. When you’re ready to enjoy them again, thaw them at room temperature for a couple of hours before indulging.
**Frequently Asked Questions**
1. **Can I use different types of cereal?**
Yes! You can experiment with other cereals like cornflakes, puffed rice, or even granola. Each option will yield a slightly different texture and taste but will still be delicious.
2. **What can I do with leftover Star Crunch bars?**
If you have extra bars, consider chopping them into crumbles and using them as a topping for ice cream, yogurt, or even in baking recipes for added texture and flavor.
3. **How can I make these bars healthier?**
You can make adjustments for a healthier version by using whole grain crispy rice cereal, reducing the sugar in the caramel, or opting for dark chocolate chips that have a higher cocoa percentage for added antioxidants.
4. **Can I add different flavors like mint or orange?**
Absolutely! You can enhance your bars by adding a few drops of mint or orange extract when melting the marshmallows. This will give your bars a refreshing twist.
5. **Is there a non-dairy version for caramels?**
Yes. Look for dairy-free caramel sauce or use a homemade sauce made from dates and coconut milk for a healthier, vegan option.
In conclusion, Little Debbie Star Crunch is more than just a nostalgic treat; it’s a delicious snack that can easily be replicated at home, accommodating various tastes and dietary preferences. Making these bars yourself allows you the freedom to modify the ingredients to suit your liking. So grab those crispy rice cereal and get ready to whip up a batch of chewy, chocolate-covered goodness that will delight both you and your loved ones. If you haven’t given them a try, now is the perfect time to dive in. Whether you stick to the original recipe or unleash your creativity, you won’t regret the experience. Enjoy crafting and savoring each delightful bite!