Prep time: 30 minutes
Cook time: 0 minutes
Total time: 30 minutes
Servings: 12
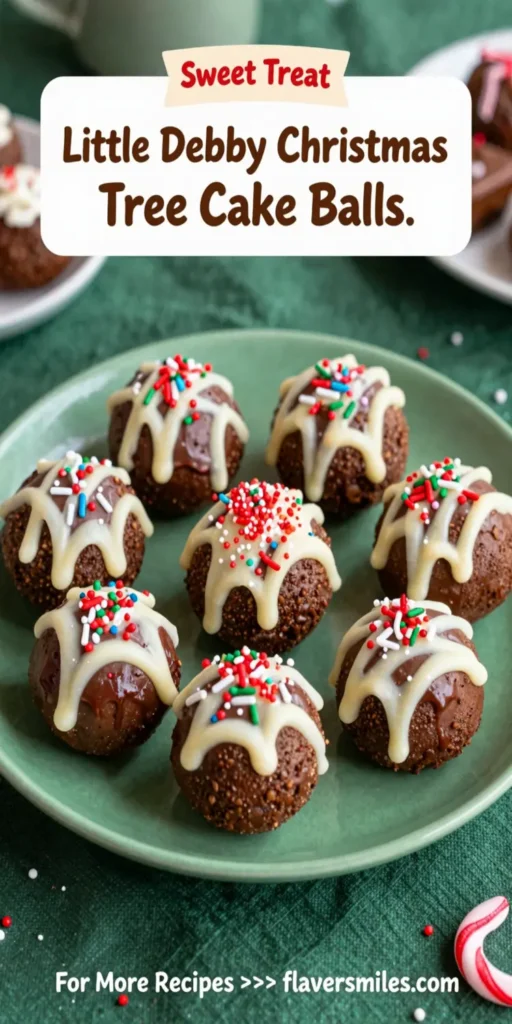
The holiday season is a time full of joy, laughter, and of course, delicious treats! One such delightful creation is the Little Debbie Christmas Tree Cake Balls. These dessert bites capture the essence of the classic Christmas tree cakes that many of us grew up with, offering a perfect blend of nostalgia and holiday cheer. With a soft, moist cake center enrobed in a sweet, vibrant coating, these cake balls are sure to impress both kids and adults alike.
What Is Little Debbie Christmas Tree Cake Balls?
Little Debbie Christmas Tree Cake Balls are a fun and festive twist on the beloved Little Debbie Christmas Tree Cakes. These cake balls are made by transforming the signature golden cake and cream filling into bite-sized morsels. The treats are then coated with a rich chocolate layer, resembling the iconic green icing found on the cake, decorated with sprinkles to mimic the joyous holiday spirit.
Why You’ll Love This
There are countless reasons to love Little Debbie Christmas Tree Cake Balls! Firstly, they are incredibly easy to make. Even if you’re a kitchen novice, you’ll find this recipe accessible and enjoyable. Moreover, these cake balls are a hit at any holiday gathering, making them an ideal treat for parties, family gatherings, or as a sweet gift for friends. Their charming appearance and delectable taste will surely win over even the pickiest eaters. Plus, they are versatile! You can have fun changing up the flavors or decorations according to your personal fancy or holiday theme.
Ingredients You’ll Need
- 1 box of yellow cake mix: This forms the base of your cake balls, providing a light and fluffy texture.
- 1 cup water: To mix with the cake mix and bind it together.
- 1/3 cup vegetable oil: This adds moisture and richness to the cake.
- 3 eggs: These provide structure and help the cake rise beautifully.
- 1 can of cream cheese frosting: The filling that gives these cake balls their signature taste.
- 1 bag of green candy melts: For coating the cake balls to resemble Christmas trees.
- Sprinkles (optional): For decoration and added festivity.
How to Make
- Preheat your oven according to the cake mix instructions. Prepare a 9×13 inch baking dish by greasing or lining it with parchment paper. This will ensure your cake comes out cleanly.
- In a large mixing bowl, combine the yellow cake mix, water, vegetable oil, and eggs. Mix on medium speed until the batter is smooth and free of lumps, about 2 minutes. This is the foundation of your cake balls, so make sure it’s well combined.
- Pour the batter into the prepared baking dish and spread it evenly. Bake according to the package instructions, typically around 30-35 minutes, or until a toothpick inserted into the center comes out clean. You want a nice golden brown color that tells you the cake is ready!
- Allow the cake to cool completely in the pan. This is crucial, as handling warm cake can lead to crumbles. Once cooled, crumble the cake into a large bowl using your hands, breaking it into tiny pieces until it resembles fine crumbs.
- Add the cream cheese frosting to the cake crumbs and mix thoroughly with your hands or a spatula until the mixture is moist and can be easily rolled into balls. Don’t worry if it seems a bit sticky; that’s just right!
- Using your hands, roll the mixture into 1-inch balls. Place them on a baking sheet lined with parchment paper, ensuring they are spaced out to avoid sticking.
- Once all the mixture is rolled, place the baking sheet in the freezer for about 30 minutes. This step helps the balls firm up, making them easier to coat later on.
- While the cake balls are chilling, melt the green candy melts according to package instructions. Stir until smooth and fully melted for an even coating.
- Remove the cake balls from the freezer. Dip each ball into the melted green candy melts, coating them entirely. Use a fork to dip and then lift them out to let the excess chocolate drip off.
- Place the coated cake balls back onto the parchment-lined baking sheet. Immediately sprinkle them with colorful sprinkles to create a festive look.
- Let the candy coating set at room temperature or place the tray in the refrigerator for quicker results.
Variations & Substitutions
Chocolate Version: If you’re a chocolate lover, consider using a chocolate cake mix instead of yellow. The creamy frosting will still complement this delightful variation, and the candy coating can either remain green or be replaced with a dark chocolate melt for a richer taste.
Gluten-Free Option: For those who need or prefer gluten-free options, use a gluten-free cake mix. Be sure to check that the frosting and candy melts you select are also gluten-free to keep your dessert safe while still being delicious.
Add Some Peppermint: For an extra holiday kick, add a few drops of peppermint extract to the frosting or sprinkle crushed peppermint candy on top after coating the cake balls for a refreshing yuletide twist.
Common Mistakes to Avoid
One common mistake is not allowing the cake to cool completely before crumbling it. This can cause the mixture to become too warm, making it harder to form balls. Make sure to be patient; it’s worth it!
Another pitfall is overmixing the batter when preparing your cake base. Overmixing can create dense balls rather than light and fluffy ones. Just mix until combined and that should be enough.
Ensure your candy coating is at the right melting point. If it’s too hot, it can cause the cake balls to melt or fall apart. Similarly, good chilling time helps the balls maintain their shape during the coating process.
Storage, Freezing & Reheating Tips
To store your Little Debbie Christmas Tree Cake Balls, place them in an airtight container at room temperature for up to two days. For longer storage, keep them in the refrigerator, where they’ll last for about a week. If you plan to enjoy them later, consider freezing them. Place the uncoated cake balls in a single layer on a baking sheet and freeze until solid. Once frozen, transfer them to a freezer-safe bag or container, where they can be stored for up to three months.
To reheat, if you’ve chosen to freeze, allow the cake balls to defrost in the refrigerator overnight before coating them. For quick fun, you can pop them back into the freezer for half an hour and enjoy them cold!
Frequently Asked Questions
Can I use other flavors of cake mix? Absolutely! You can experiment with any cake mix flavor such as chocolate, red velvet, or even vanilla. Each flavor comes with its unique taste and mood, allowing for delightful variations.
How do I know when my cake balls are properly coated? Your cake balls should be evenly coated with chocolate and have a smooth surface with no crumbs showing. The sprinkle decoration should adhere well to the chocolate while it’s still wet to ensure they stick.
Is it safe to make these with children? Yes, these cake balls are a fantastic recipe to make with kids! They can help with mixing, rolling, and decorating. Just keep an eye on them during the melting process to ensure safety with heat.
Can I make these ahead of time? Certainly! These cake balls can be prepared a day or two in advance or frozen for later enjoyment, making them ideal for prepping for holiday gatherings!
What can I use instead of candy melts? If you can’t find candy melts, you can use chocolate chips or almond bark. Just melt them down similarly, ensuring they are at a suitable temperature for dipping smoothly and effectively.
Conclusion: Little Debbie Christmas Tree Cake Balls are a delightful addition to your holiday festivities! With their nostalgic flavors and simple preparation, they are sure to become a cherished tradition in your home. Happy baking!