Prep time: 15 minutes
Cook time: 25 minutes
Total time: 40 minutes
Servings: 12 servings
There’s something truly magical about the first bite of a lemon bar. That perfect balance of sweet and tart tastes dances on your tongue, reminiscent of lazy summer afternoons spent outdoors, catching up with friends and family. These lemon bars evoke memories of warm sunshine and laughter, making them a go-to treat for any occasion. You might be thinking, “Can a dessert that’s so delectable be easy to make?” Well, the answer is a resounding yes! In this recipe, you’ll discover how to whip up delicious homemade lemon bars with an effortless approach that even beginner bakers can master. Not only will you learn the step-by-step process, but also tips on how to customize them to suit your palate.
Lemon bars may come from a long-standing tradition of baking, but we’ve modernized this recipe to ensure you can enjoy them without any fuss. The bright, vibrant flavor comes from fresh lemon juice, while a buttery shortbread base provides the perfect contrast. This recipe is both straightforward and forgiving, allowing you to create a dessert that not only looks impressive but tastes even better. Trust me, you won’t be able to resist these little slices of heaven!
What Is Lemon Bars (Easy + Bright)?
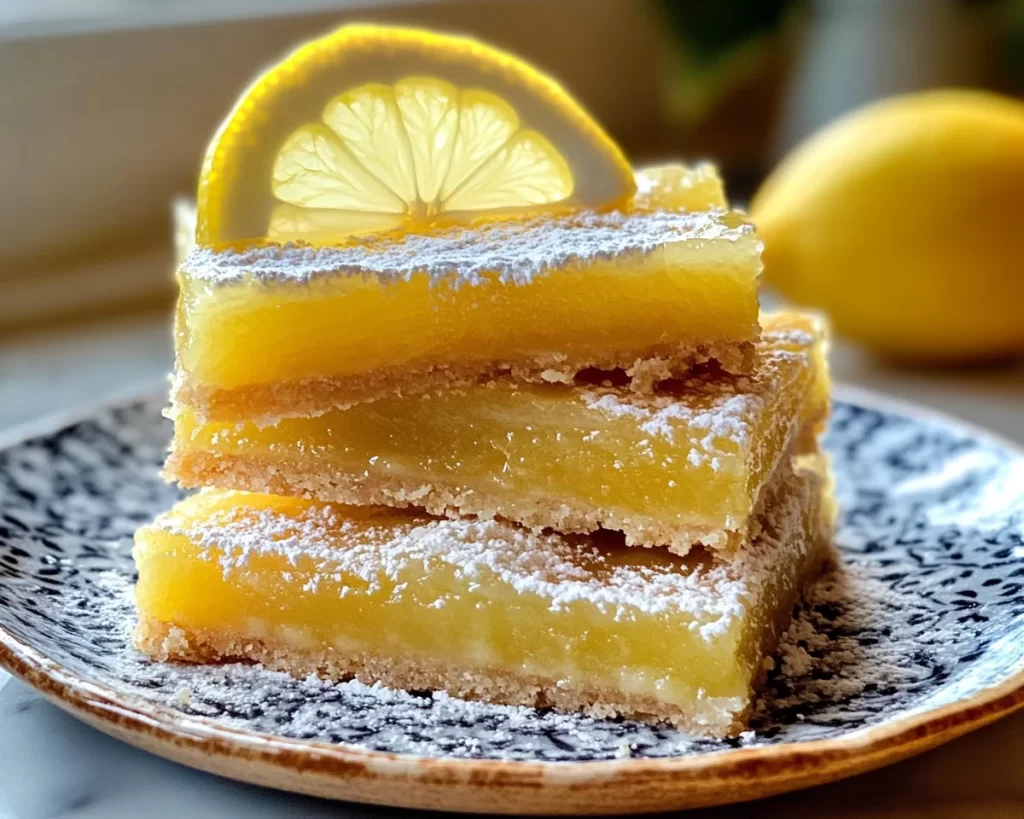
Lemon bars are a classic dessert made of a crisp, buttery crust topped with a smooth, tangy lemon filling. Traditionally, they consist of three main components: the crust, the lemon filling, and a dusting of powdered sugar on top. Originating in the early 20th century, lemon bars have gained popularity for their delightful balance of sweet and tangy flavors. The texture is equally impressive; the crust is crumbly yet rich, while the filling is silky smooth and bursting with citrus flavor that’s both refreshing and satisfying.
The beauty of lemon bars lies in their versatility. You can serve them at a summer barbecue, as a light dessert for a dinner party, or even packed as a sweet treat for a picnic. Their sunshiny yellow hue is not only visually appealing but also adds a cheerful touch to any gathering. When you bite into a lemon bar, the first sensation is the tenderness of the crust, quickly followed by the zesty burst of lemon that invigorates your taste buds. Whether you enjoy them chilled or at room temperature, lemon bars are a delightful way to celebrate flavors and moments alike.
Why You’ll Love This
There are many reasons why you’ll fall in love with this lemon bar recipe. First, the taste is out of this world. The combination of freshly squeezed lemon juice and zest provides a brightness that casts away any gloom, while the buttery crust adds a sense of indulgence that’s hard to resist. You’ll be surprised at how easy these are to make, with just a handful of ingredients required, most of which you likely have on hand. This means that you can whip them up without a last-minute trip to the grocery store, perfect for busy parents or unexpected guests.
One common misconception is that lemon bars require elaborate techniques or fancy ingredients. This recipe dispels that myth! In just a few tablespoons of butter and some sugar, you can create a stunning dessert that rivals anything from a bakery. When you compare the cost of making lemon bars at home versus buying them, the homemade option wins every time; it’s budget-friendly yet incredibly satisfying. The best part? You can easily customize this recipe to meet various dietary needs or personal preferences, making it a versatile dessert that everyone will enjoy.
Ingredients You’ll Need
- All-purpose flour: The base of your crust, providing structure and texture. You can substitute with gluten-free flour if necessary.
- Granulated sugar: Adds sweetness to both the crust and filling. Brown sugar can be used for a deeper flavor.
- Salt: Enhances the flavors in both the crust and filling. A small amount is crucial for balance.
- Unsalted butter: Brings richness to the crust; always opt for unsalted to control the salt level in the recipe.
- Fresh lemons: The star ingredient! Freshly squeezed lemon juice and zest provide that signature tartness.
- Eggs: Essential for setting the filling, giving it a smooth and creamy consistency. Use large eggs for best results.
- Powdered sugar: Used for dusting on top, adding a sweet finish that balances the tartness.
How to Make
- Preheat your oven to 350°F (175°C). This step is crucial for ensuring your lemon bars bake evenly. As the oven heats up, you can start preparing the crust, saving you time during the process.
- In a medium bowl, combine the all-purpose flour, granulated sugar, and salt. Whisk these dry ingredients together until well blended. This step will help your crust maintain a nice, even texture and ensure that the sweet and savory flavors are balanced throughout.
- Melt the unsalted butter in a microwave or on the stovetop. Let it cool slightly before adding it to your dry mixture. This prevents any clumping and helps create a creamy, cohesive dough. Stir the melted butter into the flour mixture until it forms a soft dough.
- Press this dough into the bottom of a greased or lined 9×9-inch baking pan. Ensure that you spread it evenly for consistent baking. The crust should be slightly thicker at the edges to help hold in the filling. Once done, use a fork to poke some holes in the crust, which will allow steam to escape during baking.
- Bake the crust in the preheated oven for about 20 minutes, or until lightly golden. Keep an eye on it; over-baking can lead to a tough crust. You want it just firm enough to hold the filling without becoming too dark.
- While the crust is baking, prepare the lemon filling. In another bowl, whisk together the fresh lemon juice, lemon zest, and granulated sugar until the sugar is fully dissolved. This step is key; the lemon zest enhances the flavor and aroma significantly.
- Next, add the eggs to the lemon mixture. Beat them in until thoroughly combined. Incorporating the eggs will make the filling quiche-like and contribute to that smooth texture that complements the crust beautifully.
- Once your crust finishes baking, remove it from the oven, and immediately pour the lemon filling over the hot crust. Don’t wait too long to add the filling, as it helps to create a smoother final product.
- Return the pan to the oven and bake for an additional 15 to 20 minutes. The filling should be set but still slightly wobbly in the center. The tops can become slightly golden, tell-tale sign that your lemon bars are almost ready.
- Once baked, allow the bars to cool completely in the pan on a wire rack. After they’ve cooled, transfer them to the refrigerator for at least two hours. Chilling allows for cleaner cuts when slicing into squares and gives the filling a firm texture that’s undeniably satisfying.
- Finally, sprinkle the top with powdered sugar before slicing into squares or bars. Not only will this add a beautiful presentation, but it also adds a touch of sweetness to balance out the tartness of the lemon filling.
Variations & Substitutions
Coconut Lemon Bars: If you’re a fan of coconut, consider adding shredded coconut to your crust for texture and flavor. You can use unsweetened or sweetened coconut, depending on your preference. This variation adds a tropical twist to the traditional lemon bars, making them even more appealing, especially during summer gatherings. Pairing the zesty flavor of lemon with coconut creates a delightful contrast that transports you to an island paradise.
Gluten-Free Lemon Bars: If you or someone you know has a gluten intolerance, you can easily adapt this recipe. Substitute the all-purpose flour with a gluten-free flour blend for equal results. Many gluten-free flours are available today that perform well in baked goods, making it accessible for those with dietary restrictions. Additionally, consider using a crust made from almond flour or coconut flour mixed with a bit of butter to provide a slightly different texture.
Less Sweet Lemon Bars: For those who prefer a less sweet treat, reduce the amount of sugar in the filling. You can also use a sugar substitute like erythritol or stevia, making this a great option for individuals monitoring their sugar intake. This version still maintains that bright lemon flavor but without overwhelming sweetness, perfect for a more balanced dessert experience.
Citrus Bars: Try combining lemon juice with other citrus fruits like lime or orange juice for a unique twist. This variation introduces different flavor profiles that evoke a tangy, fresh taste while maintaining the structure of the classic lemon bar. You’ll love the complexity that different citrus fruits provide!
Common Mistakes to Avoid
When preparing your lemon bars, it’s essential to keep a few common pitfalls in mind to ensure success. One of the most prevalent issues arises when measuring your flour. Overpacking your measuring cup can lead to a dense crust that lacks the light, tender texture we desire. Always spoon the flour into the cup and level it off with a knife to avoid this mistake.
Another common error is not allowing the lemon filling to cool adequately after baking, resulting in a messy, uneven slice. Patience is key; letting them chill properly in the refrigerator is vital for achieving those perfect, clean edges. Be cautious not to bake the filling too long. A perfect lemon bar is slightly jiggly in the center but set around the edges. If overbaked, the filling can become rubbery and lose that sought-after creamy quality.
Lastly, don’t forget to use fresh lemons! Bottled lemon juice lacks the vibrant flavor and aroma that fresh juice and zest provide. The brightness of fresh lemon juice truly makes these bars shine!
Storage, Freezing & Reheating Tips
To store your lemon bars, keep them in an airtight container in the refrigerator for up to one week. The cool, dry environment of the fridge will help preserve their texture and taste. If you wish to extend their shelf life, consider freezing them. Wrap the bars individually in plastic wrap and then in aluminum foil to prevent freezer burn. They can be stored in the freezer for up to three months. When you’re ready to enjoy them again, simply leave them in the refrigerator overnight to thaw before serving.
For reheating, you don’t need to worry too much about warming them back up; lemon bars are best enjoyed chilled. If you do prefer them at room temperature, simply leave them out for about 30 minutes before serving. Be sure to add a fresh dusting of powdered sugar before serving them to maintain their delightful appearance.
Frequently Asked Questions
Can I use bottled lemon juice instead of fresh lemon juice?
While bottled lemon juice is convenient, it’s best to use fresh lemon juice for the brightness and vibrant flavor it brings to lemon bars. The zest also adds essential oils that enhance the overall taste. If fresh lemons are unavailable, look for a high-quality bottled version that contains no added sugars or preservatives.
Can I make lemon bars ahead of time?
Absolutely! In fact, lemon bars can be made a day or two in advance for optimal flavor. The chilling time allows the flavors to meld together, resulting in a delicious dessert that’s even better the next day. Just be sure to keep them covered in the refrigerator until you’re ready to serve.
What can I do if my filling is too runny?
If your lemon filling doesn’t set as it should, it may be due to not baking it long enough or not using enough eggs. Make sure to check the center while it’s baking; it should be slightly jiggly but not liquid. If your filling is too runny after cooling, you can blend it back into a smooth mixture and re-bake it for a few more minutes.
Can I substitute other fruits for lemon?
Yes! You can experiment with other fruits to create unique flavor combinations. For example, lime, grapefruit, or even mixed berry flavors can work beautifully. Each will require adjustments in sugar levels based on the fruit’s natural sweetness and acidity.
Is this recipe suitable for freezing?
Yes! Lemon bars freeze exceptionally well. Be sure to wrap them tightly in plastic wrap and then in foil to maintain their freshness. They can be stored in the freezer for up to three months. Just allow them to thaw in the refrigerator overnight before serving.
Conclusion:
This lemon bar recipe is the epitome of bright, refreshing dessert satisfaction. Its sweet yet tart flavor profile makes it an unbeatable choice for any occasion, while the simple preparation method invites bakers of all skill levels to join in on the fun. I encourage you to give it a try, customize it to meet your tastes, and share it with friends and family. You just might create a new tradition! Enjoy those first bites of sunshine, and watch how quickly they become a favorite in your home.


