Prep time: 20 minutes
Cook time: 0 minutes
Total time: 4 hours (including chilling)
Servings: 12 slices
If you’ve ever had a craving for something sweet, creamy, and oh-so-delicious, then the Irresistible No-Bake Oreo Cheesecake Slice is your answer! Imagine indulging in a slice of dessert that combines the rich flavors of classic cheesecake with the playful crunch of Oreos. This no-bake treat takes the stress out of dessert making, allowing you to whip up something scrumptious without even turning on the oven!
What makes this recipe special is not just its simplicity but also the joy it brings to both the creators and the lucky ones who get to taste it. It’s perfect for special occasions or just to brighten up a regular day. Throughout this article, you’ll learn how to make this cheesecake slice step-by-step, discover variations to suit your taste, and gather tips to ensure it comes out perfect every single time.
What Is Irresistible No-Bake Oreo Cheesecake Slice?
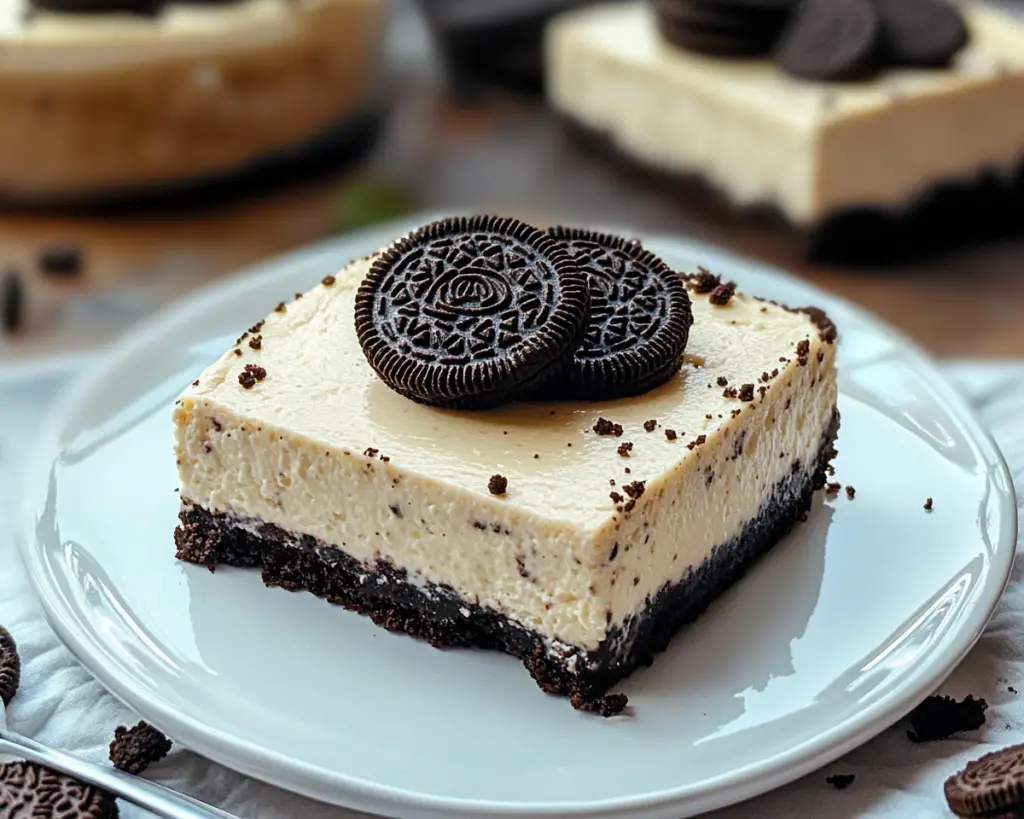
The Irresistible No-Bake Oreo Cheesecake Slice is a delightful dessert that marries the beloved flavor of Oreos with a creamy cheesecake filling. Originating from the fantastic world of no-bake desserts, this cheesecake is a crowd-pleaser thanks to its luscious texture and irresistible cookie crust. The filling, made from smooth cream cheese, sugar, and whipped cream, offers a light yet indulgent experience.
This dessert is characterized by its layers of flavor and texture, with the crunchy, sweet Oreo crust providing a perfect contrast to the silky, creamy filling. The visual appeal is equally enticing, with the black and white color contrast making it a standout at any gathering. Unlike traditional baked cheesecakes, which can often be heavy and time-consuming to prepare, the no-bake version eliminates the baking step—making it a fantastic choice for busy parents or beginners in the kitchen who want an impressive dessert without the fuss.
In short, this cheesecake slice is a blend of rich, velvety cream and delightful cookie crunch, all served up in an easy-to-make slice that is perfect for any occasion.
Why You’ll Love This
You’re going to love the Irresistible No-Bake Oreo Cheesecake Slice for several reasons. First and foremost, it boasts an **incredible taste** that combines the sweet and slightly bitter notes of chocolate with the creamy cheesecake base, appealing to chocolate lovers and dessert enthusiasts alike. Furthermore, its **ease of preparation** allows even those who are just starting out in the kitchen to enjoy a homemade dessert.
Cost-wise, this recipe is relatively budget-friendly. With simple ingredients like cream cheese, sugar, and Oreos, you won’t have to break the bank to craft this indulgence. Furthermore, it can easily be tailored to fit different dietary needs. Whether you want to make a gluten-free version or simply customize its flavor, this recipe provides ample opportunity for creativity.
It’s also worth noting the common misconception that cheesecakes must be baked to be delicious. The no-bake version proves otherwise, delivering a light and airy dessert that melts in your mouth without the time and temperature checks of traditional baking. Compared to store-bought alternatives, this homemade option allows you to control the ingredients, ensuring a superior taste that is both delectable and satisfying.
In essence, this delicious cheesecake not only simplifies your dessert-making process but also enriches your overall cooking experience—perfect for family gatherings, special occasions, or simply improving your weeknight routine.
Ingredients You’ll Need
To make the Irresistible No-Bake Oreo Cheesecake Slice, gather the following ingredients:
- Oreos: The star ingredient, these cookies form a crunchy crust and add flavor throughout the dessert.
- Butter: Used to bind the cookie crust together, providing richness and flavor.
- Cream Cheese: The foundation of the cheesecake filling; it gives the dessert its creamy texture.
- Powdered Sugar: Sweetens the filling without making it gritty, ensuring a smooth consistency.
- Heavy Whipping Cream: Whipped to soft peaks to create a light, airy texture in the cheesecake.
- Vanilla Extract: Enhances the flavor of the cheesecake, providing a warm, aromatic touch.
Each ingredient plays a crucial role in creating this delicious cheesecake slice. The **Oreos** aren’t just for the crust; crumbled Oreos can also be mixed into the filling for added texture. If you don’t have Oreos, you can substitute them with any chocolate sandwich cookies, though the classic flavor shines best with the original.
For the **butter**, unsalted butter is recommended, allowing you to control the salt levels in your dessert.
**Cream cheese** provides that signature tangy flavor; make sure to use full-fat cream cheese for the best results. You can substitute it with a vegan cream cheese if you’re looking for a dairy-free option.
The **powdered sugar** is cheaper and more preferable for no-bake desserts, as it blends seamlessly into the mixture.
Using **heavy whipping cream** adds richness, while the vanilla extract brightens up the flavor palette, ensuring a balanced taste.
How to Make
Follow these step-by-step instructions to create your Irresistible No-Bake Oreo Cheesecake Slice:
- Begin by preparing the **cookie crust**. In a food processor, add 24 Oreos and pulse until finely crushed. It should resemble sand. Pour in ½ cup of melted butter and pulse again until well combined. The mixture should hold together when pressed.
- Next, transfer the Oreo mixture into a 9×9-inch square baking dish. Using the back of a measuring cup or your hands, press the mixture firmly into the bottom of the dish, ensuring an even layer. Let this crust chill in the refrigerator while preparing the filling.
- In a large mixing bowl, beat 16 ounces of softened cream cheese with 1 cup of powdered sugar using an electric mixer. Mix until smooth and creamy, ensuring there are no lumps. This process should take about 2-3 minutes. If you’re using cream cheese that’s not softened, it may cause lumps in your filling, so be cautious here.
- In a separate bowl, whip 1 cup of heavy whipping cream until soft peaks form. It’s important to watch carefully; over-whipping can turn it into butter! Fold the whipped cream gently into the cream cheese mixture until fully incorporated. Be gentle to keep the mixture airy and fluffy.
- Add 1 teaspoon of vanilla extract to the filling and fold in 5 crushed Oreos for extra flavor. Mix everything until just combined; we want to maintain that light texture. It’s crucial to fold and not mix vigorously to avoid deflating the whipped cream.
- Once the filling is ready, take your chilled crust out of the fridge. Spoon the cheesecake filling over the crust and smooth it out evenly with a spatula. You can also sprinkle some crushed Oreos on top for a decorative touch.
- Cover the baking dish with plastic wrap or aluminum foil and let it chill in the refrigerator for at least 4 hours, or overnight for best results. This cooling period allows the flavors to meld beautifully and the filling to set properly.
- When ready to serve, remove the cheesecake from the fridge, cut it into squares, and serve chilled. For added flair, drizzle with chocolate syrup or serve with whipped cream and whole Oreos on the side.
By following these straightforward steps, you’ll create a cheesecake slice that’s not only flavorful but also visually stunning. The texture is everything in this recipe, so remember to handle it gently to maintain its creamy and airy qualities.
Variations & Substitutions
Chocolate Peanut Butter Variation: For those who love chocolate and peanut butter, adding ½ cup of creamy peanut butter to your cheesecake filling will take it to another level. This variation enhances the richness and gives a nutty flavor that balances perfect with the sweetness of Oreos. You can also drizzle some melted chocolate on top for a decadent finish. It’s a great option for peanut butter lovers!
Vegan Version: You can easily make this dessert vegan-friendly by substituting the cream cheese with a plant-based alternative and using coconut cream instead of heavy whipping cream. Simply refrigerate a can of coconut milk overnight, scoop out the hardened cream, and whip it just like regular heavy cream. The Oreo cookies are already vegan, so they fit perfectly into this recipe.
Mint Chocolate Variation: If you want a refreshing twist, try adding 1 teaspoon of peppermint extract into the filling for a mint chocolate cheesecake. It’s a delightful combination that pairs wonderfully with the Oreo base! To enhance the flavor, you can use mint-flavored Oreos, which adds an extra layer of deliciousness.
No-Bake Fruit Variation: For a fruity spin, consider folding in some fresh fruit like raspberries or strawberries to the filling. Use about 1 cup of pureed fruit to give your cheesecake a vibrant color and refreshing taste. This variation is fantastic for summer gatherings when fresh fruit is at its peak.
Common Mistakes to Avoid
One common mistake is not letting the cream cheese soften enough before mixing. If your cream cheese is too cold, it can lead to lumps in the filling. To prevent this, let it sit at room temperature for at least 30 minutes before use.
Another mistake is over-mixing the whipped cream when folding it into the cream cheese mixture. If you mix too aggressively, you risk losing the airiness that makes this dessert so light. Instead, use a gentle folding technique.
Additionally, overlooking the chilling time can result in a slice that doesn’t hold its shape when cut. Many people are eager to dig in, but the resting period is crucial for the filling to set properly.
Lastly, using a non-stick springform pan can be helpful; if you don’t have one, ensure to grease your dish well to avoid sticking when it’s time to serve.
Storage, Freezing & Reheating Tips
To preserve your Irresistible No-Bake Oreo Cheesecake Slice, keep it covered in the fridge for up to a week. Make sure to use plastic wrap or cover it tightly with aluminum foil to maintain its freshness. If you find that you won’t finish it within that time frame, this cheesecake can be frozen for up to 3 months.
When freezing, it’s best to slice the cheesecake first for easy serving later. Wrap each slice individually in plastic wrap, followed by aluminum foil, or place them in airtight containers for optimal protection against freezer burn.
To defrost, remove the desired number of slices from the freezer and place them in the refrigerator for several hours or overnight. Avoid defrosting in the microwave, as this could change the texture and flavor of the cheesecake.
Frequently Asked Questions
Can I use a different type of cookie for the crust? Yes! While Oreos are highly recommended for their flavor and texture, you can use any chocolate sandwich cookies or even graham crackers. Just remember that the taste and texture may vary slightly depending on your choice of cookie.
How long can I keep leftovers in the fridge? Leftovers can typically be stored in the fridge for up to one week. Ensure that you cover them well to keep your dessert fresh and safe from other odors in the refrigerator.
Can I make this recipe gluten-free? Absolutely! You can use gluten-free chocolate sandwich cookies to create the crust; just check the packaging to ensure they meet your gluten-free needs. The other ingredients, such as cream cheese and heavy cream, are also naturally gluten-free.
Is it possible to make this cheesecake slice ahead of time? Yes, in fact, this cheesecake is perfect for making ahead! You can prepare it a day before your event to allow it to chill properly. The longer it sits, the better the flavors will meld together.
What can I top this cheesecake slice with? There are plenty of delicious options! Consider drizzling it with chocolate syrup, sprinkling crushed Oreos on top, or adding whipped cream. Fresh fruits like strawberries or raspberries also make for a lovely addition that adds freshness to the rich flavors.
Conclusion:
The Irresistible No-Bake Oreo Cheesecake Slice proves that crafting a stunning dessert can be both straightforward and rewarding. With its rich flavors, delightful textures, and easy preparation, it’s a recipe that you’ll find yourself returning to again and again.
Feel free to explore the variations to suit your personal taste, or even add your own twist. This cheesecake is perfect for any gathering, from birthdays to cozy family dinners—it’s sure to impress. So roll up your sleeves, gather your ingredients, and embrace a culinary adventure that culminates in an unforgettable dessert experience! Don’t forget to share your version and relive the joy of creating this tasty cheesecake slice with your friends and family. Enjoy!


