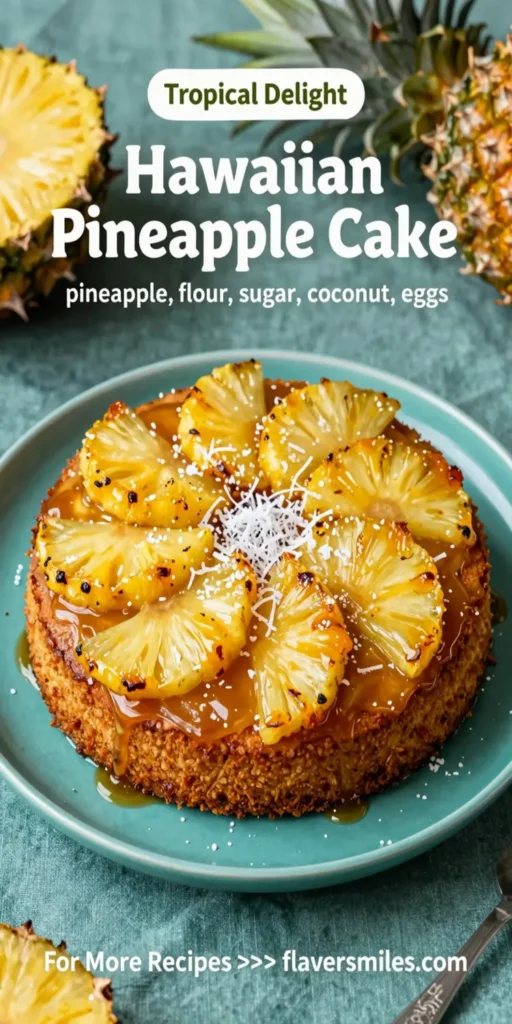
Prep time: 20 minutes
Cook time: 35 minutes
Total time: 55 minutes
Servings: 10
Hawaiian Pineapple Cake is a delightful dessert that infuses the tropical essence of the islands right into your kitchen. This cake is not just a treat for the taste buds but also an experience filled with sunshine and warmth. With every bite, you’re transported to a lush paradise, where sweet pineapples meld beautifully with rich flavors. It’s perfect for summer barbecues, birthday parties, or any time you want to brighten your day with something sweet.
What Is Hawaiian Pineapple Cake?
Hawaiian Pineapple Cake is a moist, flavorful cake that combines ripe pineapples, coconut, and a hint of almond extract. The cake is typically topped with a luscious cream cheese frosting and garnished with toasted coconut and maraschino cherries, making it a feast for both the eyes and the palate. The moist texture and the sweet, fruity flavor make it a hit among both children and adults, ensuring it disappears quickly at gatherings.
Why You’ll Love This
There are countless reasons to love Hawaiian Pineapple Cake. First and foremost, it’s incredibly easy to make, even for those who may not feel comfortable in the kitchen. The recipe requires simple ingredients that are often readily available, making it both budget-friendly and accessible.
Moreover, the combination of flavors—sweet pineapples, creamy frosting, and toasted coconut—offers a delightful and refreshing taste that is not only pleasing but also evokes fond memories of sunny vacations. Share this dessert with your family and friends, and watch their faces light up with joy.
Ingredients You’ll Need
- 2 cups all-purpose flour: This forms the base of the cake, giving it structure and a fluffy texture.
- 2 cups granulated sugar: Adds sweetness to the cake, complementing the natural sugars in the pineapples.
- 1 teaspoon baking powder: Helps the cake rise and achieve an airy consistency.
- 1 teaspoon baking soda: Works with the baking powder to create the perfect rise.
- 1/2 teaspoon salt: Enhances the flavors of the cake.
- 1 cup buttermilk: Provides moisture and contributes to a tender crumb.
- 1/2 cup vegetable oil: Keeps the cake moist and rich; butter can also be used for added flavor.
- 1 teaspoon vanilla extract: Adds warmth and depth of flavor.
- 1 teaspoon almond extract: Complements the pineapple and enhances the overall flavor.
- 1 cup crushed pineapple (drained): Provides sweetness and moisture; make sure to drain it well to prevent a soggy cake.
- 1 cup shredded coconut: Adds texture and a tropical flavor; unsweetened coconut can be used for a less sugary cake.
How to Make
- Preheat the oven: Start by preheating your oven to 350°F (175°C) to ensure it’s ready when you need to bake the cake. This step is crucial for an even rise and golden-brown crust.
- Prepare your baking pans: Grease and flour two 9-inch round cake pans. This helps the cake to easily release once baked. You can also use parchment paper for extra insurance against sticking.
- Mix the dry ingredients: In a large mixing bowl, whisk together the all-purpose flour, sugar, baking powder, baking soda, and salt until combined. Properly mixing these dry ingredients ensures that your cake rises evenly.
- Combine the wet ingredients: In a separate bowl, mix together the buttermilk, vegetable oil, vanilla extract, and almond extract. Stir in the drained crushed pineapple and shredded coconut until everything is well incorporated, creating a lovely wet mixture.
- Combine wet and dry ingredients: Gradually add the wet ingredients into the dry ingredients, stirring gently to combine. Be careful not to overmix, as this can lead to a dense cake.
- Pour the batter into the pans: Divide the batter evenly between the prepared cake pans and smooth out the tops with a spatula. This helps in achieving a uniform bake.
- Bake: Place the pans in the preheated oven and bake for 30 to 35 minutes or until a toothpick inserted into the center comes out clean. Keep an eye on them; ovens can vary!
- Cool the cakes: Once baked, allow the cakes to cool in the pans for 10 minutes before carefully transferring them to a wire rack to cool completely. This prevents sogginess.
- Prepare the frosting: While the cake cools, whip up the cream cheese frosting by combining cream cheese, unsalted butter, vanilla extract, and powdered sugar until fluffy and smooth. This will be the finishing touch!
- Assemble the cake: Once the cakes have cooled completely, place one layer on a serving plate. Spread a generous amount of cream cheese frosting on top before placing the second layer on top. Frost the top and sides of the cake with the remaining frosting. Finish with toasted coconut and cherries as a garnish.
Variations & Substitutions
Tropical Fruit Variation: Add additional tropical fruits like mango or passion fruit to the batter for a mixed tropical explosion. This not only enhances the flavor but also adds vibrant color to the cake, making it even more alluring.
Gluten-Free Option: Substitute the all-purpose flour with a 1:1 gluten-free flour blend. This allows those with gluten sensitivities to enjoy the cake without compromising taste. The texture may vary slightly, but the delicious flavors will still shine through.
Coconut Flour Variation: For a richer coconut flavor, replace up to half of the all-purpose flour with coconut flour. Just remember that coconut flour is very absorbent, so you may need to adjust your liquid ingredients slightly.
Vegan Version: Replace the eggs with flax eggs (1 tablespoon of ground flaxseed mixed with 2.5 tablespoons of water equals one egg). Use plant-based buttermilk (almond milk + vinegar), and substitute the cream cheese with a vegan alternative. This way, you can enjoy a cruelty-free version of this delightful dessert.
Common Mistakes to Avoid
Overmixing the batter: Mixing the batter too much can lead to a dense cake. Ensure that you gently fold the ingredients together just until combined.
Not drenching the pineapple: It’s important to drain the crushed pineapple effectively. If there’s too much liquid, the cake can become soggy. Always press out excess juice to maintain the structure of your cake.
Rushing the cooling process: Skipping the cooling step is a common error. If you frost a warm cake, the frosting can melt and create a mess. Be patient and let the cakes cool completely before adding frosting.
Storage, Freezing & Reheating Tips
Store any leftover Hawaiian Pineapple Cake in an airtight container in the refrigerator for up to five days. This will help maintain its freshness and prevent it from drying out. If you’d like to freeze the cake, it’s best to do so without frosting. Wrap the cake layers tightly in plastic wrap and aluminum foil before placing them in the freezer. The icing can be frozen separately as well.
When you’re ready to enjoy the frozen cake, simply thaw it in the refrigerator overnight and then frost it when you’re ready to serve. If you have leftover frosted cake, store it in the refrigerator. Reheat individual slices in the microwave for about 15-20 seconds until they are slightly warm.
Frequently Asked Questions
Can I make this cake ahead of time?
Absolutely! Hawaiian Pineapple Cake can be baked a day in advance. Just make sure to wrap the cooled cake layers well before refrigerating. Frost it on the day you plan to serve for the best texture and flavor.
Can I use fresh pineapples instead of canned?
Yes, using fresh pineapples is a fantastic option! Just ensure to finely chop or crush them and drain any excess juice to get the right consistency in your batter.
What is the best way to achieve a moist cake?
To achieve the ultimate moist cake, make sure to measure your ingredients accurately, particularly the liquid components. Incorporating oil instead of butter also helps keep the cake moist. Additionally, underbaking slightly can result in a tender texture.
Is there a way to make this cake healthier?
Certainly! You can substitute some of the granulated sugar with applesauce, or use whole wheat flour instead of all-purpose flour. Additionally, you can reduce the amount of sugar by half without sacrificing too much sweetness.
Can I add nuts to the recipe?
Yes, chopped walnuts or macadamia nuts can be a delightful addition to Hawaiian Pineapple Cake. Simply fold in about half a cup of chopped nuts into the batter for an extra crunch and flavor boost.
Conclusion: Hawaiian Pineapple Cake is a tropical delight that captures the essence of sunny days and festive gatherings. Whether you’re serving it for a special occasion or a family dinner, this cake is sure to leave a lasting impression. With its simple recipe and wonderful flavors, it’s no wonder this dessert is so beloved. So roll up your sleeves, gather your ingredients, and transport your taste buds to Hawaii with this fantastic cake!