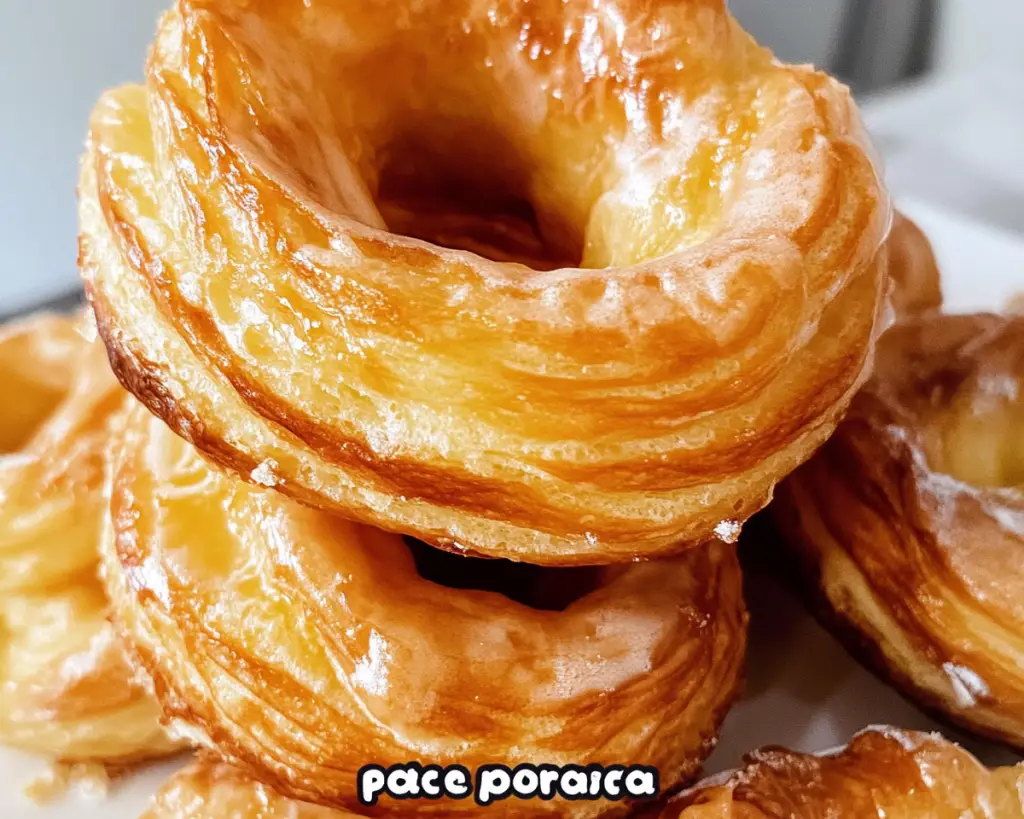
French Crullers are a delightful twist on the classic doughnut that have captured the hearts (and stomachs) of many with their light, airy texture and crispy exterior. These pastries, which trace their roots back to France, are primarily known for their unique shape and their irresistible crispiness paired with a soft, melt-in-your-mouth interior. Unlike regular doughnuts that are made from yeast or cake batter, crullers are made from a mixture known as **choux pastry**. This pastry is cooked on the stove before being piped into shapes, resulting in a creation that is both lighter and puffier than traditional options.
What makes this recipe so special? First and foremost, it’s incredibly easy to prepare, making it a fantastic choice for both beginner bakers and experienced cooks. The taste is out of this world, and it’s a treat that can elevate any morning routine or gathering. In this comprehensive article, you will learn how to make French Crullers from scratch, explore various tips and variations, understand what common mistakes to avoid, and find answers to some frequently asked questions.
What Is French Crullers?
French Crullers are a type of pastry made from **choux pastry**, which is also used for other French pastries like éclairs and profiteroles. The defining characteristic of crullers is their unique shape, often circular or twisted, which creates ridges that enhance their crispy texture once fried or baked. Originating from France, the term “cruller” comes from the Dutch word “kruller” meaning “curled,” which aptly describes the pastry’s form.
When you take a bite of a French Cruller, the contrast between the crisp exterior and airy, soft interior creates a heavenly experience. The outside is lightly golden, often glazed with a sweet sugar syrup or a vanilla icing that adds an additional layer of flavor without overwhelming it. The dough is rather simple but requires some technique in preparation, primarily in the cooking of choux pastry, which elevates them from an ordinary doughnut to an exquisite pastry.
The versatility of crullers is yet another feature that makes them special. They can be served plain, dusted with powdered sugar, or dressed up with glazes and toppings to suit any taste. These pastries are not only a hit at breakfast or brunch but are also a delightful treat for special occasions, coffee breaks, or a simple indulgent snack.
Why You’ll Love This French Crullers Recipe
There are several reasons why this French Crullers recipe will quickly become a favorite in your home. First and foremost is the taste. French Crullers possess a wonderful balance of light fluffiness combined with a golden, crispy exterior, making each bite a pleasure to experience. The subtle sweetness from the glaze accentuates the natural flavor of the pastry without overpowering it, ensuring that even those with a refined palate will find delight in them.
Another advantage of making French Crullers at home is the relatively simple ingredients used. Most recipes call for basic pantry staples, such as flour, sugar, eggs, and butter. This means you won’t have to take a trip to specialty stores to find what you need. Additionally, the process can be completed in under an hour, making it a practical choice for busy parents or beginner bakers who may feel intimidated by more complex pastry recipes.
Also, making crullers at home allows you to customize them to your own taste preferences. For example, you can experiment with different flavors, such as cinnamon or even chocolate, and create glazes that reflect your favorite flavors. You can easily cater to dietary restrictions as well, such as making them gluten-free or reducing sugar.
One common misconception is that French Crullers are overly complicated to make. While there are a few technical elements involved, with proper guidance and practice, it becomes an enjoyable cooking experience rather than a daunting task.
Ingredients You’ll Need
Here is a complete list of ingredients required to create perfect French Crullers:
– **Water (1 cup)**: The base of the mixture to cook the choux pastry, providing hydration and steam.
– **Unsalted butter (½ cup)**: Adds richness and flavor to the dough, creating a tender and crispy pastry. You can substitute with a dairy-free butter for a vegan option.
– **All-purpose flour (1 cup)**: This provides structure to the pastry. If needed, gluten-free flour blends can serve as substitutes, but ensure they are specifically meant for pastries.
– **Salt (½ teaspoon)**: Enhances the flavor of the pastry and balances sweetness.
– **Sugar (2 tablespoons)**: Adds a gentle sweetness to the crullers. You can adjust this amount based on your taste or even use a sugar alternative.
– **Eggs (4 large)**: The key ingredient that provides leavening when combined with water and flour, creating that light texture.
– **Vegetable oil (for frying)**: Essential for frying the crullers, providing a crispy outer layer. You may also use coconut or canola oil.
– **Powdered sugar (for glazing)**: Used for making a sweet glaze for finishing your crullers. Adjust the quantity based on preference.
– **Vanilla extract (1 teaspoon)**: Adds a hint of warmth to the glaze that complements the flavor of crullers perfectly. You can use other extracts like almond for a twist.
How to Make French Crullers
Creating French Crullers at home involves several steps, but don’t let it intimidate you; the result is well worth the effort. Follow these detailed instructions to guide you through the process of making your own crullers:
1. **Make the Choux Pastry**: Start by combining 1 cup of water and ½ cup of unsalted butter in a medium saucepan. Place the saucepan over medium heat and stir occasionally, allowing the butter to melt completely. Once the mixture reaches a simmer, remove it from the heat and add 1 cup of all-purpose flour all at once, along with ½ teaspoon of salt and 2 tablespoons of sugar. Stir vigorously with a wooden spoon until the mixture forms a ball and pulls away from the sides of the pan. You’ll know it’s ready when it’s slightly shiny and well-combined.
2. **Incorporate the Eggs**: Now, let the dough cool for a few minutes to avoid cooking the eggs. Then, transfer it to a stand mixer or a large mixing bowl. Begin adding the 4 large eggs, one at a time, mixing on medium speed until each egg is fully incorporated before adding the next. The mixture should become smooth, glossy, and of a piping consistency.
3. **Prepare for Frying**: In a large, heavy-bottomed pot or a deep fryer, pour in vegetable oil to a depth of about 3 inches. Heat the oil over medium heat until it reaches 365°F (185°C). To ensure safety, use a thermometer for accuracy because overheating the oil can cause fires, while insufficient heat can result in greasy pastries.
4. **Pipe the Crullers**: Once your oil is hot, prepare a piping bag fitted with a star-shaped tip and fill it with the choux pastry. To pipe, you can use parchment paper or a silicone baking mat. Pipe your crullers into the desired shape, typically a circular or twisted shape. Make sure to leave some space between each cruller for expansion during frying.
5. **Fry the Crullers**: Carefully lower one or two crullers at a time into the hot oil. Fry for about 3-4 minutes on each side or until they are golden brown. Be cautious not to overcrowd the pot, as this can lower the oil temperature and hinder the frying process. Use a slotted spoon to gently flip them halfway through cooking.
6. **Drain Excess Oil**: Once golden brown, remove the crullers from the oil and place them on a plate lined with paper towels to absorb excess oil. Allow them to cool for a few minutes.
7. **Prepare the Glaze**: While your crullers are cooling, you can prepare the sweet glaze by combining 1 cup of powdered sugar and 2-3 tablespoons of water in a shallow bowl, adding a teaspoon of vanilla extract for flavor. Mix until smooth and adjust the consistency; it should not be too runny.
8. **Glaze the Crullers**: After they’ve cooled slightly, dip the top of each cruller into the glaze, allowing excess to drip off. For extra sweetness, you can sprinkle additional powdered sugar over the crullers while the glaze is still wet.
9. **Serve and Enjoy**: Your French Crullers are now ready to be served! Enjoy them fresh, ideally on the day they are made, since they taste best when they are still warm and crispy.
5 Variations & Substitutions
### 1. Chocolate Glazed Crullers
To take your crullers to a whole new level, consider adding a chocolate glaze. Simply melt ½ cup of semi-sweet chocolate chips with a tablespoon of shortening in a microwave-safe bowl, stirring until smooth. Dip the cooled crullers in the chocolate glaze for a rich and decadent treat that satisfies any chocolate craving. This variation is particularly appealing for chocolate lovers and provides a different flavor profile with a luscious finish.
### 2. Matcha Crullers
For those who enjoy unique and trendy flavors, incorporating matcha green tea powder into the dough is an excellent choice. Simply add 1-2 tablespoons of matcha powder while mixing in the eggs. The result will be a delightful green color and a subtle earthy flavor that pairs wonderfully with a simple glaze. This variation is perfect for health-conscious individuals who want a pastry that highlights the benefits of matcha, including antioxidants.
### 3. Cinnamon Sugar Crullers
Put a spin on the classic cruller by rolling them in a mixture of cinnamon and sugar after frying for a comforting fall flavor. Combine ½ cup of granulated sugar with 1 tablespoon of ground cinnamon, and while the crullers are still warm, coat them generously. This variation is ideal for those who love the warm spices of cinnamon and want an easy alternative to glazing.
### 4. Lemon Glaze
For a fresh and tangy twist, try making a lemon glaze by substituting the vanilla extract with lemon juice and adding a teaspoon of lemon zest to the powdered sugar. This will provide a light, citrusy flavor that cuts through the sweetness of the crullers beautifully. This variation is excellent for spring and summer gatherings when you want a refreshing treat.
### 5. Gluten-Free Crullers
If you’re following a gluten-free diet, fear not! You can make crullers entirely gluten-free by using a gluten-free flour blend that is specifically formulated for baking. Ensure the blend includes xanthan gum for proper texture. The crullers will be just as delightful, allowing everyone to enjoy this classic pastry without gluten concerns.
Common Mistakes to Avoid
When it comes to making French Crullers, there are a few pitfalls that could lead to unsatisfactory results. The first major mistake is improper cooking of the choux pastry. If you don’t cook the flour mixture long enough, the cruller may lack a proper rise, resulting in dense and soggy pastries. Conversely, overcooking it can lead to a dry dough.
Another mistake is the oil temperature. If the oil isn’t hot enough, your crullers will turn out greasy and won’t achieve the desired crispiness. Use a thermometer to accurately gauge the oil temperature before frying. On the other hand, if the oil is too hot, the outside will brown too quickly while the inside remains uncooked.
Also, avoid overcrowding the pot while frying, as this can lower the temperature of the oil and affect how well the crullers cook. Fry them in small batches to ensure even cooking and the perfect texture.
Finally, don’t skip the resting period after cooking. Allow the crullers to cool slightly before glazing them, as this will prevent the glaze from melting away and ensure it sticks nicely to the surface.
Storage, Freezing & Reheating Tips
To maintain the delightful texture and flavor of your French Crullers, storing them properly is crucial. If you intend to enjoy them within a day or two, simply place them in an airtight container at room temperature. This will help preserve their crispiness.
If you have leftover crullers or if you’ve made a batch for future enjoyment, consider freezing them. Let the crullers cool completely before placing them in a single layer on a baking sheet. Freeze them until solid, then transfer them to a freezer-safe bag or airtight container. This method prevents them from sticking together and makes it easy to grab a single cruller whenever the craving strikes.
To reheat frozen crullers, preheat your oven to 350°F (175°C) and place them on a baking sheet. Heat for about 10-12 minutes or until warmed through. This will help restore their crispiness and make them taste freshly made.
Frequently Asked Questions
**1. Can I make French Crullers without frying?**
Yes! If you prefer a healthier option, you can bake the crullers instead of frying. Preheat your oven to 375°F (190°C), pipe the crullers onto a baking sheet lined with parchment paper, and bake them for about 20-25 minutes or until they are golden and puffed up. The texture will differ slightly, being less crispy, but they will still be delicious.
**2. Can I substitute the eggs in the recipe?**
If you’re looking for an egg-free alternative, you can use substitutes such as flax eggs or commercial egg replacements. To make a flax egg, mix 1 tablespoon of ground flaxseed with 2.5 tablespoons of water. Let it sit for about 5 minutes until it thickens. Note that the texture may vary slightly from traditional crullers.
**3. How can I make the crullers more flavorful?**
Experimenting with different flavors can elevate your crullers from great to extraordinary. Adding spices such as nutmeg or anise can create deeper flavors. You can also infuse the milk with vanilla bean or citrus zest while heating the liquid for the choux pastry.
**4. What’s the best way to glaze the crullers?**
For the best glaze application, dip the top half of each cruller into the glaze, allowing excess to drip off. You can also drizzle the glaze over them with a fork for a more decorative finish. Ensure they are still warm when glazing so that the coating adheres well.
**5. Can I store the dough before frying?**
While it’s best to fry the dough immediately for optimal results, you can refrigerate the choux pastry for up to a few hours before frying. Just be sure to cover it tightly to maintain moisture.
In conclusion, French Crullers are a delightful pastry that offers a unique flavor and texture profile compared to traditional doughnuts. With this recipe, you can create a warm, crispy, and airy treat that your family and friends will rave about. I encourage you to try making these crullers from scratch and experiment with various flavors and glazes that suit your taste.
Share this delightful experience with your loved ones, and prepare for the fantastic compliments you’ll undoubtedly receive! Happy baking!