Prep time: 15 minutes
Cook time: 30 minutes
Total time: 45 minutes
Servings: 8
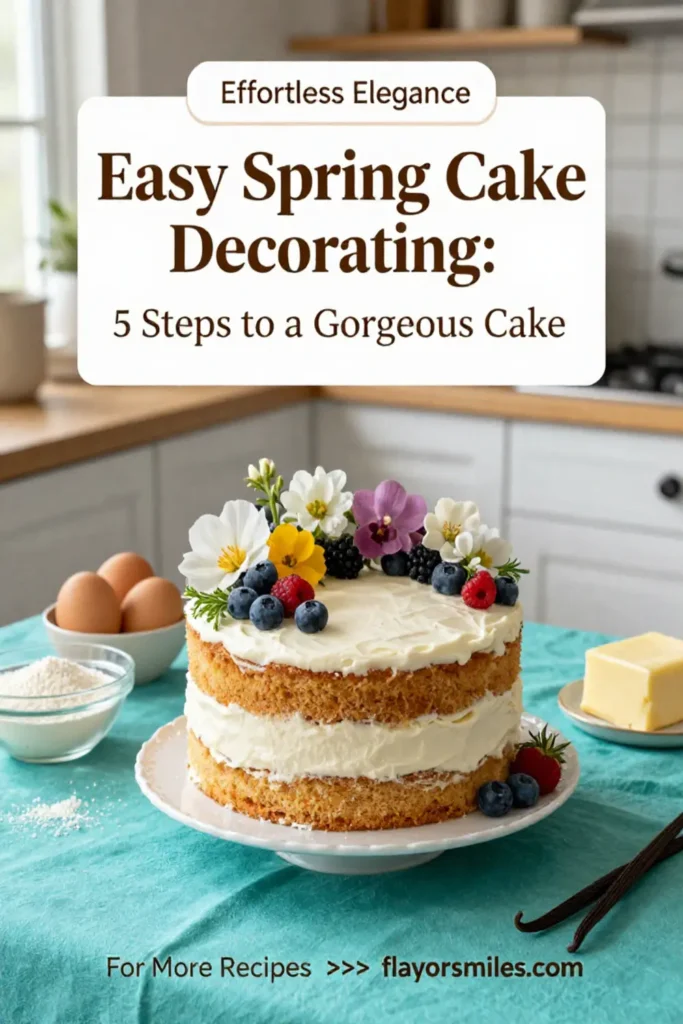
Spring is the perfect time for a delightful cake decorating adventure! With flowers blooming and nature rejuvenating, there’s no better way to celebrate the season than with a beautifully decorated cake. This Easy Spring Cake Decorating guide will take you through five manageable steps to transform a simple cake into a stunning centerpiece that everyone will admire. Whether you’re a busy parent looking to whip up a treat with the kids or a kitchen beginner eager to delve into the world of cake decoration, this recipe is tailored for you. So put on your apron and let’s dive in!
What Is Easy Spring Cake Decorating: 5 Steps to a Gorgeous Cake?
This method not only simplifies the intricate art of cake decorating but also showcases the vibrant themes of spring. With just a few basic ingredients and some simple techniques, you can create a cake that looks professional and will impress your friends and family. The beauty of this guide lies in its flexibility; you can customize your cake to fit any occasion or personal taste.
Why You’ll Love This
There are numerous reasons why you’ll fall in love with this cake decorating process. First, it’s incredibly **accessible**. You don’t need to possess advanced baking or decorating skills to achieve impressive results. Additionally, the use of fresh, seasonal ingredients helps the cake taste as good as it looks. The decorations can reflect your personality or the theme of the event, making it a truly unique centerpiece. Plus, the joy of creating something beautiful with your own hands is immensely satisfying!
Ingredients You’ll Need
To create your gorgeous cake, gather the following ingredients:
- Flour: 2 cups. All-purpose flour works best for a moist cake texture.
- Sugar: 1 ½ cups. Granulated sugar enhances sweetness and moisture.
- Baking Powder: 1 tablespoon. This helps the cake rise and achieve a fluffy texture.
- Salt: ½ teaspoon. A pinch of salt balances the sweetness of the cake.
- Butter: ½ cup, softened. This adds richness and depth of flavor.
- Eggs: 3 large. Eggs act as a binding agent and provide structure.
- Milk: 1 cup. This adds moisture and richness to the cake batter.
- Vanilla extract: 2 teaspoons. For enhanced flavor, this fragrant extract is key.
- Icing sugar: 3 cups (for decoration). This will be essential for your buttercream frosting.
- Food coloring: Assorted colors. Bright colors make for vibrant spring-themed decorations.
- Fresh flowers or edible decorations: For a natural and appealing touch.

How to Make
- Preheat your oven to 350°F (175°C). Greasing and flouring your cake pans will help prevent sticking once the cake is baked. Use two 9-inch round cake pans for this recipe, and ensure they are evenly coated.
- In a sizeable mixing bowl, combine the flour, baking powder, and salt. Using a whisk, meticulously mix these dry ingredients to create an even blend. This step is crucial to ensure that your cake rises beautifully without any clumps.
- In a separate bowl, cream the softened butter and granulated sugar using an electric mixer until light and fluffy. This should take about 4 to 5 minutes. The combination should appear pale and airy, adding volume to the batter.
- Add the eggs, one at a time, mixing well after each addition. Follow this with the milk and vanilla extract, continuing to mix until everything is well combined. The batter should be smooth, rich, and full of delightful aromas, making your kitchen smell like a bakery!
- Gradually incorporate the dry mixture into the wet ingredients, stirring gently. Over-mixing can make the cake tough, so be sure to stop once everything is just combined. Pour the batter evenly into the prepared pans and smooth the tops.
- Bake in the preheated oven for 25 to 30 minutes or until a toothpick inserted in the center comes out clean. The cakes will be golden brown, and the aroma will be mouthwatering. Allow them to cool in the pans for about 10 minutes before transferring to wire racks to cool completely.
- Once cooled, prepare your buttercream frosting by mixing the icing sugar with softened butter until smooth. You may add a few drops of milk for a smoother consistency, and incorporate food coloring to achieve your desired shades.
- To decorate, place one cake layer on a serving plate and spread an even layer of frosting on top. Place the second layer on top and frost the entire cake with a thin layer of frosting (crumb coat). Chill for 20 minutes before applying a final layer of frosting.
- Use spatulas or piping bags to create decorative swirls, flowers, or any spring-themed designs on the cake. Finish it off with fresh flowers or edible decorations for a vibrant touch. Your cake is now a stunning spring creation!
Variations & Substitutions
Chocolate Variation: For chocolate lovers, you can substitute ¾ cup of flour with cocoa powder to create a chocolate cake. This will give your cake a rich, decadent flavor. You may also consider making chocolate buttercream frosting instead of the standard one, enhancing the overall taste.
Fruit-Infused Cake: Add 1 cup of chopped fruits such as strawberries, blueberries, or raspberries into the batter for a fresh fruity twist. This will not only elevate the flavor but also give your cake a beautiful spring vibe. Pair this with a cream cheese frosting to complement the fruitiness.
Gluten-Free Option: Substitute regular flour with a gluten-free flour blend suitable for baking. Be mindful that this might alter the texture slightly, so always check your package for specific instructions.
Vegan Cake: To make this cake vegan-friendly, replace the eggs with a flaxseed mixture (1 tablespoon of ground flaxseed mixed with 2.5 tablespoons of water for each egg). Use plant-based milk and vegan butter for frosting as an alternative.
Mini Cakes: Instead of making one large cake, consider baking mini cakes in a muffin tin! This allows for individual servings and offers an adorable presentation. They can be decorated similarly, focusing on sprucing them up with vibrant frosting and fun toppings.
Common Mistakes to Avoid
When it comes to cake decorating, certain pitfalls can overshadow your efforts. One common mistake is improperly measuring ingredients, particularly flour. Too much flour can lead to a dry cake, so always spoon and level off the flour rather than scooping directly from the bag.
Another mistake is overbaking the cake. Keep an eye on the time; a toothpick should come out clean, but the cake should still feel soft and slightly springy. Baking too long can lead to a dry cake.
Finally, remember that letting the cake layers cool completely before frosting is essential. If you frost while the cake is still warm, it can cause the frosting to melt and slide off. Patience pays off in achieving that ideal finish!
Storage, Freezing & Reheating Tips
To store your decorated cake, keep it in an airtight container at room temperature for up to three days. For longer storage, consider wrapping the cake tightly in plastic wrap and aluminum foil and placing it in the freezer, where it can last for up to three months.
If you need to reheat the cake, do so in a microwave on low power for a few seconds just until warmed. Be cautious not to overheat, as this can make the cake tough.
When thawing a frozen cake, let it sit at room temperature for about an hour before serving, ensuring it regains its delightful texture and flavors.
Frequently Asked Questions
What type of cake works best for decoration?
For best results, a butter cake or sponge cake works wonderfully for decorating. These types of cake have a sturdy structure that can support the weight of frosting and decorations, making them ideal for a beautiful presentation.
Can I make the cake ahead of time?
Absolutely! You can bake the cake a day in advance and store it in an airtight container. Frosting is best done on the day of serving, but you can also freeze the unfrosted cake layers.
What should I do if my cake cracks?
If your cake cracks during baking, don’t worry! You can level the layers with a serrated knife before frosting to ensure they look even and aesthetically pleasing. A generous layer of frosting will also cover most imperfections.
How can I make the frosting easier to work with?
Ensure your butter is at room temperature before mixing. If your frosting is too thick, add a teaspoon of milk to loosen it up. Conversely, if it’s too runny, adding more icing sugar will thicken it up.
Can I customize my decorations?
Yes! The beauty of cake decorating is that it allows for immense creativity. You can use various toppings like fruit, nuts, or edible flowers to match the theme of your celebration or your personal aesthetic.
Conclusion: Creating an Easy Spring Cake not only brings flavor to your table but also offers an opportunity to express your creativity in an engaging and joyful way. By following the steps outlined above, even those with little baking experience can achieve a visually stunning cake. So get your supplies ready, gather loved ones, and enjoy this delightful springtime adventure!