**Prep time:** 30 minutes
**Cook time:** 2 hours
**Total time:** 2 hours 30 minutes
**Servings:** 6 servings
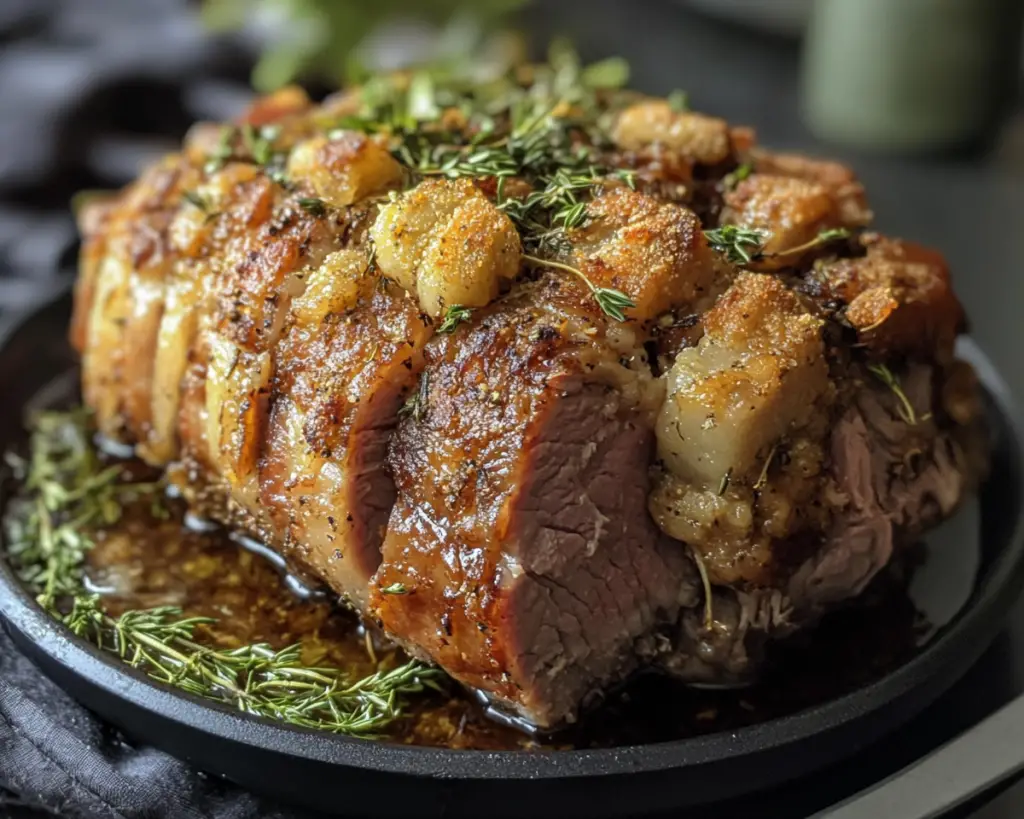
There’s something uniquely captivating about the aroma of a crispy pork roast wafting through your kitchen, isn’t there? Picture this: a succulent roast with golden, crunchy skin that shatters with every slice, revealing tender, juicy meat. This dish evokes memories of family gatherings and special occasions, where the star of the meal is undeniably a beautifully roasted piece of pork.
This recipe for a crispy pork roast is not only rewarding but also surprisingly simple. You’ll learn how to achieve that perfect, crackling skin while ensuring the meat remains juicy and flavorful from start to finish. Whether you’re a seasoned home cook or just starting your culinary adventures, this pork roast will impress your family and friends.
**What Is Crispy Pork Roast?**
Crispy pork roast, often called “porchetta” in Italian or “carnitas” in Mexican cuisine, is a beloved dish characterized by its **crispy skin** and succulent meat. Traditionally made from a whole pig, this version uses a **pork shoulder** or **pork belly** for a more manageable approach. The process involves seasoning the meat with a variety of spices and cooking it at a low temperature before giving it a final blast of high heat.
The flavor profile can vary depending on the seasoning used, but common ingredients include **garlic, rosemary**, and **fennel**. A well-executed crispy pork roast features contrasting textures: the crunchy skin contrasts perfectly with the tender, moist meat. This roast can be served as the star of a family dinner or shredded for use in sandwiches, tacos, or salads.
**Why You’ll Love This Crispy Pork Roast**
You’ll love this crispy pork roast for many reasons. First and foremost, the taste is simply unbeatable. The combination of marbled fat and seasoning enhances the natural pork flavor, making every bite a delight.
From an ease of preparation standpoint, while it does require some attention, the actual hands-on cooking time is relatively minimal. As the roast does most of the work, you’re free to whip up complementary sides or set the table.
Furthermore, it’s a cost-effective way to feed a crowd. A pork shoulder tends to be more affordable than many cuts of beef, making it an excellent choice for families or gatherings. Additionally, it’s incredibly versatile; the leftovers can be used in various dishes, ensuring that you won’t be stuck with a monotonous meal plan for the week.
**Ingredients You’ll Need**
Here’s a list of the ingredients required for making a perfect crispy pork roast, followed by each ingredient’s role in the dish:
– **Pork shoulder or pork belly** (about 4-5 pounds): This cut provides the necessary fat content for moisture and flavor.
– **Kosher salt** (to taste): Essential for seasoning and drawing moisture out of the skin for that crispy texture.
– **Black pepper** (to taste): Adds an aromatic warmth to the flavor.
– **Garlic cloves** (4-6, minced): Imparts a robust flavor that complements pork beautifully.
– **Fresh rosemary** (1 tablespoon, chopped): A classic herb that adds a refreshing essence.
– **Olive oil** (2 tablespoons): Helps the spices adhere and boosts flavor.
– **Paprika or fennel seeds** (1 teaspoon): Optional, but enhances the flavor depth with a slight smokiness.
**How to Make Crispy Pork Roast**
Now, let’s dive into the step-by-step guide to preparing your crispy pork roast:
1. **Preheat Your Oven**
Begin by preheating your oven to **450°F (232°C)**. This first blast of high heat is crucial for developing the crispy skin that everyone loves.
2. **Prepare the Pork**
Pat the pork shoulder or belly dry with paper towels to remove excess moisture. This step is vital for achieving that signature crackling skin.
3. **Score the Skin**
Using a sharp knife, gently score the skin in a crosshatch pattern, being careful not to cut into the meat itself. This allows fat to render out during cooking, which helps to achieve that crispy outer layer.
4. **Season Generously**
In a bowl, mix together the minced garlic, chopped rosemary, salt, pepper, and olive oil. Rub this mixture all over the pork, ensuring it gets into the score lines for maximum flavor.
5. **Roast the Pork**
Place the pork roast on a rack in a roasting pan. Roast in the preheated oven for **30 minutes** at 450°F (232°C). This high temperature will start the crisping process.
6. **Reduce Temperature**
After the initial 30 minutes, reduce the oven temperature to **325°F (163°C)**. Continue roasting for another **1.5 hours**. You want the internal temperature to reach **190°F (88°C)** for the meat to be tender and shreddable.
7. **Final Crisping**
Once cooked, increase the oven temperature again to **475°F (246°C)** for an additional **10-15 minutes** to really crisp up the skin. Keep an eye on it, as this can happen quickly.
8. **Rest the Roast**
Once the pork is out of the oven, let it rest for at least **20-30 minutes**. Resting allows the juices to redistribute throughout the meat, ensuring each slice is juicy and tender.
9. **Slice and Serve**
Use a sharp knife to slice the pork. Serve it as a roast or shred it for other dishes. Enjoy the crispy skin alongside tender meat that pairs beautifully with your favorite sides.
**3 Variations & Substitutions**
1. **Herb-Infused Roast**
If you enjoy aromatic herbs, consider using thyme or sage in place of rosemary. Both herbs lend a different yet delightful flavor profile to your roast. Thyme can add a subtle earthiness, while sage provides warmth, perfect for a comforting meal. Adjust the quantity based on your preference, and feel free to mix them for a vibrant herb blend!
2. **Sweet and Spicy Glaze**
For those looking to add a twist, brush your pork with a mixture of **honey**, **soy sauce**, and **sriracha** during the final 15 minutes of roasting. This sweet and spicy glaze adds an exciting layer of flavor with a sticky finish. Just be cautious; excess sugars can lead to faster browning, so monitor during cooking.
3. **Citrus Zest Addition**
Include the zest of an orange or lemon into the seasoning mix for a refreshing citrus element. The zest will bring brightness to the rich pork, cutting through the heaviness with a touch of acidity. It’s a wonderful addition, especially if you’re serving this roast during warmer seasons or for festive occasions.
**Common Mistakes to Avoid**
When it comes to cooking a crispy pork roast, there are a few common pitfalls to be aware of:
– **Not Drying the Pork Skin**: Moisture on the surface of the skin creates steaming instead of crisping. Make sure to dry the pork thoroughly before scoring and seasoning.
– **Skipping the Scoring**: Scoring the skin is essential for releasing fat during roasting. If you skip this step, you might end up with rubbery skin, lacking that desired crunch.
– **Overcooking the Pork**: While you want to ensure the pork reaches a safe internal temperature, overcooking can lead to dry meat. Use a meat thermometer to check the temperature, aiming for **190°F (88°C)**, as this ensures tenderness without the drying out.
– **Ignoring Resting Time**: Cutting into the roast immediately can cause all the juices to leak out, leading to a dry experience. Resting the meat allows for flavorful juices to redistribute throughout, which makes leaving it alone worthwhile.
**Storage, Freezing & Reheating Tips**
Proper storage of your crispy pork roast will extend its deliciousness.
– **Refrigeration**: Store leftover pork roast in an airtight container in the refrigerator for up to **4 days**. Ensure it cools completely before sealing it to avoid trapped moisture.
– **Freezing**: If you intend to enjoy leftovers later, wrap the roast tightly in plastic wrap and then foil before placing in the freezer. Properly stored, it can maintain quality for **up to 3 months.** Thaw overnight in the refrigerator before reheating.
– **Reheating**: The best way to reheat your pork roast is in the oven. Preheat the oven to **350°F (177°C)** and place the pork in a baking dish covered with foil for **20-30 minutes** or until heated through. If you desire crispy skin again, uncover in the last five minutes and increase the temperature to **400°F (204°C)**.
**Frequently Asked Questions**
1. **Why is my pork roast not crispy?**
The skin’s moisture is often the culprit behind a less-than-crispy outcome. Make sure to pat the skin dry thoroughly before seasoning. Additionally, scoring the skin helps fat render out, promoting crispiness.
2. **Can I use a different cut of pork for this roast?**
Yes, while pork shoulder and belly are ideal, you can use other cuts like pork loin or ribs. Keep in mind that different cuts may require adjustments in cook time and temperature.
3. **What side dishes pair well with crispy pork roast?**
Excellent side dish options include roasted vegetables, creamy mashed potatoes, coleslaw, or apple sauce. These accompany the roast well, adding balance to the richness of the pork.
4. **Can I make this roast ahead of time?**
Absolutely! You can prepare and season the pork roast a day ahead, keeping it covered in the refrigerator. When you’re ready, take it out to allow it to come to room temperature before roasting.
5. **How do I know when my pork is done?**
A meat thermometer is your best friend in this situation. For tender, pull-apart pork, aim for an internal temperature of **190°F (88°C)**. If using a different cut, follow specific guidelines for that cut.
In conclusion, there’s something truly special about preparing and savoring a crispy pork roast. The flavors, textures, and the joy of gathering around the table with loved ones create lasting memories. Don’t hesitate to try this method and customize it to your tastes; the rewards are worth every effort. Get cooking, and share the love of good food! You won’t regret it.