Prep time: 30 minutes
Cook time: 1 hour
Total time: 1 hour 30 minutes
Servings: 8
If you’re searching for a dessert that will leave your guests in awe yet is surprisingly simple to create, the **Creamy Burnt Cheesecake** is your answer! This cake captivates with its **rich, velvety texture** and tantalizes the taste buds with hues of caramelized sweetness and a hint of island flavors. Picture this: a perfectly burnished top that crackles slightly as you dig in, revealing a creamy layer that is rich yet light. It’s the type of dessert that lingers long after the last bite, creating warm memories around the table.
The beauty of this recipe lies not only in its indulgent nature but also in its simplicity. Imagine an elegant dish that begs for little more than **cream cheese**, **sugar**, and **eggs**. By the time you are done, you’ll not only have a delectable dessert, but you’ll also learn great tips for achieving that signature burnt look, variations that cater to various dietary preferences, and common mistakes to sidestep. Let’s elevate your dessert game with this stunning cheesecake!
What Is Creamy Burnt Cheesecake Recipe – Best Easy Dessert for Sweet Treats?
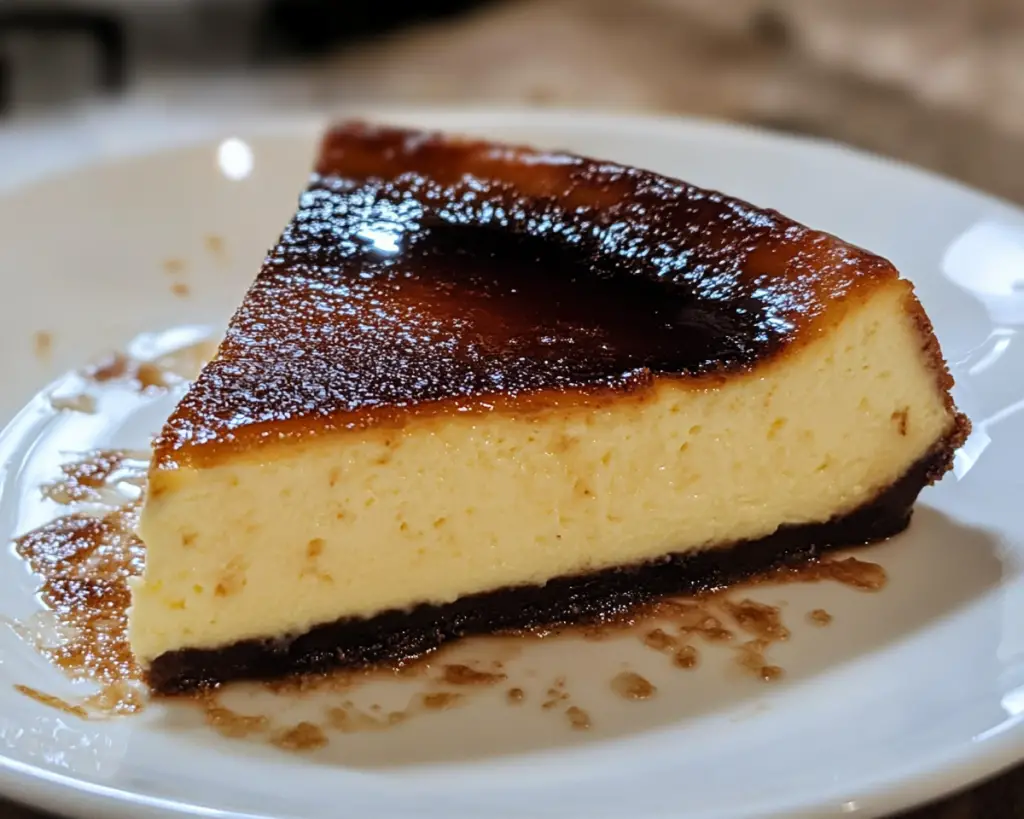
Creamy burnt cheesecake, or **Basque cheesecake**, originates from the Basque region of Spain. Unlike traditional cheesecakes that often have a crust, this unique dessert is ***flourless*** and has a **creamy** center that melts in your mouth. The delightfully charred top adds not only aesthetic appeal but also a flavorful note that contrasts beautifully with the sweetness beneath.
The balance between the toasted exterior and rich interior is what makes this cheesecake extraordinary. The **caramelization** on the surface provides a hint of smokiness that complements its buttery taste. Moreover, the flavors deepen as the cheesecake cools, allowing for an even more ethereal experience when served chilled. Creating this dish is uncomplicated enough for a beginner, yet offers a sense of refined elegance that can impress even the most experienced home chefs.
At its core, creamy burnt cheesecake invites creativity. You can incorporate flavors such as citrus zest, vanilla, or even different kinds of cheese to customize it to your liking. With each mouthful, you experience a texture that balances between **silky smooth** and decadently rich. In summary, this dessert is not merely a sweet treat; it’s a **culinary experience** that delights the senses.
Why You’ll Love This
There are countless reasons why this creamy burnt cheesecake will become a staple in your dessert repertoire. First and foremost, the taste is absolutely divine—its blend of creamy and slightly charred notes creates a flavor profile that is **exceptionally pleasing**. Unlike regular cheesecakes, it is less fussy and demands minimal ingredients, making it a quick option for those unexpected guests or busy weeknight cravings.
Another significant aspect is its **versatility**. You can easily adjust the recipe, incorporating seasonal flavors to suit the time of year or dietary requirements. Think orange zest for a spring twist or rich chocolate for the winter holidays. The recipe requires only a few simple steps and minimal kitchen equipment—perfect for anyone who may feel intimidated by baking.
One common misconception is that burnt cheesecake is hard to get right; however, this recipe demystifies the process. With its forgiving nature, even beginners can end up with a stunning result. Learning how to bake it correctly comes down to a few key tips, such as maintaining the appropriate oven temperature and understanding when the cheesecake has properly set.
Ingredients You’ll Need
- Cream Cheese: The primary ingredient. It lends the cheesecake its creamy texture. Make sure it’s softened for easier blending.
- Granulated Sugar: This adds sweetness and helps create that desirable caramelization on the surface.
- Eggs: Essential for binding the cheesecake and giving it structure. Make use of large eggs.
- Heavy Cream: Adds richness and a silky texture that elevates the cheesecake. Low-fat substitutes will not provide the same creamy result.
- Vanilla Extract: Enhances flavor depth. Feel free to experiment with different extracts like almond for a unique twist.
- Salt: A small amount balances the sweetness and enhances flavor. Use fine sea salt for better dissolve.
Make sure to invest time in sourcing quality ingredients. The kind of cream cheese and **organic eggs** you use can dramatically affect the outcome of your cheesecake. Using fresh eggs helps achieve an airy texture, while high-quality cream cheese produces a smoother filling.
How to Make
- Preheat the Oven: Begin by preheating your oven to 400°F (200°C). A hot oven is essential for achieving that beautiful burnt exterior. Position a rack in the middle of the oven to ensure even heat distribution.
- Prepare the Cheesecake Mixture: In a mixing bowl, beat together 16 ounces of softened cream cheese and 1 cup of granulated sugar until it becomes smooth and creamy. This could take about 3-5 minutes. No lumps should remain, as they will affect the final texture of the cheesecake.
- Add Eggs: Slowly incorporate 3 large eggs one at a time, ensuring you mix well after each addition. Scrape down the bowl to make sure everything is fully integrated. The batter should be relatively liquefied; if it’s too thick, the cheesecake won’t cook evenly.
- Incorporate Heavy Cream: Gradually slow pour in 1 cup of heavy cream into the mixture, combining well until it appears glossy and uniform. Add 1 teaspoon of vanilla extract and a pinch of salt, stirring to blend. At this point, the batter should be smooth and silky.
- Prepare the Baking Dish: Line a 9-inch springform pan with parchment paper. Ensure that the parchment paper rises above the edge of the pan; this will help prevent the cheesecake from sticking and ensure easy removal after baking. Avoid greasing the pan as it can impact the texture.
- Pour Mixture and Bake: Pour the cheesecake mixture into the lined pan. Bake in your preheated oven for approximately 60 minutes. You’ll know it’s done when the top is a deep golden-brown and the center is just slightly jiggly.
- Cool Down: Remove from the oven and allow to cool at room temperature for 1-2 hours. Then transfer the cheesecake to the refrigerator for at least 4 hours or overnight. This cooling period is crucial for achieving the best texture.
- Serve: Once chilled, carefully remove the springform pan and slice the cheesecake. Enjoy it plain or with fresh fruits or sauces like caramel! This dessert shines in its simplicity.
Each step in this recipe contributes to a luscious cheesecake that you will adore. As you follow these instructions, allow yourself to be mindful. Watch the transformation of the ingredients as they come together in lovely harmony!
Variations & Substitutions
Citrus Burnt Cheesecake: Adding a splash of lemon or orange juice can brighten the flavor profile of your cheesecake. If you enjoy zesty notes, consider incorporating 1-2 tablespoons of juice along with 1 tablespoon of grated zest into the creamy mixture. The citrus will cut through the richness and create a refreshing experience. This version helps make the dessert feel lighter, perfect for spring or summer gatherings.
Chocolate Burnt Cheesecake: For chocolate lovers, adding **cocoa powder** or melted chocolate makes for a decadent version of this burnt cheesecake. Using ½ cup of cocoa powder or 4 ounces of melted dark chocolate can offer depth and richness that pairs beautifully with the cream cheese. Just be cautious not to overpower the traditional flavors; a delicate balance will make all the difference.
Vegan Burnt Cheesecake: For those who are dairy-free or vegan, this creamy burnt cheesecake can still cater to your needs. Substitute the cream cheese with vegan cream cheese, which is now widely available. Replace the eggs with flaxseed or chia seed mixtures (1 tablespoon of seeds mixed with 3 tablespoons of water equals 1 egg). Use coconut cream instead of heavy cream for that luxurious texture. This variation is excellent for gatherings involving **plant-based** eaters.
Gluten-Free Burnt Cheesecake: While this recipe is naturally gluten-free due to a lack of traditional crust, ensure that all used ingredients—especially baking powder and sugar—are certified gluten-free. This version allows everyone to enjoy this dessert without concerns, making it versatile enough for any occasion.
Each of these variations demonstrates how adaptable this cheesecake can be. Feel free to experiment with different flavors or techniques based on your preferences.
Common Mistakes to Avoid
One of the most significant issues that can arise during the preparation of burnt cheesecake is overbaking. This can lead to a dry or grainy texture, which nobody wants! Pay attention to the visual cues; it should have a golden-brown top with a wobbly center. If you hear a crackle as you put the cheesecake in the oven, this may be a warning sign—a sign that your oven temperature is too high.
Another common mistake is using cold ingredients. Cold cream cheese or eggs can lead to a lumpy batter. Always bring your **dairy products to room temperature** before starting. This small step can significantly improve the final texture.
Lastly, avoid removing the cheesecake from the pan too soon. Allowing it to cool gradually in the pan will help achieve the rich, silky texture you’re aiming for. Chilling it overnight will enhance the flavors even more and make slicing easier.
Storage, Freezing & Reheating Tips
When it comes to storing your creamy burnt cheesecake, you can keep it in the refrigerator for about 3-4 days. Make sure to cover it well with plastic wrap or store it in an airtight container; this keeps it fresh and prevents it from absorbing any unwanted odors from the fridge.
If you wish to freeze your cheesecake, it can last up to three months. To do this, allow it to cool completely, then wrap it tightly in plastic wrap and aluminum foil to prevent freezer burn. When you’re ready to enjoy again, thaw overnight in the refrigerator before serving. This method helps preserve its creamy texture.
Reheating is generally not necessary; the cheesecake is fantastic served cold. However, if you’d like it at room temperature, simply let it sit out for about 30 minutes before serving. This warming process not only enhances the flavor but also creates a divine melting quality, especially if you drizzle some **warm sauce** on top.
Frequently Asked Questions
Can I make the cheesecake ahead of time?
Absolutely! In fact, preparing the cheesecake a day in advance enhances its flavor as it sits in the refrigerator. Just ensure it is wrapped tightly to maintain freshness.
What is the best way to tell if the cheesecake is done?
The top should be a deep golden brown, while the center will still jiggle slightly. Avoid waiting until it is completely firm, as this will lead to a dry texture.
Can I substitute ingredients if I have dietary restrictions?
Yes! As mentioned earlier, there are various adaptations. Using vegan cream cheese or coconut cream can achieve similar results for those on dairy-free diets, while gluten-free consumers can simply stick to labeled gluten-free ingredients.
What should I serve with this cheesecake?
This cheesecake is delightful on its own, but you can enhance it with fresh fruits like berries, a drizzle of caramel sauce, or a sprinkle of crushed nuts for added texture.
Can I use a different pan?
While a springform pan offers the best results, you can also use a regular cake pan. Just ensure you cut thin slices when serving to maintain the shape. A silicone mold is also an option for easy release.
Conclusion:
This Creamy Burnt Cheesecake is more than just a dessert; it’s a delightful experience that combines simplicity with sophisticated flavors. It’s easy to prepare, adaptable for various dietary needs, and sure to impress anyone lucky enough to share it with you. So why not give this recipe a try? Customize it to your liking, and don’t hesitate to share the delicious outcome with friends and family. You may just find that your cheesecake becomes the highlight of gatherings. Explore the endless possibilities that come with this easy dessert recipe; the sweet indulgence is waiting for you!


