Prep time: 10 minutes
Cook time: 20 minutes
Total time: 30 minutes
Servings: 4
If you’ve been searching for a guilt-free snack that satisfies your craving for something crispy and savory, look no further than classic kale chips! These are not your ordinary chips; they’re packed with nutrients, incredibly easy to prepare, and can conveniently fit into your busy lifestyle. Imagine savoring a crispy, flavorful bite that not only tastes amazing but also nourishes your body. This recipe adds a healthy twist to traditional snacking and can be quickly made with just a few ingredients. By the end of this article, you will not only know how to make scrumptious kale chips but also discover fascinating tips, variations, and answers to commonly asked questions.
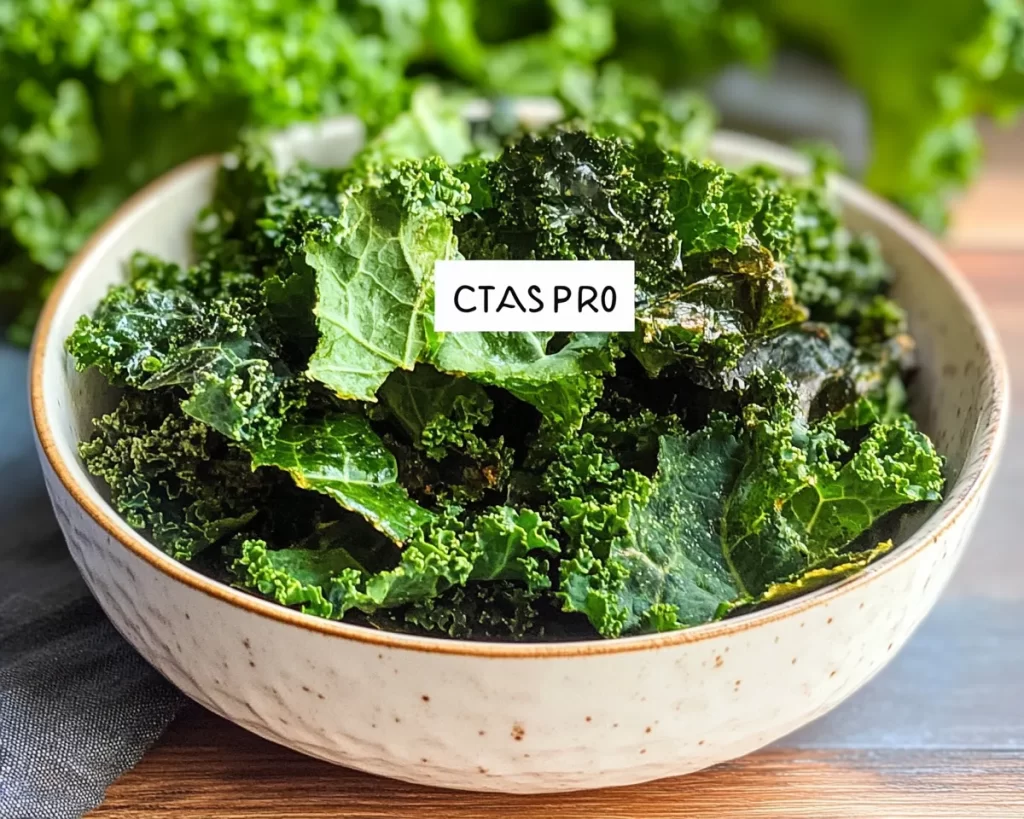
What Is Classic Kale Chips?
Classic kale chips originate from the concept of a healthier alternative to conventional potato chips. They are made from fresh, nutrient-dense kale leaves that are seasoned and baked until perfectly crispy. The texture is light and crunchy, which contrasts beautifully with the rich, earthy flavor of the kale itself. By simply tossing the leaves in some olive oil and seasoning, you turn an otherwise leafy green into an irresistible snack.
When baked correctly, the kale chips maintain a delightful crunch while offering an array of flavors depending on the seasoning you choose. Whether you prefer them with just a pinch of salt or dressed up with spices, cheese, or even vinegar, kale chips can be a versatile treat. Plus, they are an excellent way to sneak in some vitamins and minerals without sacrificing flavor.
Why You’ll Love This
There are numerous reasons why classic kale chips are a fantastic choice for snack time. First, their taste is wonderfully addictive. You’ll often find yourself reaching for just one more chip, which is unlike many other snacks that can leave you feeling guilty afterward. Kale is a powerhouse of nutrients, rich in vitamins A, K, and C, along with plenty of fiber and antioxidants, contributing to your overall health.
Making kale chips is incredibly easy and cost-effective. Kale itself is usually reasonably priced, especially when in season, and by preparing it at home, you can save significantly compared to store-bought options. Common misconceptions about kale chips often stem from the notion that they may be difficult to make or bland in flavor. However, making these chips at home allows for endless customization, letting you explore different seasoning combinations and even heating methods, such as air frying.
Imagine sitting down with a bowl of these crispy delights while watching your favorite show or enjoying them as part of a healthy lunch. They are perfect for meal prep to have on hand throughout the week, catering to various dietary needs, from vegan to gluten-free.
Ingredients You’ll Need
- Kale: The star of the dish. Look for fresh, vibrant leaves without any brown spots. You can substitute with other leafy greens like Swiss chard, but the texture may differ.
- Olive Oil: This adds richness and helps the seasoning stick. If you’re avoiding oil, you can use a light spritz of cooking spray instead.
- Salt: Essential for enhancing the flavors. Sea salt or Himalayan salt works wonderfully; however, feel free to experiment with flavored salts for added depth.
- Seasonings: Common choices include garlic powder, onion powder, smoked paprika, or nutritional yeast for a cheesy flavor. Each adds a different profile to your chips, catering to your taste preferences.
When preparing kale chips, the type and quality of kale matter. Opt for organic when possible, as kale tends to be on the Environmental Working Group’s list of vegetables with high pesticide residues.
How to Make
- Preheat your oven. Start by preheating the oven to 350°F (175°C). This step is crucial for achieving the desired crunch. A proper temperature ensures that your kale chips don’t burn quickly but allow enough time to become crispy.
- Wash and dry the kale. Rinse the kale thoroughly under cool water to remove any dirt or insects. Once clean, dry it gently using a salad spinner or a clean kitchen towel. Moisture can lead to soggy chips, so make sure they are as dry as possible.
- Remove the stems. Tear the kale leaves off the stems and into bite-sized pieces. The stems can be tough and might not crisp up well. This will ensure you get a delicate chip every time.
- Toss the leaves. In a large mixing bowl, combine the kale with olive oil and your chosen seasonings. Use your hands to massage the oil and seasoning into the leaves, ensuring every piece is coated evenly. This step enhances the flavor throughout and guarantees even cooking.
- Spread on a baking sheet. Line a baking sheet with parchment paper and spread the kale in a single layer. Avoid overcrowding; this ensures even cooking and crispiness. If necessary, use two baking sheets to accommodate all the kale.
- Bake until crispy. Place the baking sheet in the preheated oven and bake for about 15-20 minutes. Keep an eye on them towards the last few minutes, as they can quickly transition from perfectly crisp to burnt. Rotate the sheet halfway through to ensure even browning.
- Cool and enjoy! Once the kale chips are golden brown and crispy, take them out of the oven and let them cool for a few minutes. This cooling period helps them maintain their crunch. Enjoy your kale chips as a snack or use them as a garnish on salads and soups for added texture.
Variations & Substitutions
Spicy Kale Chips: Elevate your kale chips with a bit of heat. Add some cayenne pepper, chili powder, or crushed red pepper flakes to the olive oil mixture before tossing it with the leaves. This variation is perfect for those who enjoy spicy foods and can transform your snack into a zesty treat. Pair it with a cooling dip, like yogurt, to balance out the heat.
Cheesy Kale Chips: For a flavor reminiscent of cheesy snacks without the dairy, sprinkle nutritional yeast over the kale before baking. Nutritional yeast brings a nutty, cheesy flavor making this variation suitable for vegans or those looking to reduce dairy consumption. Combine it with a touch of garlic powder for an irresistible flavor combination.
Lemon Zest Kale Chips: Adding citrus can brighten up the flavor. Combine fresh lemon juice and zest into the olive oil before tossing with the kale leaves. The acidity from the lemon can elevate the chips, offering a fresh and delightful taste. This variation is especially refreshing during warmer months, serving as a light snack or appetizer.
Sweet Kale Chips: If you’re feeling adventurous, consider drizzling a honey or agave syrup mixture over the kale before baking. Add a sprinkle of cinnamon for intrigue. This sweet variation can satisfy your cravings while providing a healthier snack option for those who have a penchant for something sweet.
Common Mistakes to Avoid
One common mistake people make when preparing kale chips is using wet leaves. If any moisture remains after washing, it can lead to soggy chips that won’t crisp up during baking. Always ensure the leaves are thoroughly dried before seasoning.
Another point to consider is overcrowding the baking sheet. When kale leaves are piled on top of each other, they will steam rather than bake, resulting in chips that are more limp than crispy. Always allow space between each piece for optimal airflow.
Finally, failing to monitor the baking process can result in burnt chips. Kale chips can go from perfectly crispy to burnt in mere minutes, so use your senses—keep an eye on them, and don’t leave the oven unattended during the last few minutes of cooking.
Storage, Freezing & Reheating Tips
To maintain the crispiness of your kale chips, store them in an airtight container at room temperature. Avoid refrigerating as the moisture can make them soggy. Ideally, enjoy them within a few days for optimal flavor and crunch.
If you anticipate having leftovers, a great practice is to bake smaller batches to avoid wastage. However, if you have to freeze them, spread the baked, cooled chips on a baking sheet in a single layer and freeze for about an hour before transferring them to a freezer-safe container. This will help prevent them from clumping together.
If you want to re-crisp kale chips, preheat your oven to 300°F (150°C) and place them on a baking sheet for about 5-10 minutes. Keep a close eye to ensure they don’t burn, and enjoy them once more!
Frequently Asked Questions
Can I use other greens besides kale? Yes, other leafy greens such as collard greens, Swiss chard, or even spinach can be used, though the texture will differ. Spinach, for instance, might bake faster and require closer monitoring.
Are kale chips healthy? Absolutely! Kale chips are a guilt-free snack compared to traditional potato chips. They are high in vitamins and minerals while being low in calories when prepared without excess oil or heavy seasoning.
Can I make these in an air fryer? Yes, using an air fryer can yield even crispier results! Set the air fryer to 300°F (150°C) and cook for about 5-10 minutes, giving it a shake halfway through to ensure even cooking.
Can I make them without oil? While the texture may not be the same, you can lightly mist kale with vinegar or a splash of lemon juice for a flavorful, oil-free version. Just keep in mind that the chips may not crisp up as much.
How do I know when the chips are done? Look for a light golden color and a crispy texture. They should break easily when you try to bite into them. Be careful not to let them burn, as they can quickly go from perfect to overdone in just a couple of minutes in the oven.
Conclusion:
Classic kale chips are not just a delicious snack; they’re a fantastic way to incorporate healthy greens into your diet in an enjoyable format. With a few simple ingredients and a short cooking time, you can whip up a batch any day of the week. Feel free to customize them to suit your taste preferences, and don’t hesitate to share this recipe with friends or family. Whether you enjoyed them as a midday snack, part of a meal, or a party appetizer, I hope you take the plunge and try making these kale chips today—your taste buds will thank you!


