Prep time: 15 minutes
Cook time: 15 minutes
Total time: 30 minutes
Servings: 24 cookies
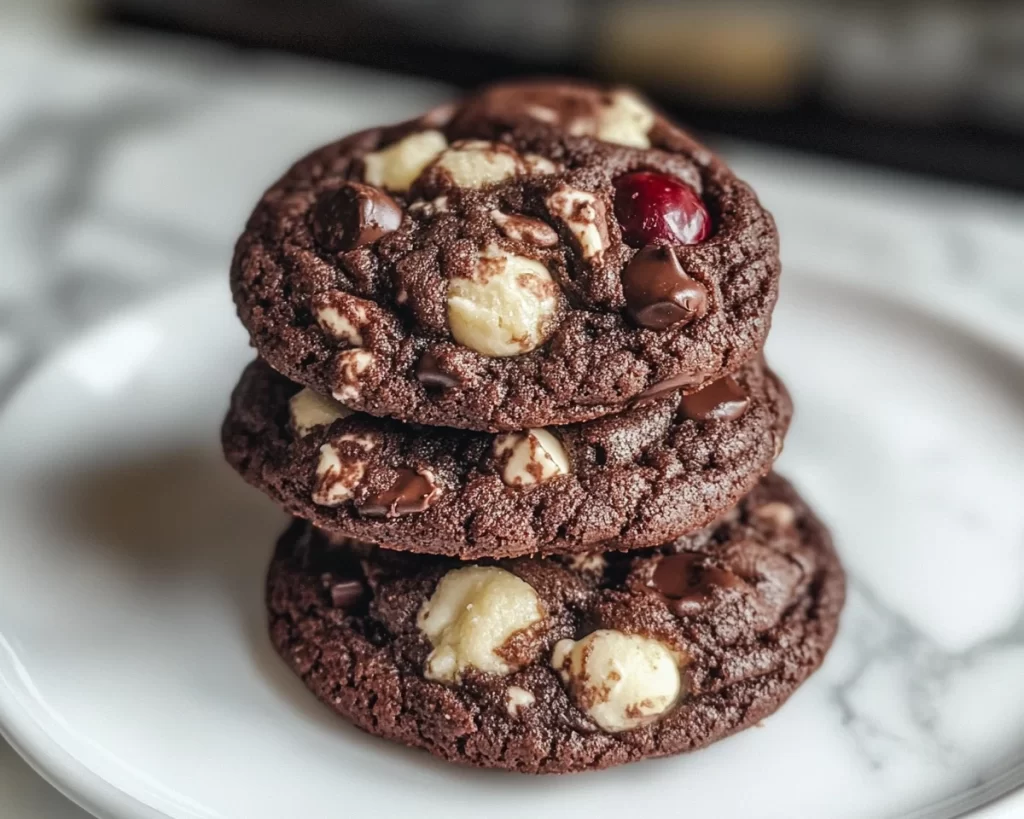
Chocolate lovers, rejoice! Today, we’re diving into an extraordinary treat: the Black Forest Cookie, also known as Triple Chocolate Cherry Cookies. These decadent cookies blend the rich flavors of chocolate with the delightful tartness of cherries, creating a delightful balance that’s simply irresistible. Whether you’re in need of a sweet fix or planning to impress friends and family at your next gathering, these cookies are surprisingly easy to whip up—and what’s even better? They can be made in just 30 minutes! With every bite, you’ll experience a rich, indulgent texture combined with the bright pop of cherries, making these cookies perfect for any occasion.
What Is Black Forest Cookie: Triple Chocolate Cherry Cookies in 30 Minutes?
The Black Forest Cookie merges the elements of the famous Black Forest cake into a cookie form. They feature three types of chocolate: cocoa powder for a deep flavor, chocolate chips for gooey sweetness, and white chocolate to add a delightful contrast. Cherries play a starring role, transforming these cookies into a dessert that’s not only delightful but also reminiscent of cherry pie. This cookie recipe is incredibly flexible, allowing you to tailor the ingredients to match your taste.
Why You’ll Love This
There are numerous reasons to fall in love with these cookies. First, the combination of **deep chocolate flavors** paired with **tart cherries** creates a flavor profile that is incredibly satisfying. The cookies have a beautiful chewy texture with crisp edges, making for an enjoyable bite. Second, the quick preparation time appeals to busy parents and anyone who may not have hours to spend in the kitchen. Finally, these cookies can easily be adapted or customized to suit various dietary needs or preferences, resulting in a delightful treat that all can enjoy.
Ingredients You’ll Need
- 1 cup unsalted butter – Softened, this creates a rich, luscious base for our cookies.
- 1 cup granulated sugar – Provides sweetness and helps achieve a crispy texture.
- 1 cup brown sugar – Adds moisture and enhances the overall flavor profile.
- 2 large eggs – Binds the ingredients together and assists in leavening.
- 2 tsp vanilla extract – Provides depth and rounds out the flavors.
- 2 cups all-purpose flour – The main structure that holds our cookies together.
- ¾ cup unsweetened cocoa powder – Grants that rich chocolatey goodness.
- 1 tsp baking soda – Helps the cookies rise, creating that perfect texture.
- ½ tsp salt – Balances sweetness and boosts flavor.
- 1 cup semi-sweet chocolate chips – Melts beautifully, adding pockets of gooey chocolate.
- 1 cup white chocolate chips – Provides a creamy contrast to the darker chocolates.
- 1 cup dried cherries – Adds a tart, fruity flavor that complements the chocolate.
How to Make
- Preheat your oven to 350°F (175°C). Line a baking sheet with parchment paper. The parchment will help prevent sticking and ensure even baking.
- In a large mixing bowl, cream together the softened butter, granulated sugar, and brown sugar until light and fluffy. This step is crucial, as it incorporates air into the batter, giving the cookies a perfect texture.
- Add the eggs, one at a time, mixing well after each addition, followed by the vanilla extract. Continue until the mixture is smooth.
- In a separate bowl, whisk together the flour, cocoa powder, baking soda, and salt. Gradually add this dry mixture to the wet ingredients, stirring until just combined. Be careful not to overmix, as this could lead to tough cookies.
- Fold in the semi-sweet chocolate chips, white chocolate chips, and dried cherries. The dough will be quite thick, so be sure to mix thoroughly until the ingredients are evenly distributed.
- Using a cookie scoop or tablespoon, drop rounded balls of dough onto the prepared baking sheet, leaving enough space between each ball for spreading.
- Bake in the preheated oven for 10-12 minutes or until the edges are set but the centers remain soft. They will continue to cook a bit once out of the oven, so slightly under-baking is better for a chewy result.
- Allow the cookies to cool on the baking sheet for 5 minutes before transferring them to a wire rack to cool completely. This cooling process helps them firm up and enhances the flavor.
Variations & Substitutions
Gluten-Free Option: If you’re looking for a gluten-free version of these cookies, substitute the all-purpose flour with a gluten-free flour blend. Ensure the blend is suitable for baking; many contain xanthan gum, which helps with structure.
Vegan Version: For a vegan alternative, use coconut oil or a plant-based butter substitute in place of regular butter. Replace the eggs with flaxseed eggs, using 1 tablespoon of ground flaxseed combined with 2.5 tablespoons of water for each egg needed.
Chocolate Chunk Cookies: Instead of using chocolate chips, try chopping up your favorite chocolate bars. The chunks will melt differently and provide a delightful texture contrast in each cookie bite.
Cherry Substitutions: If you don’t favor cherries or want to switch things up, dried cranberries or raspberries can also add a lovely tartness, complementing the chocolate nicely. You can even use fresh berries for a seasonal twist.
Common Mistakes to Avoid
When making the Black Forest Cookie, it’s important to avoid a few common pitfalls:
Overmixing: Mixing the dough too much can lead to tougher cookies. Once you combine the dry and wet ingredients, mix just until everything is incorporated.
Skipping the chill: Allowing the dough to chill in the fridge for about 15-20 minutes can help prevent spreading in the oven, resulting in thicker cookies that are perfectly chewy.
Ingredient substitutions: Pay attention to ingredient quality. Use high-quality chocolate and fresh cherries for the best results. Cheap ingredients may affect the overall taste and texture of your cookies.
Storage, Freezing & Reheating Tips
To store your Black Forest cookies, place them in an airtight container at room temperature, where they will stay fresh for up to a week. If you want to extend their shelf life, freeze the cookies. Wrap each cookie in plastic wrap and place them in a freezer-safe bag or container; they can last for up to 3 months in the freezer.
To enjoy frozen cookies, simply let them thaw at room temperature or reheat them in the oven at 350°F for a few minutes to get that freshly baked texture back. It’s a perfect way to have a batch ready for unexpected guests or late-night cravings!
Frequently Asked Questions
Can I use fresh cherries instead of dried? Fresh cherries can be used, but be sure to chop them and remove the pits. Keep in mind that they may add moisture to the cookie dough, so you might need to reduce other liquid ingredients slightly.
How do I adjust the cookie for higher altitude? At higher altitudes, cookies may spread more. An easy solution is to slightly reduce the sugar or add a bit more flour to counteract this.
Can I add nuts to the cookies? Yes! If you enjoy a bit of crunch, consider adding chopped walnuts or pecans. Just fold them in with the chocolate and cherries.
What if the dough seems too soft? If your cookie dough feels unusually soft, let it chill in the refrigerator for about 30 minutes. Chilling helps firm up the dough, leading to better-shaped cookies when baked.
Can I use milk chocolate instead of semi-sweet? Absolutely! If you prefer a sweeter taste, milk chocolate will work wonderfully but make sure you adjust the sugar levels according to your preference, as it is already sweeter than semi-sweet varieties.
Conclusion: These Black Forest Cookies will undoubtedly elevate your dessert game. With their blend of rich chocolate and tart cherries, they’re sure to impress anyone lucky enough to receive one. Prepare them quickly, savor their delightful flavor, and enjoy every delicious bite! Don’t forget to share your baking experience, and happy baking!