Prep time: 10 minutes
Cook time: 5 minutes
Total time: 15 minutes
Servings: 12 bars
Creating the perfect dessert can often feel like a daunting task, especially when you’re juggling a busy lifestyle or trying to please a crowd. However, our Black Forest Cookie Bars change the game with their no-bake simplicity and delicious flavor. Imagine rich chocolate layers melded with cherries and luscious cream, all ready in just 15 minutes. These bars are perfect for parties, potlucks, or even a cozy night in.
What Is Black Forest Cookie: No Bake Black Forest Cookie Bars in 15 Minutes?
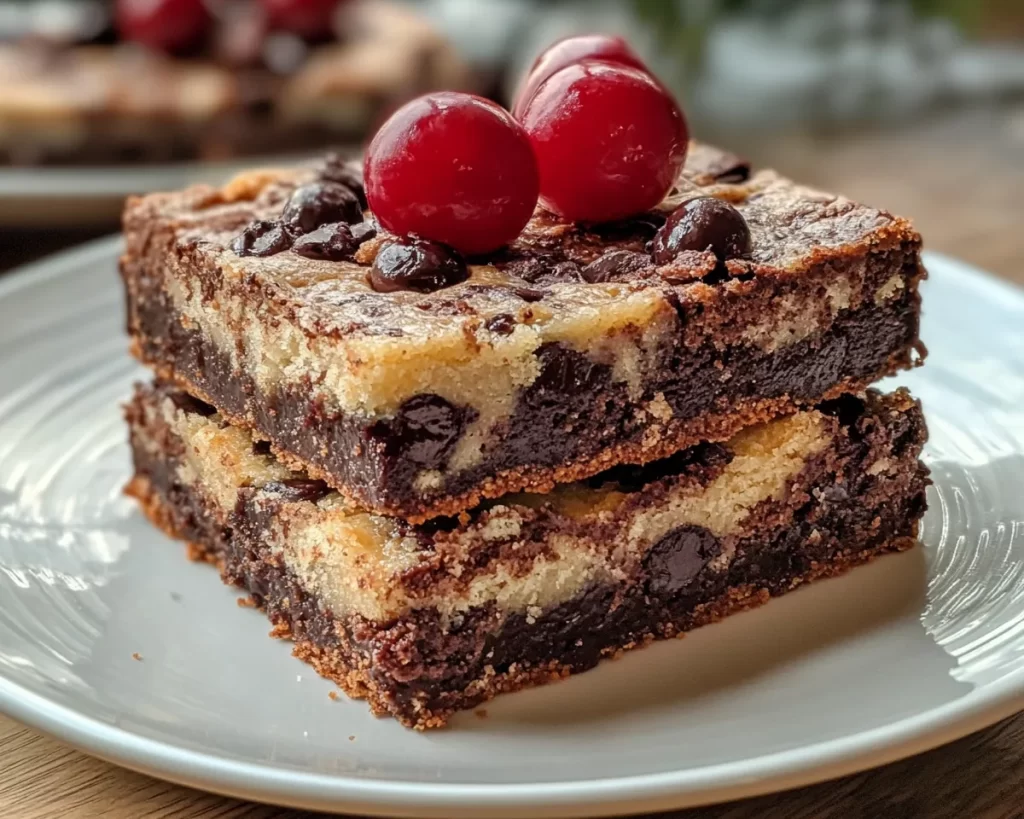
The Black Forest Cookie Bars are a delightful take on the classic Black Forest cake, transformed into convenient, bite-sized bars. These bars highlight the traditional flavors of chocolate and cherry, creating an indulgent dessert that is both easy to make and visually stunning. Made without the need for baking, this recipe allows you to savor the rich flavor of chocolate combined with the tart sweetness of cherries. Perfect for those who love a no-fuss dessert that doesn’t compromise on taste or presentation.
Why You’ll Love This
The appeal of Black Forest Cookie Bars lies in their quick preparation and fantastic flavor. They require minimal effort, making them an ideal dessert option for busy parents or anyone short on time. The bars are not only a treat for the taste buds but also a feast for the eyes, making them a charming addition to any gathering. With each bite, you’ll experience the delightful crunch of cookies blended with the creamy texture of the filling and the fresh burst of cherries. They’re also customizable, allowing for various adaptations based on what you have on hand.
Ingredients You’ll Need
- Chocolate Sandwich Cookies: These serve as the base of your bars, providing a rich chocolate flavor and a crunchy texture.
- Butter: Use unsalted butter to bind the cookie crumbs together. The fat content helps achieve the right consistency.
- Cherries: Fresh or canned, they bring a tart flavor that contrasts beautifully with the sweetness of the chocolate.
- Heavy Cream: This will be whipped into a light, airy topping that complements the dense cookie layer.
- Powdered Sugar: A sweetener for the whipped cream, adding another layer of indulgence.
- Chocolate Syrup: Drizzle on top for added richness and to enhance the overall presentation.
How to Make
- Begin by crushing the chocolate sandwich cookies. Place them in a food processor and pulse until they reach a fine crumb consistency. This will create the base layer of your bars.
- Next, melt the unsalted butter in a microwave-safe bowl. Once melted, mix it with the cookie crumbs until the mixture resembles wet sand. This step is crucial for binding the crumbs together.
- Press the cookie crumb mixture evenly into the bottom of a lined baking dish. Ensure it’s tightly packed to create a stable base that holds the layers above.
- In another bowl, whip the heavy cream and powdered sugar together until soft peaks form. This whipped cream will add a fluffy texture, balancing the density of the cookie layer.
- Spread the whipped cream over the cookie layer with a spatula, smoothing it out for an even finish. Be gentle to maintain the fluffiness of the cream as you prepare for the final touch.
- Finally, layer the cherries on top, followed by a drizzle of chocolate syrup. Let the bars chill in the refrigerator for at least 2 hours for set just right.
Variations & Substitutions
Nut-Free Version: If you or someone you’re serving has nut allergies, ensure that all ingredients are nut-free. You can substitute the chocolate sandwich cookies with nut-free cookie varieties. This makes the bars safe and still delicious for everyone!
Fruit Variations: Instead of cherries, try using strawberries or raspberries. Each fruit provides a unique flavor profile while still pairing beautifully with chocolate. You can also mix in different berries for a colorful, fruit-filled bar.
Vegan Option: To make this dessert plant-based, switch to vegan cookies and use coconut cream instead of heavy cream. The flavor remains rich, and it caters to your vegan friends without sacrificing taste!
Flavored Whipped Cream: Experiment with adding a splash of vanilla or almond extract to the whipped cream to give it an extra flavor boost. You may also sprinkle in some cocoa powder for a rich chocolate experience.
Common Mistakes to Avoid
Not Melting the Butter Completely: Ensure your butter is fully melted to create a cohesive mixture with the cookie crumbs. Undermelted butter can lead to a crumbly base that won’t hold together well.
Packing the Crumb Base Too Tightly: While it’s important to firm up your base, overpacking can result in a dense bar that’s difficult to slice. Aim for a balance between firm and crumbly.
Skipping the Chilling Step: Don’t skip refrigerating the bars! Chilling allows the layers to set properly, ensuring they hold their shape when you cut them. This step will also improve the overall texture and flavor melding.
Storage, Freezing & Reheating Tips
To store the Black Forest Cookie Bars, keep them in an airtight container in the refrigerator for up to one week. This helps maintain freshness and texture. If you plan to freeze the bars, wrap them tightly in plastic wrap and then place them in a freezer-safe container. They can be stored in the freezer for up to three months. When you’re ready to enjoy, thaw them in the refrigerator overnight. Avoid reheating them since the bars are best served chilled.
Frequently Asked Questions
Can I make these bars ahead of time?
Absolutely! In fact, making them a day in advance allows the flavors to meld beautifully. Just be sure to keep them well-sealed in the refrigerator to maintain freshness until serving.
Can I use other types of cookies for the base?
Yes, feel free to experiment with different cookies! Graham crackers or Oreos work wonderfully as alternatives while still providing a delightful base. Each cookie type will add a unique twist to the flavor.
How do I fix a soggy base?
If your base turns out soggy, it may be due to too much butter or not allowing it to set properly. You can try placing it back in the fridge for a little longer to help firm it up, or next time, reduce the butter slightly.
What can I serve with these bars?
These bars pair nicely with a scoop of vanilla ice cream or a dollop of additional whipped cream on the side. For added flair, you can garnish them with fresh cherries or a sprinkle of chocolate shavings.
How do I cut the bars without them falling apart?
To achieve clean cuts, let the bars chill and set in the refrigerator for a longer period. When cutting, use a hot knife to make slicing easier and create cleaner edges. Wipe the knife between cuts for the best results.
Conclusion:
The Black Forest Cookie Bars are a winning dessert option that combines ease of preparation with exquisite flavors. Perfect for any occasion, they can be made in no time and customized to suit your preferences. Enjoy your creation and impress your friends and family with this delightful no-bake treat!


