Prep time: 10 minutes
Cook time: 15 minutes
Total time: 25 minutes
Servings: 12 cookies
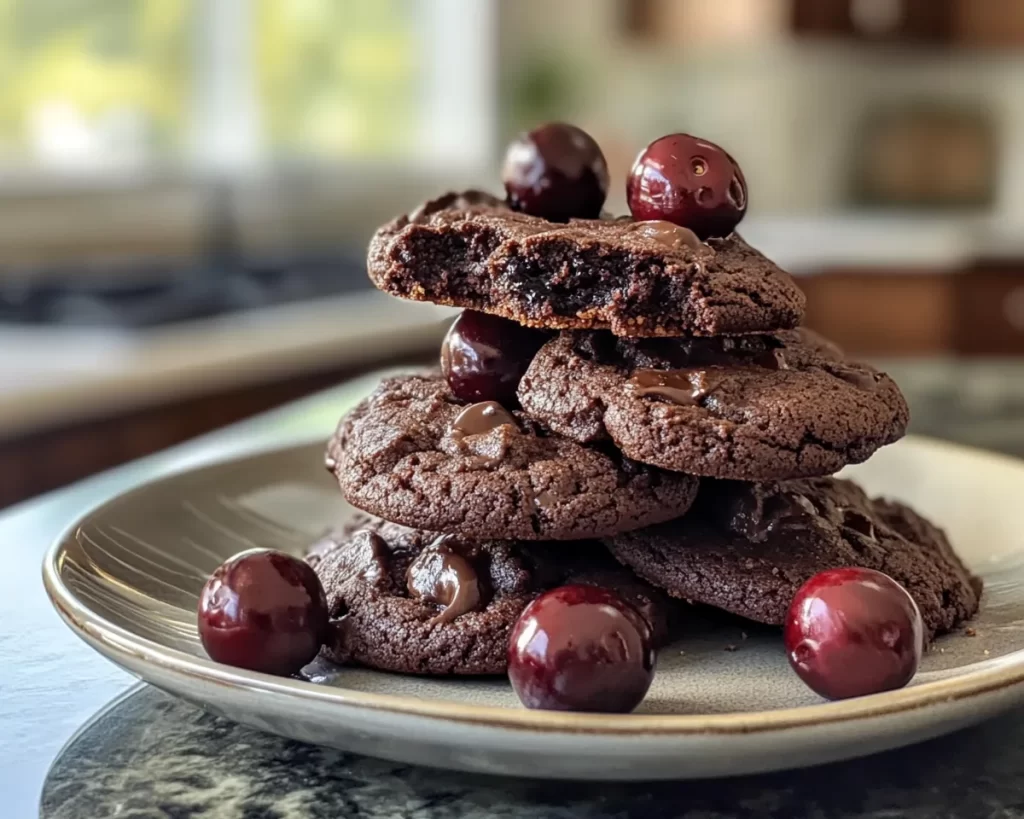
When it comes to baking cookies, few things can excite your kitchen quite like the smell of fresh cookies right out of the oven. **Black Forest Cookie: Dark Cocoa Cherry Melt Away Cookies** are not just cookies; they are an experience. These delectable morsels combine rich cocoa, sweet cherries, and a melt-in-your-mouth texture that transports you to a world of flavor, inspired by the classic Black Forest cake. Perfect for busy parents, dessert lovers, or even those who just want to satisfy a sweet tooth, this recipe is a delightful treat ready in no time at all!
What Is Black Forest Cookie: Dark Cocoa Cherry Melt Away Cookies in 25 Minutes?
These cookies are an echo of the classic Black Forest cake, known for its generous use of dark chocolate, cherries, and cream. But in cookie form, they become even easier to enjoy! The star ingredients—dark cocoa powder and tart cherries—combine to provide a wonderful balance of flavors. You can serve them as is, or perhaps with a dollop of whipped cream for a touch of luxury. With their soft, melt-away texture and intriguing contrast of tartness from the cherries, these cookies stand out on any dessert table.
Why You’ll Love This
You will love these cookies not just for their incredible taste but for their ease of preparation. The recipe doesn’t require any special techniques, making it suitable for kitchen beginners. If you’re a busy parent looking for a quick baking project, or someone who just loves cookies, this recipe could be your new favorite. Plus, the versatility of flavors allows you to customize the cookies to suit your taste.
Ingredients You’ll Need
- 1 cup all-purpose flour: This forms the base of your cookie dough and provides the structure.
- 1/3 cup dark cocoa powder: Adds that rich chocolate flavor and gives your cookies their distinctive dark color.
- 1/2 teaspoon baking soda: This is essential for helping the cookies rise slightly.
- 1/8 teaspoon salt: Enhances the flavor of chocolate and balances sweetness.
- 1/2 cup unsalted butter, softened: The key to that melt-away texture, butter also adds richness to the flavor.
- 1/2 cup sugar: Sweetness is essential, and sugar aids in achieving a chewy texture.
- 1/4 cup brown sugar: Brown sugar brings moisture and a hint of caramel flavor.
- 1 large egg: Acts as a binding agent and contributes to the cookies’ texture.
- 1 teaspoon vanilla extract: This adds depth to the flavor profile.
- 1 cup dried cherries, chopped: Provides irresistible bursts of tartness throughout each cookie.
- 1/2 cup chocolate chips (optional): For those who can’t get enough chocolate!
![Black Forest Cookie Image]
How to Make
- Preheat your oven to 350°F (175°C). This is an essential first step, ensuring that your cookies bake evenly and achieve that perfect golden color.
- In a medium bowl, whisk together the flour, dark cocoa powder, baking soda, and salt. Make sure to combine these dry ingredients thoroughly so that the cocoa powder is evenly distributed.
- In a large mixing bowl, cream together the softened butter, granulated sugar, and brown sugar until the mixture is light and fluffy. This can take about 2-3 minutes. The lightness of the mix will help create that melt-away texture.
- Add the egg and vanilla extract to the butter-sugar mixture, mixing until fully incorporated. Be sure to scrape down the sides of the bowl to ensure everything is well-blended.
- Gradually add the dry ingredients to the wet mixture, mixing on low speed until just combined. Be careful not to over-mix; you want the dough to stay tender.
- Fold in the chopped cherries and chocolate chips (if using) gently so that they are evenly distributed throughout the dough.
- Drop spoonfuls of the dough onto a lined baking sheet, leaving space between each cookie. This allows for spreading while baking.
- Bake for 10-12 minutes, or until the edges are firm and the center remains slightly soft. The cookies will continue to set as they cool.
- Let them cool on the baking sheet for a few minutes before transferring to a wire rack to cool completely. This step helps them firm up just right without becoming too hard.
Variations & Substitutions
Nutty Addition: Consider adding 1/2 cup of finely chopped walnuts or pecans to give the cookies a crunchy texture. The nuts add a delightful contrast to the softness of the cherries and chocolate.
Fruit Mix: If you’re not a fan of cherries, consider substituting with dried cranberries or apricots. This change will alter the flavor profile but maintain that chewy goodness.
Vegan Version: To make these cookies vegan, substitute the butter with coconut oil or a vegan butter alternative, and replace the egg with a flax egg (1 tablespoon ground flaxseed mixed with 2.5 tablespoons of water and let it sit for 5 minutes).
Gluten-Free Option: Swap out the all-purpose flour for a 1:1 gluten-free baking flour. This will ensure everyone can enjoy this delightful recipe, regardless of dietary restrictions.
Common Mistakes to Avoid
One common mistake is using cold butter. Using softened butter is crucial for creaming with the sugars to achieve a lovely texture. If your butter is too hard, it won’t blend well, resulting in dense cookies.
Another issue could be over-mixing the dough. This can lead to tough cookies, ruining the melt-in-your-mouth experience. Mix just until combined; small streaks of flour are fine.
Finally, keep an eye on your baking time. Each oven can bake differently. If you leave your cookies in too long, they may become hard and lose that wonderful tenderness.
Storage, Freezing & Reheating Tips
To store your cookies, place them in an airtight container at room temperature. They can stay fresh for about a week, but I doubt they will last that long! If you want to keep them longer, consider freezing them. Just layer cookies between parchment paper in a freezer-safe container, and they will last up to three months.
When you’re ready to enjoy your frozen cookies, simply take them out and enable them to come to room temperature. If you want them warm, pop them in the microwave for a few seconds or place them in a warm oven for a few minutes.
Frequently Asked Questions
Can I use fresh cherries instead of dried ones?
Using fresh cherries is possible, but you should remove the pits and chop them first. Keep in mind that fresh cherries have a higher moisture content, so reduce the liquid in the recipe slightly. You may also want to increase the baking time to accommodate for the extra moisture.
How do I ensure my cookies are chewy?
To achieve a chewier cookie, consider under-baking them slightly. The centers should look soft and slightly underdone before taking them out of the oven. They will continue cooking as they cool on the baking sheet.
Can I double the recipe?
Absolutely, you can double the recipe if you are hosting a gathering or just want more delicious cookies on hand. Just ensure that you have enough space on your baking sheets and enough time to bake them in batches if necessary.
What type of cocoa powder should I use?
Using high-quality unsweetened dark cocoa powder will yield the best flavor. Brands like Ghirardelli or Hershey’s Special Dark are great choices for that rich chocolate taste.
Can these cookies be made ahead of time?
Yes, you can certainly make the dough ahead of time and store it in the refrigerator for up to three days. When you’re ready to bake, just scoop the chilled dough onto a baking sheet and bake as instructed.
Conclusion:
The **Black Forest Cookie: Dark Cocoa Cherry Melt Away Cookies** recipe is a delightful and quick baking project that is sure to impress friends and family alike. Combining rich flavors and a melt-in-your-mouth texture, these cookies cater to various tastes and dietary preferences. From busy parents to kitchen beginners, anyone can whip up this cookie treat within 25 minutes. Enjoy the process, and happy baking!