**Prep time:** 20 minutes
**Cook time:** 1 hour 30 minutes
**Total time:** 1 hour 50 minutes
**Servings:** 8
If you’re looking for a dessert that’s as light as a cloud and just as dreamy, homemade Pavlova cake is the answer. Named after the famous Russian ballerina Anna Pavlova, this dessert boasts a crunchy outer shell with a soft, marshmallow-like inside. If you’ve never made a Pavlova before, don’t worry! This recipe will guide you step-by-step to create an impressive dessert that will leave your guests swooning with delight.
In this article, you’ll learn not only how to make a perfect Pavlova cake but also what makes it so special. We’ll explore its origins, how to achieve that perfect texture, and what toppings work best. So, grab your whisk and get ready for a delicious adventure in baking.
What Is Pavlova Cake?
Pavlova cake is a meringue-based dessert that hails from either New Zealand or Australia — both countries lay claim to its invention. The origins may be somewhat contentious, but one thing is for sure: Pavlova cakes are a staple at celebrations and gatherings in both countries.
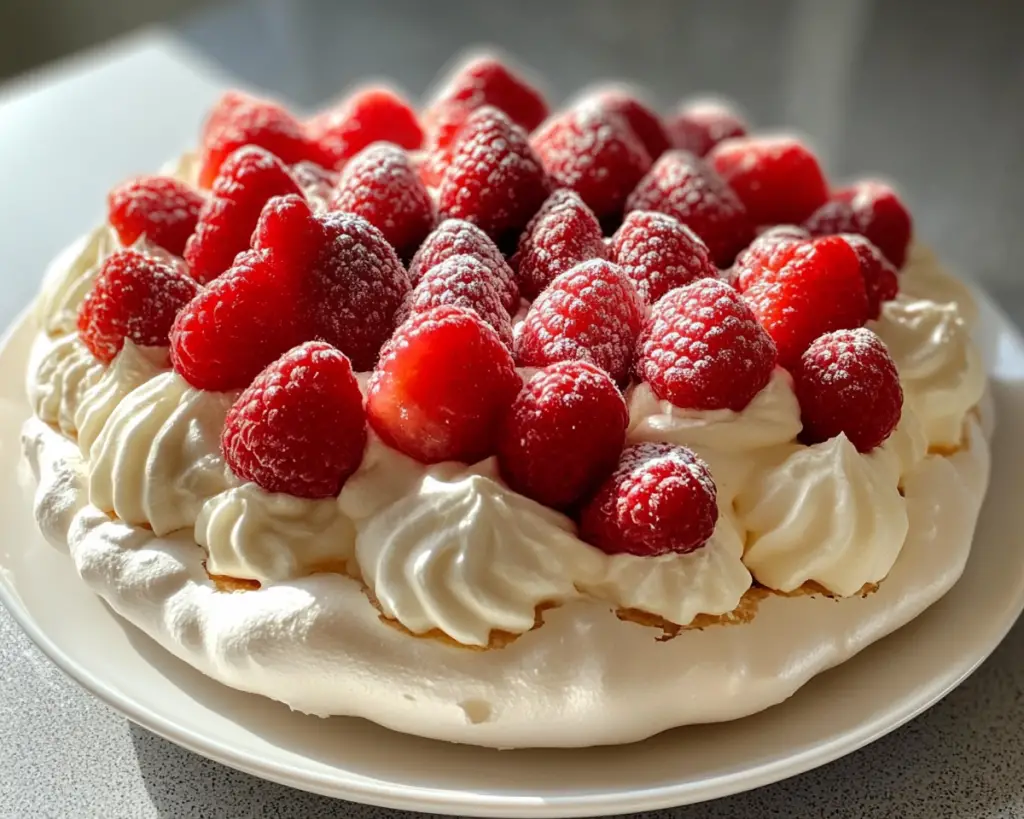
The ideal Pavlova is characterized by a crunchy exterior paired with a soft, chewy inside that practically melts in your mouth. It is typically topped with whipped cream and an assortment of fresh fruits, making it both visually stunning and delectable. You can expect notes of light sweetness and creaminess, complemented by the tartness of seasonal fruits.
To make an excellent Pavlova, it’s crucial to get the meringue just right. This requires proper handling of the egg whites and a careful baking process to achieve the perfect balance of textures.
Why You’ll Love This Pavlova Cake
There are many reasons to adore this dessert. First and foremost, its flavor is simply divine, with a perfect mix of sweet and tangy, thanks to the toppings.
1. **Easier Than You Think:** While Pavlova may seem daunting, it’s surprisingly easy to prepare. All you need are a few simple ingredients and some careful steps, and you’ll have an elegant dessert in no time.
2. **Customizable:** You can tailor the toppings to suit seasonal fruits or your guests’ preferences. Whether you prefer berries, kiwis, or tropical fruits, the Pavlova will work beautifully.
3. **Naturally Gluten-Free:** If you’re cooking for someone with gluten sensitivities, Pavlova is the perfect dessert option. There are no flour-based ingredients, so it’s safe to enjoy.
4. **Visually Stunning:** There’s no denying that a beautifully decorated Pavlova is a showstopper. Its airy structure combined with vibrant fruits makes it a feast for the eyes.
5. **Light and Refreshing:** Unlike heavier cakes, Pavlova is light on the palate. It’s perfect after a rich meal, leaving your guests feeling satisfied but not overly full.
However, many novice bakers may be concerned about making meringue—fret not! With a few tips and techniques detailed below, you’ll find that making a Pavlova at home is a rewarding experience.
Ingredients You’ll Need
To make a classic Pavlova cake, you need just a handful of ingredients. Here’s what you’ll require:
– **4 large egg whites**: The main structure of the Pavlova, egg whites are key to creating that fluffy meringue. Ensure they are at room temperature for best whipping.
– **1 cup granulated sugar**: This will sweeten your meringue and also contribute to the crunchy texture. Fine sugar works best for dissolving quickly.
– **1 teaspoon white vinegar**: This acid helps stabilize the egg whites, ensuring your meringue holds its shape. You can also use lemon juice as a substitute.
– **1 tablespoon cornstarch**: This helps to create that marshmallow-like interior while adding a slight crispiness to the exterior.
– **1 cup heavy whipping cream**: Used for topping, it should be whipped to soft peaks for a luscious, creamy finish.
– **Fresh mixed fruit**: Consider seasonal fruits like strawberries, blueberries, kiwi, or passionfruit for topping – they not only add flavor but also a pop of color.
Make sure to gather your ingredients ahead of time and check for any possible substitutes to meet dietary needs.
How to Make Pavlova Cake
Creating a homemade Pavlova may seem intimidating, but I promise it’s well worth the effort. Follow these steps, and you’ll have a delightful dessert you can be proud of!
1. **Preheat the Oven:** Start by preheating your oven to 250°F (120°C). Make sure your oven rack is in the center position. This low-temperature approach will allow the meringue to dry out without browning.
2. **Prepare Your Baking Sheet:** Line a baking sheet with parchment paper. You can draw a circle (about 8 inches in diameter) on the parchment and flip it over – this will guide you as you spread the meringue.
3. **Whip the Egg Whites:** In a clean mixing bowl, begin whipping the room-temperature egg whites using an electric mixer (or a whisk if you’re feeling adventurous). Start on low speed and gradually increase to medium. Whip until the mixture starts to become foamy.
4. **Add Sugar Gradually:** Once the egg whites are frothy, start adding the granulated sugar one tablespoon at a time. Make sure to allow each addition to dissolve before adding more. After about 5-7 minutes, the mixture should be glossy and form stiff peaks when you lift the beaters.
5. **Incorporate Cornstarch and Vinegar:** Gently fold in the cornstarch and vinegar using a spatula. Be careful not to deflate the meringue—this step is crucial for that light texture!
6. **Shape the Meringue:** Spoon the meringue mixture onto the prepared parchment paper, using the drawn circle as a guide. Create a slight well in the center to hold your whipped cream and toppings later on.
7. **Bake the Pavlova:** Place the baking sheet in the preheated oven and bake for approximately 1 hour and 15 minutes. You’re looking for a dry, crisp exterior with a soft, marshmallow-like inside. The meringue should not brown but instead maintain a bright white color.
8. **Cool Down:** Once baked, turn off the oven and let the Pavlova cool completely in the oven. This helps prevent it from cracking due to sudden temperature changes.
9. **Whip Cream and Assemble:** Once cool, carefully transfer the Pavlova to a serving platter. Whip the heavy cream until soft peaks form and spread it generously over the top of the Pavlova.
10. **Top with Fresh Fruit:** Add an assortment of fresh fruits on top of the whipped cream. Consider mixing in some berries, sliced kiwis, and even a touch of mint for a refreshing finish.
11. **Slice and Serve:** Cut the Pavlova gently with a serrated knife and serve to your guests. They will be amazed at your baking prowess!
3 Variations & Substitutions
**1. Berry Pavlova**
To make a berry Pavlova, simply top your whipped cream with a variety of fresh berries. Strawberries, blueberries, and raspberries create a beautiful contrast with the white meringue. Not only do they add a burst of flavor, but they also provide vibrant colors that can make your dessert feel even more celebratory.
**Tip:** macerating the berries in a little bit of sugar and lemon juice before topping allows them to release some juices and enhances sweetness.
**2. Chocolate Pavlova**
For chocoholics, consider adding cocoa powder to your meringue for a chocolate twist. Substitute about 1/4 cup of sugar with 1/4 cup of cocoa powder for a richer flavor. Top with chocolate ganache instead of whipped cream and sprinkle shaved chocolate on top.
**Who it’s for:** This variation is perfect for a more decadent option—ideal for parties or special occasions.
**3. Tropical Fruit Pavlova**
Use tropical fruits such as mango, pineapple, and passionfruit for a fresh and exotic twist. The sweetness of these fruits plays beautifully against the Pavlova’s lightness, creating a tropical treat that’s perfect for summer get-togethers.
**Tip:** Add a squeeze of lime juice over the fruits for an extra zing that complements the sweetness and balances flavors.
Common Mistakes to Avoid
1. **Using cold egg whites:** Egg whites whip best when they are at room temperature. Try to take the eggs out of the fridge about 30 minutes before you start, or you can place them in a bowl of warm water for 10 minutes.
2. **Improper folding techniques:** When folding in the cornstarch and vinegar, do it gently to maintain the volume of air you’ve whipped into the egg whites.
3. **Baking at too high a temperature:** High temperatures can cause the Pavlova to crack or brown. Always stick to low heat as mentioned in the recipe.
4. **Skipping the cooling step:** Allowing your Pavlova to cool in the oven prevents sudden temperature changes. Removing it too early could lead to a collapse.
5. **Overbaking:** It’s better to underbake slightly than to overbake. A perfect Pavlova should have a crunchy exterior with a soft, marshmallow-like interior. Start checking at the 1-hour mark.
Storage, Freezing & Reheating Tips
For the best texture and taste, Pavlova is best served fresh on the same day it’s made. However, if you need to store any leftovers:
– **Unassembled Pavlova:** Store the pavlova shell in an airtight container at room temperature for about 2-3 days. Be sure not to cover it tightly, as this can introduce moisture which will ruin the crisp texture.
– **Assembled Pavlova:** Once topped with cream and fruits, it’s best eaten immediately. However, you can keep it in the refrigerator for a few hours, but the texture of the meringue will soften over time.
– **Freezing:** Although it’s not ideal to freeze meringue, if you absolutely must, freeze the undressed Pavlova shell. Wrap it tightly in plastic wrap and then in foil for up to a month. Thaw it in the fridge overnight before use but note that it may not have its original texture.
When ready to serve, simply whip some cream, assemble your toppings, and enjoy!
Frequently Asked Questions
**1. Can I make Pavlova in advance?**
Yes! You can prepare the Pavlova shell up to a day in advance and store it in an airtight container. However, it’s best to add cream and toppings the day of serving to maintain the crisp texture.
**2. What if my Pavlova cracks?**
Cracking can be a common occurrence, and it doesn’t affect the taste. If it does crack, cover it with whipped cream and fruits, which not only hides any imperfections but enhances its beauty with toppings.
**3. Why did my Pavlova deflate?**
Deflation may occur if the egg whites were not whipped enough or if they were too warm when combined with the other ingredients. Make sure to whip to stiff peaks and ensure that egg whites are at room temperature.
**4. Can I make mini Pavlovas?**
Absolutely! Simply pipe smaller meringue circles onto your baking sheet instead of one large meringue. Adjust baking time accordingly, usually around 30 minutes, but keep an eye on them to avoid overbaking.
**5. What other toppings can I use?**
While fruit and whipped cream are traditional, feel free to get creative! You could use lemon curd, chocolate mousse, or even a cream cheese frosting. The key is balancing the sweetness of the Pavlova with the toppings.
The homemade Pavlova cake is such a wonderful treat, ticking all the boxes for taste, aesthetic appeal, and ease of preparation. Do not shy away from putting your twist on it with various toppings or flavors. I encourage you to give this recipe a try—your family and friends will be impressed with not only its beauty but also its delightful taste. Share your creations with the world, and don’t forget to come back for more delicious recipes!
[Read also: Easy Dessert Recipes for Beginners]


